Author: Steve Bissell Page 3 of 6

Steve is a program manager with Pilatus Aircraft and a person with a broad life experience. He has passions for woodworking, bicycle frames and anything “Do-It-Yourself” as well as a desire to share these interests.

Trestle Table Part 4: Maybe We’ll Finish the Glue-up This Time….

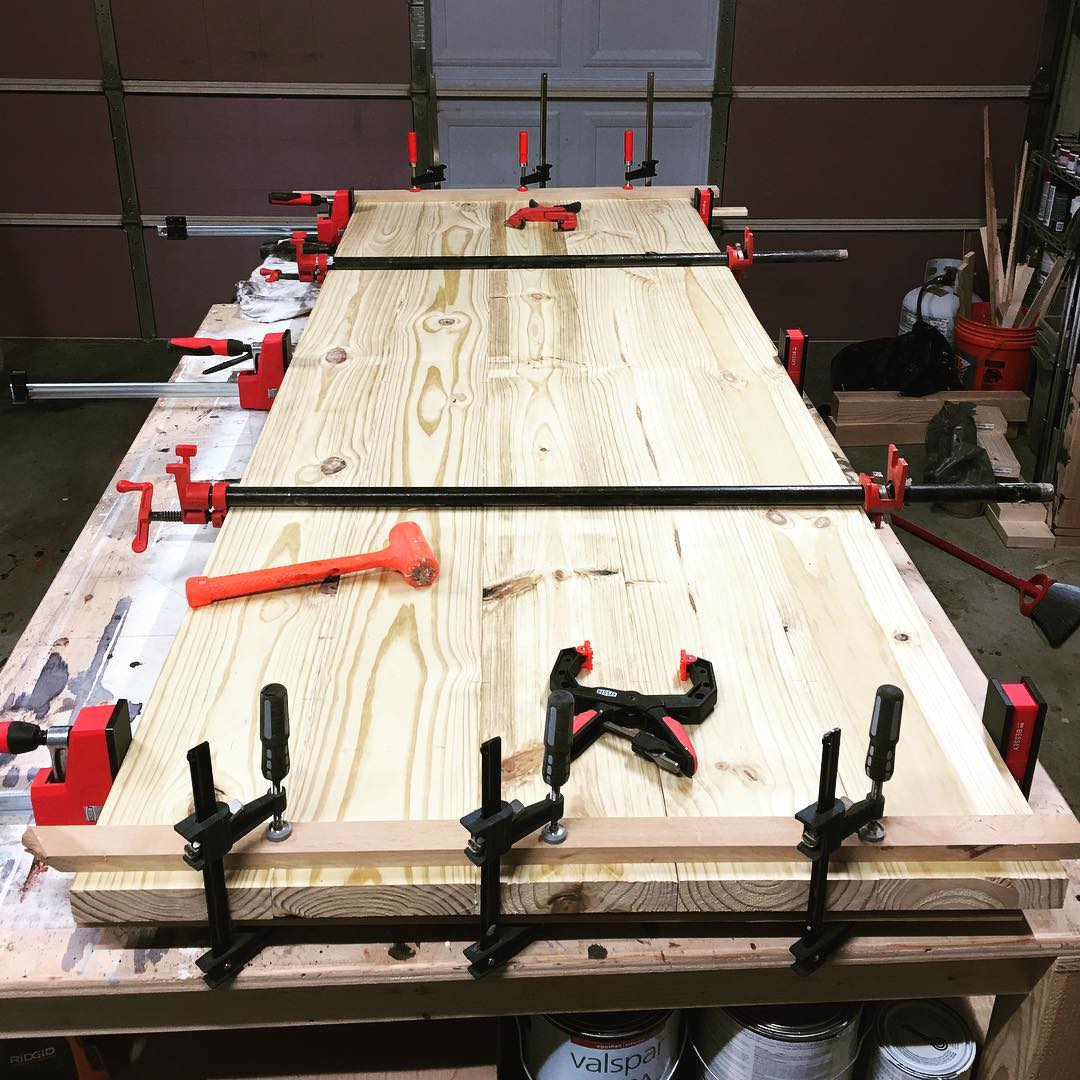
I have already flattened the bottom faces of the tabletop assemblies and even though it may not be best practice, I want to flatten and smooth the top faces prior to the final glue-up. It will be easier for me to do this now and after the top is fully glued I’ll only have to flatten/smooth the center of the panel.

The key implements for this task are my #5 jack plane, #7 jointer plane and #4 smoothing plane.

Trestle Table Part 3: Tabletop Prep and Partial Glue-up

a.k.a. Have a heapin’ mess o’ clamps and wet rags handy…..

Probably the single most teeth-grinding, face-sweating task in my experience is gluing up a large tabletop. It’s really a straightforward procedure however, I always stress about it and this one is no different. I have found though, that if I get everything prepared beforehand and do a complete dry fit, then I can reduce the number of feral whacks with a mini-sledge hammer necessary to achieve relative flatness.

Trestle Table Part 2: Joinery For The Base

In any work surface not supported by a leg at each corner, it is even more important than usual to combine the engineering of time-tested joinery with the skills to produce joints that are tight and without (much) error. This table is almost solely reliant on the venerable mortise and tenon joint, even the bridle joint that connects the top brace to the leg is a form of mortise and tenon.

While my joints may not look this good, I hope to make them precise enough so that they will outlast at least my great-great-grandchildren’s lives.

Trestle Table Part 1: Design and Preparation

The message to my family: Ask, and I will build.  Or more specifically: Ask, and I will add it to my list of projects….

Occasionally, if the need is urgent, I’ll modify my priorities and this is just such an occasion. My son is moving out of a small apartment and into one that he’ll share with two roommates. Nobody has a table worth eating a meal on and at the same time, I’ve been offered some 70 year old barn timbers for a great price (free). For some time now I’ve been thinking about how much I like Shaker design and a trestle table is a good example of their design ethic. With a guiding doctrine of simplicity, utility and honesty, the Shakers produced furniture that was well-made, and minimalist.

Small Display Cabinet Part 4: Carcass Glue-up, Drawer, Finish

a.k.a. The prodigal woodworker returns from business trips

Hey there friends and neighbors, I’m sorry you haven’t heard from me in a while but there’s this thing that pays the rent and keeps food on the table that I have to deal with. I’ve been in the land of dates and niqabs not once, but twice, in the last 4 weeks and let me tell you, I’m not happy about it. However…..comma…..I get a paycheck to do a job and I’m going to do it until I start my own business and build furniture for a living (hysterical laughter issues from the peanut gallery).

Joking aside, I’ve made some progress on the cabinet.

Small Display Cabinet Part 3: Rabbets and Dados and Panels, Oh My!

So at first I thought I would build the back of the cabinet, which will be a frame and panel, as the next step. However, even though I started with a picture as an initial guide, I’m trying to be as visual as I can during this process. I’ve learned from previous projects that something I build, even though it’s from a drawing or plan, may not look just right when it’s actually built (no offense to previous designers).

Small Display Cabinet Part 2: Doweling the Sides

First, I’d like to wish everyone a Happy New Year and hope your holidays were as nice as mine. Lots of family and lots of good food and drink! And, after all the cake and cookies, I’m craving vegetables…….

I had a few days to putter around my garage and made some progress on the wall cabinets. I’ve cut the sides and top/bottoms to a tad over finished dimensions so I can now get a look at the final proportions.

Small Display Cabinet Part 1: Design

A simple, yet elegant wall cabinet. 

So I wanted to build something nice for a family member and thought it would be different to tackle a project that wouldn’t take me 10 months to finish like the Sewing Center (I still have a day job…..) and I came across this small wall display cabinet:

Sewing Center Part 15: Finishing!

The Finish Line (Pun Intended)

I’m a happy guy. Why? ‘Cus I’ve got a happy wife :-).

This is the end-game and of course my most disliked part of any project is the last part: sanding and finishing.

Sewing Center Part 14: Final Tweaks and Door Hardware

The penultimate chapter, can you see the light?!!

Hi everybody! It’s been a while since my last post as I have been on business travel and not had a chance to do much woodworking for a while 🙁 . I have returned from a certain Middle Eastern country and since I didn’t say anything bad about the ruling party I still retain my freedom (if not my principles; hey, we all gotta pay the mortgage).

Page 3 of 6

Powered by WordPress & Theme by Anders Norén