
A simple, yet elegant wall cabinet.
So I wanted to build something nice for a family member and thought it would be different to tackle a project that wouldn’t take me 10 months to finish like the Sewing Center (I still have a day job…..) and I came across this small wall display cabinet:

At first I couldn’t find any link to the designer but after some googling, I found a reference to Saiki Woodwork (even though this cabinet is no longer on their website). So, credit where it’s due, I’m taking “inspiration” from this.
Proportions
First, I liked the proportions so I printed the picture and used a ruler to determine the ratio of height to width (270mm/85mm). This works if the shot is fairly straight-on like this one is. If you remember some of your high school algebra we can calculate some actual dimensions by cross-multiplication.

If I want the actual cabinet to be 700mm high then the equation looks like this: 270/85 = 700/x where “x” is the actual width. Cross-multiplying brings us to this: 270x = (85*700), then 270x = 59,500. Finally, divide both sides by 270 and we have: x = 59,500/270 or x = 220 (220.37 actually, but I round down). Voila, height is 700mm and width is 220mm.
Usually, if I’m working from a plan, someone with much better design sense has already determined nice proportions however, when I’m working from a picture or someone’s drawing, I’ll take the advice of many woodworking masters and cobble together a model. You can use cardboard, poster board, styrofoam, or scrap wood. Anything you can use to get an idea of what it will look like in the flesh (wood).
I had some styrofoam, scrap pine and a piece of thin ply to make the first model 700mm by 220mm. I also nailed a couple scraps together to simulate the height of the drawer, in this case, one taller than in the picture and one closer but still a bit tall.
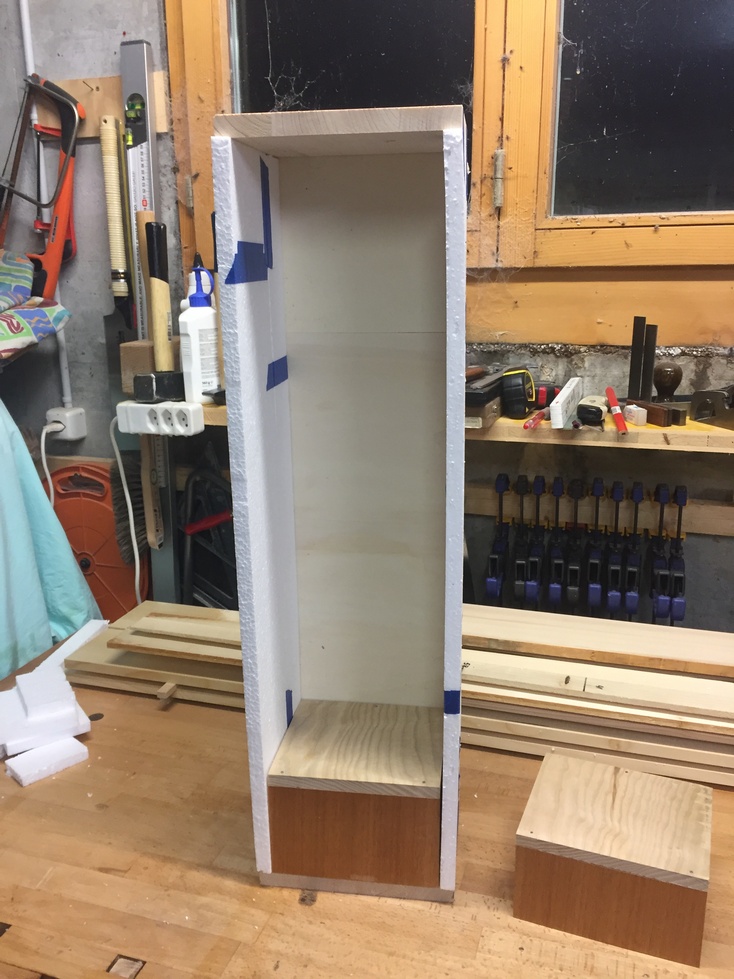
I enlisted my good wife for her opinion (a wise move) and she thought it was still a little too imposing. I want something that won’t be so “in your face” when you enter the room and see it on the wall. So another reason for the model is because small changes make a big difference. I reduced the width by only 15mm and the height about 20mm. I also reduced the the depth about 10mm. The overall effect is, to the eye, a significant change, especially when I hold the model up against the wall and/or compare it to the other model side by side.


And the model still leaves some doubt because the pine I used is 18mm thick and I plan to use 15mm stock to build the actual piece. This will give a more “delicate” feel to the piece. I probably should go buy some 15mm MDF and make another model but I’ll take a leap of faith on this one.
The last design aspect I’m thinking about is to cut the front edges of the top and bottom slightly concave. I’ll then carve the front of the drawer to match the curve. We’ll see, I haven’t decided yet and will cut some scraps to see how it will look when the time comes.
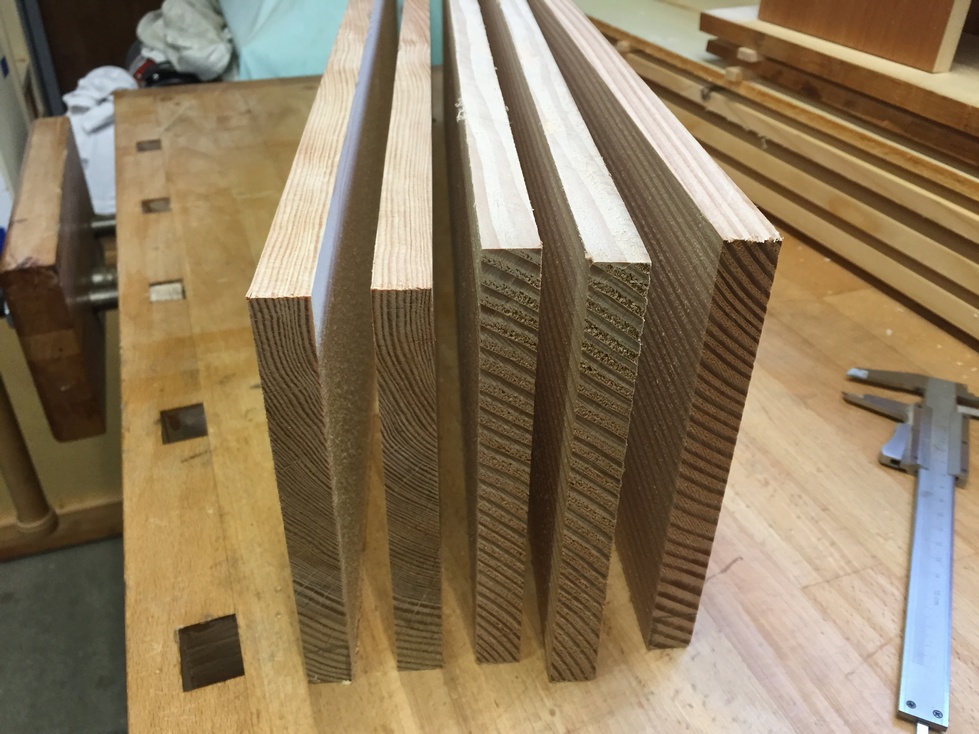
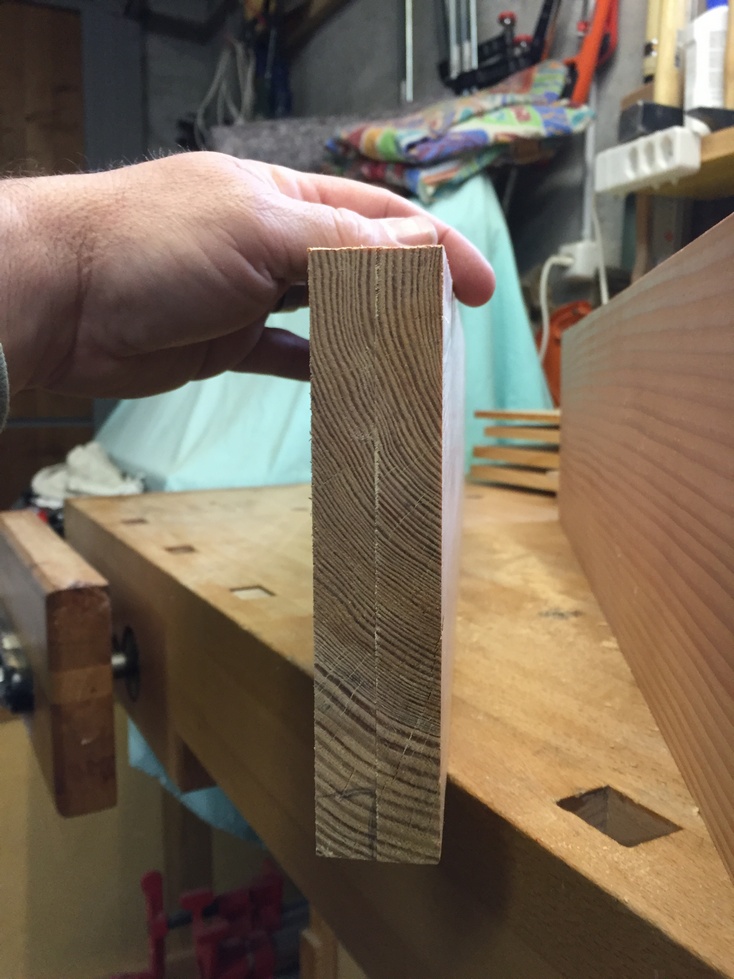
The other major deviation from the original picture is the wood itself. I wanted to use some very light pine, quarter-sawn for a nice straight grain but the white pine I have is not wide enough. Rather than do a glue-up, I have some other quarter-sawn pine that looks to me to be Douglas fir, that is wide enough. One piece is old-growth, as evidenced by the nice tight grain and the other is newer growth with its wider spaced rings, although still a pretty piece with pink tones. I will actually be making two cabinets, one each for different members of the family. I was lucky to have these two pieces of DougFir on hand.
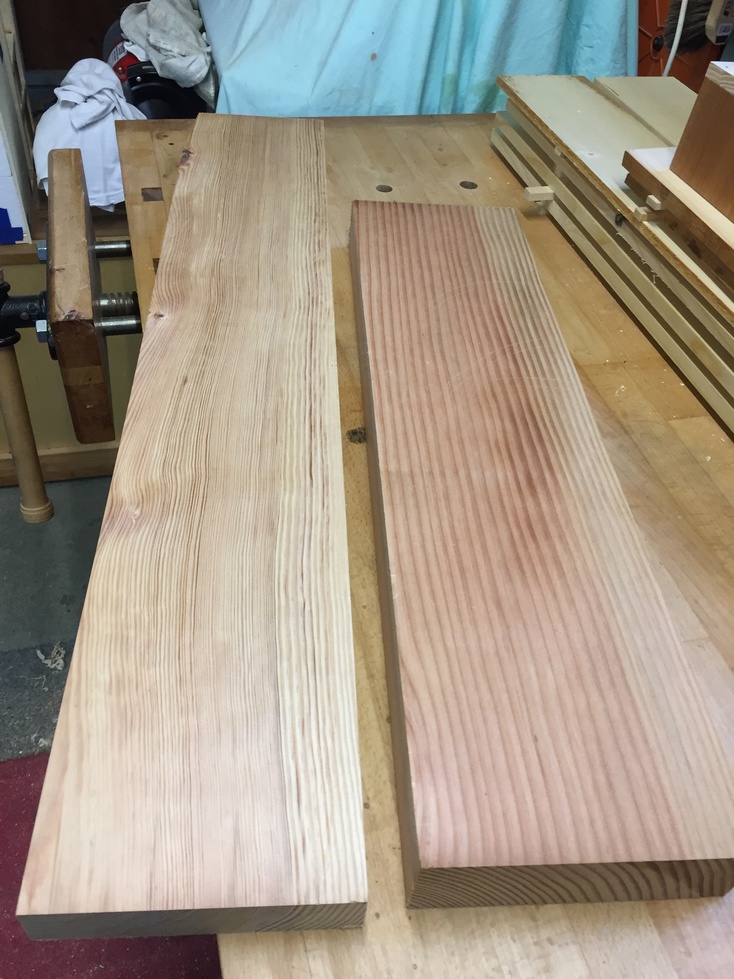
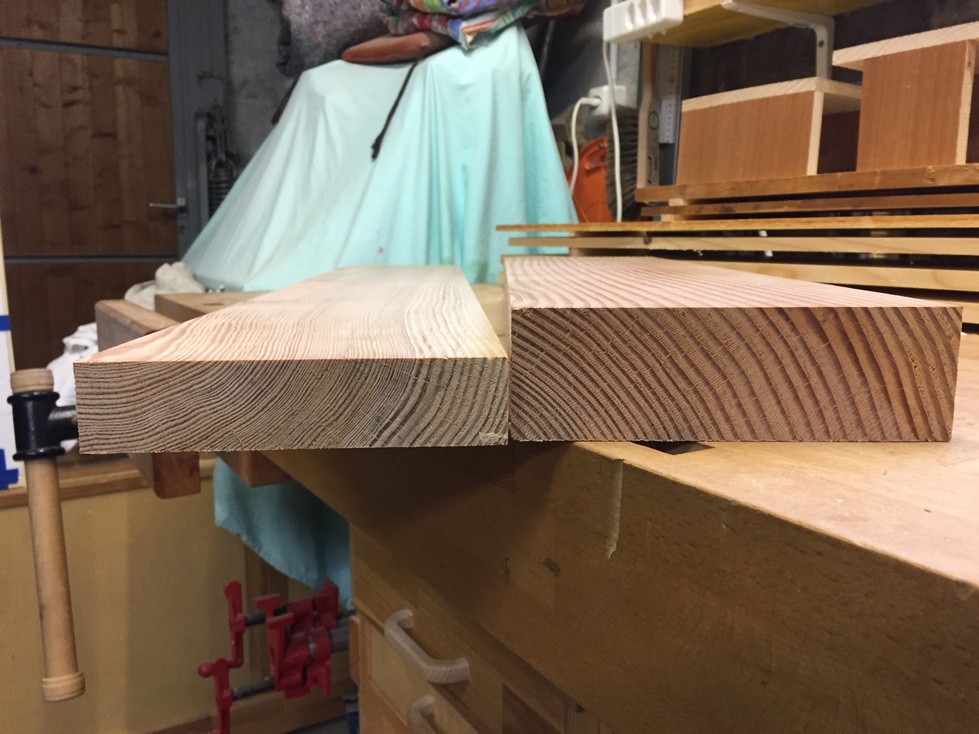
The old growth piece on the left is about 35mm thick and a meter long so when I re-saw it into two, each half will be enough for one side and one top/bottom as well as being 17mm thick. The piece on the right is 54mm thick but not as long. I’ll re-saw it into three pieces of 17mm each. After the wood moves a bit and acclimates, I’ll should be able get a final thickness of 15mm. For a more detailed description of re-sawing, you can browse Part 3 of the Sewing Center but here it is in brief.
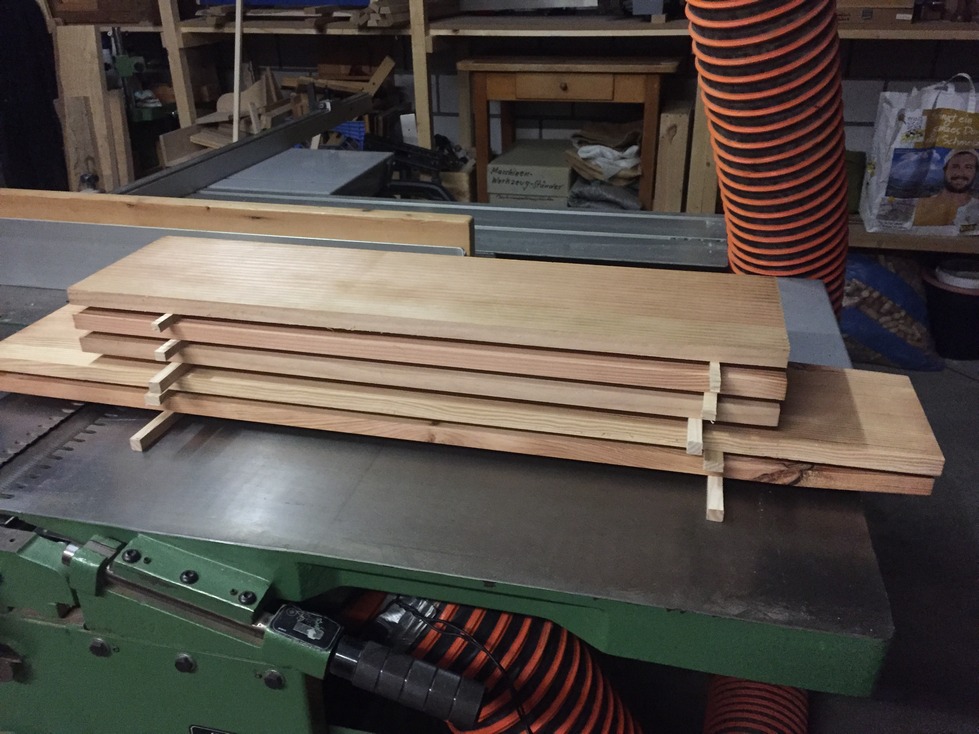
I’ve cut both pieces to rough length, jointed one face and one edge, planed the other face, and cut to rough width. I then mark a square corner on the edge of both. I set my marking gauge to 17mm and mark the length along the top edge. For the thick piece, I mark once from either side, that way I’ll have a little extra for the middle piece to get planed on both sides.
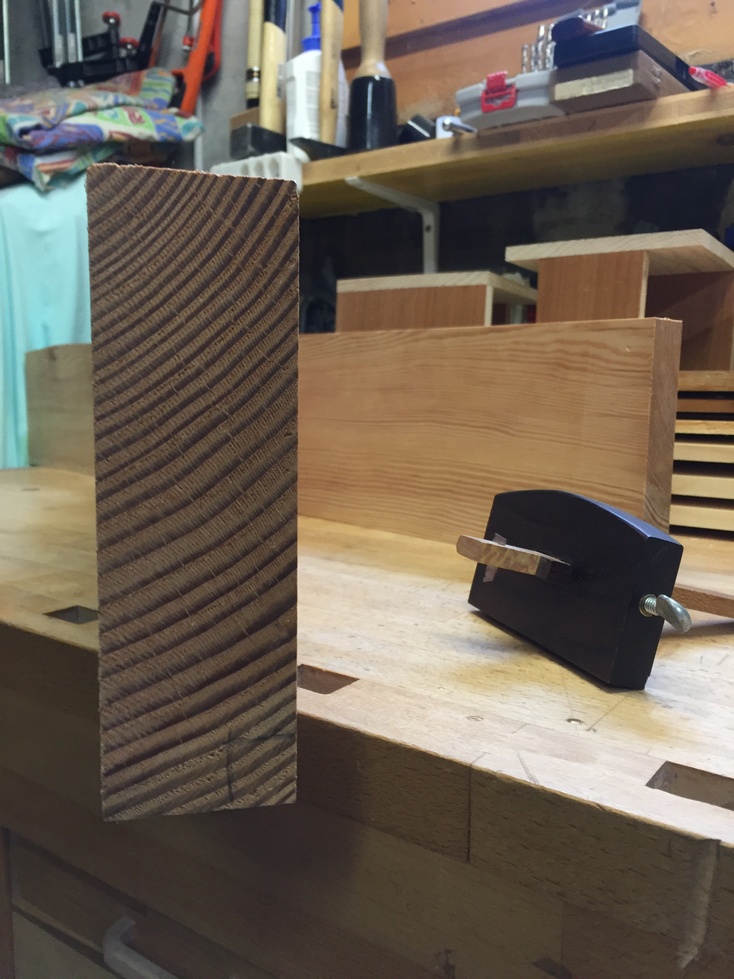
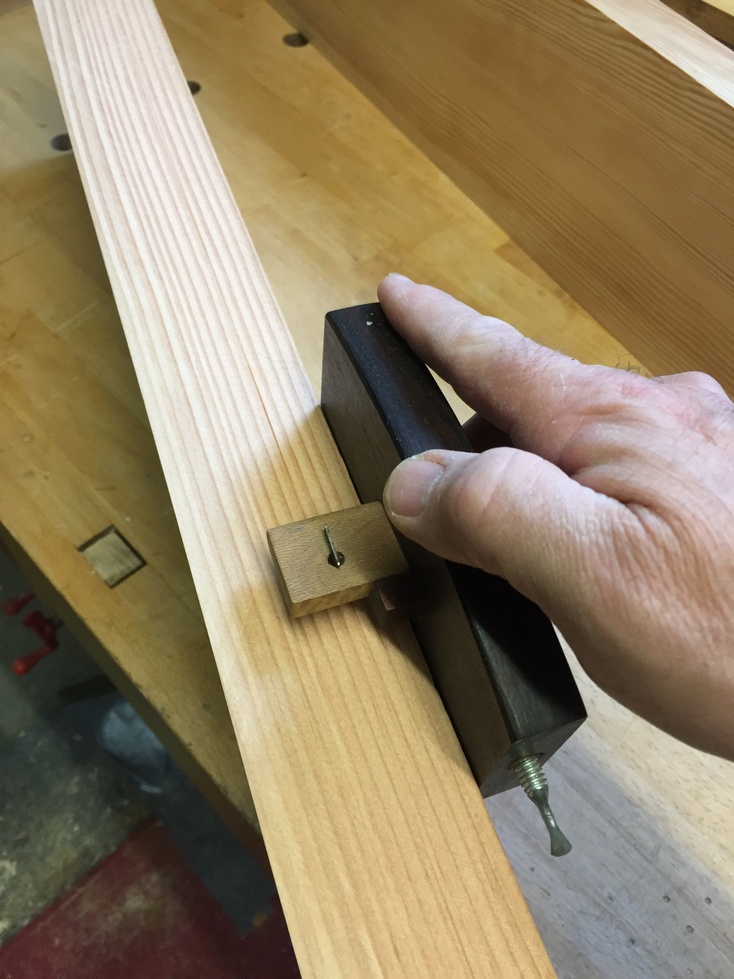
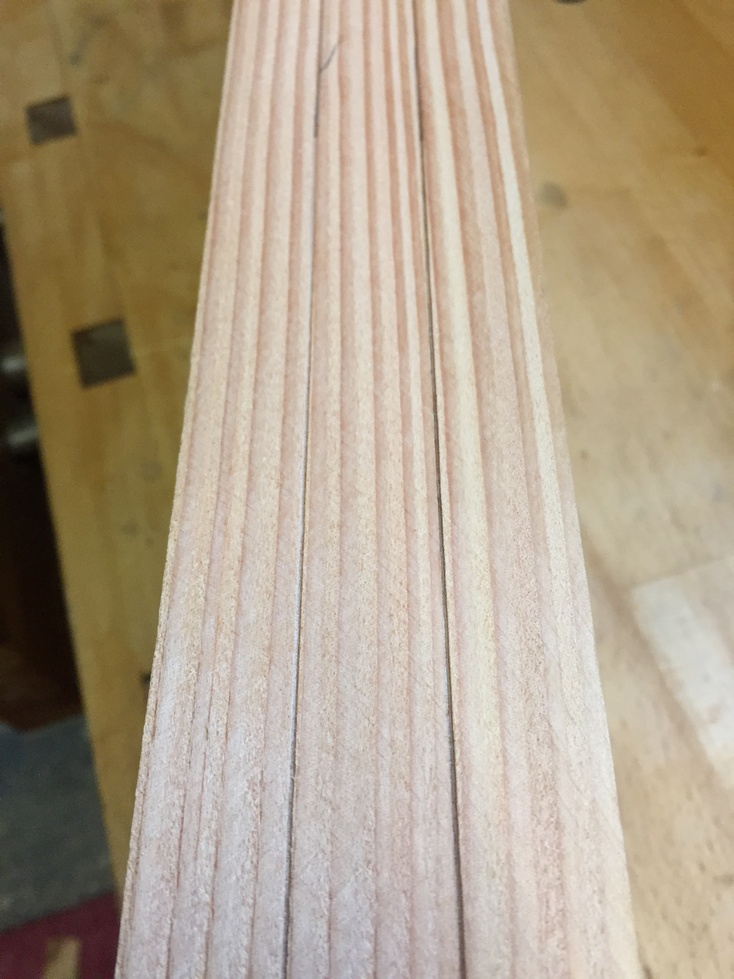
I take a 0.7mm mechanical pencil and run it along the marks so they are easier to see and then, using a square, I make sure that the bandsaw table is square to the blade.
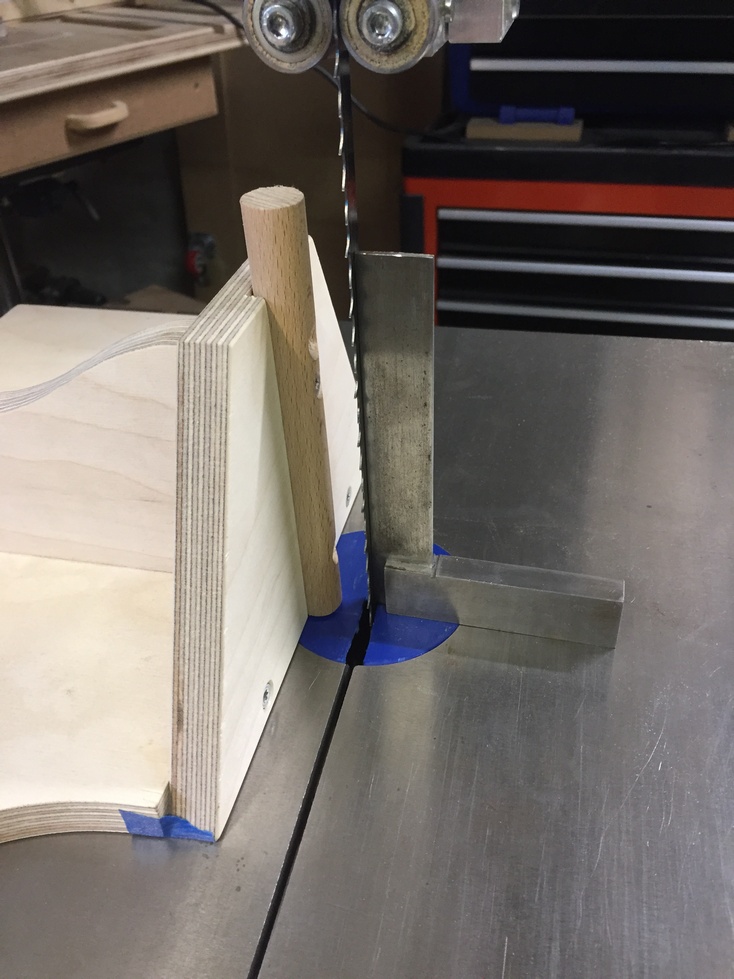
I set my re-sawing jig in place 17mm from the blade and double-check that the guide is square to the table. Since both pieces of wood will yield 17mm thick sub-pieces, I can make all three cuts without changing the position of the jig.

Quartersawn wood that is already dry and stable tends to move less when re-sawn. Holding the pieces together, there is no visible cup however, a little bit of a bow along the length.

Although dry, these freshly re-sawn pieces will need to acclimate to the garage environment so I sticker them on my jointer table for a few days or a week. I’ll then joint and plane them again and hopefully still have 15mm of thickness in the final product.
Next Chapter: While the sides, top and bottom are acclimating, I’ll prepare the stock for frame and panel backs.
As Christmas is right around the corner, I’ll shamelessly pitch Chris Schwarz’s “Anarchist’s Gift Guide” ‘cus he recommends woodworking stuff I find useful and won’t break the bank. He’s left Popular Woodworking Magazine but still writes a blog there (at least for now, I think it’s done at the end of the year). Anyhoo, if you’re wondering what to get the woodworker in your life (maybe that’s you), check it out at: https://www.popularwoodworking.com/chris-schwarz-blog/
Leave a Reply