The message to my family: Ask, and I will build. Or more specifically: Ask, and I will add it to my list of projects….
Occasionally, if the need is urgent, I’ll modify my priorities and this is just such an occasion. My son is moving out of a small apartment and into one that he’ll share with two roommates. Nobody has a table worth eating a meal on and at the same time, I’ve been offered some 70 year old barn timbers for a great price (free). For some time now I’ve been thinking about how much I like Shaker design and a trestle table is a good example of their design ethic. With a guiding doctrine of simplicity, utility and honesty, the Shakers produced furniture that was well-made, and minimalist.
In fact, this table design is so simple that even I could build it from just a picture. However, that won’t be necessary as I found a good article on building one of these tables written by Christopher Schwarz, a well-known woodworker and author whom I have a great respect for. If interested, you can read the article here.
While Schwarz’s table is big enough (32 x 80 inches, 81 x 203 cm), we decided that a wider table that was not as long would fit the space better and still seat 8 people comfortably. We ended up with about 38 x 70 inches (100 x 180 cm), which is a size we are familiar with, i.e. our dining table at home.
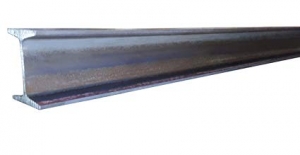
A particular design feature of this table is that it is very strong. This is due to the fact that the stretcher, the piece that extends from foot to foot lengthwise, is mounted high and attaches to the underside of the table top. Picture an I-Beam used for construction:
The top horizontal “flange” is the tabletop and the vertical “web” is the stretcher. This design resists bending, twisting, and racking forces. If you search for pictures of trestle tables, the vast majority of them are a variation of this:
You might imagine that this design will still resist twisting due to the braces the top is attached to, and because wood is strong, any top thicker than ¾ of an inch probably isn’t in danger of bending either. However, lean against the end and you’d be applying considerable racking force to the stretcher joints. It’s still a strong design, but having used tables like this in the past, one thing I don’t care for is bumping my knees or shins against a low stretcher.
Now we get to the materials. In Chris’ article, he shows you how to build this table using typical (in the U.S.) two-by construction lumber. Two-by (2×4, 2×6 etc), is actually 1.5 inches thick so if you laminate two pieces together you get a 3 inch thick piece of wood. This is probably by far the most popular option and accessible to the most people. It is also the option I would have taken if I hadn’t been gifted with a nice combination machine that has a 12 inch jointer/planer. Add to that the availability of old barn timbers and I have the capability to process those timbers into dimensioned lumber.
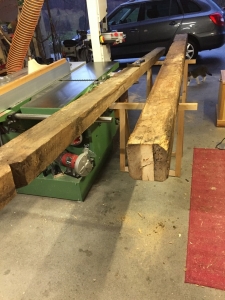
Enter the timber:
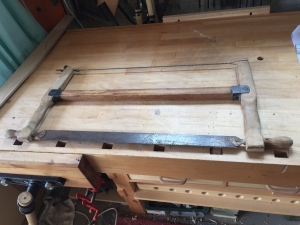
These are both over 12′ (4m) long so the first order of business is to crosscut them into manageable lengths. Luckily for my back, the pile of timbers is less than 100 feet from the garage. Because my chainsaw is in Albuquerque and I want to further my sawyer skills (and keep in shape), I’m going to use a handsaw to crosscut these timbers. Specifically, a frame saw that I picked up for a few bucks in a Brockenhaus (Swiss thrift store/second-hand shop).
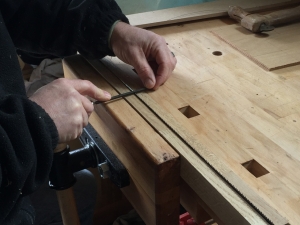
As I start to cut it is painfully obvious that the teeth are very dull and I’m not in search of the ultimate workout. I remove the blade and prepare for a little sharpening. Since I’m still a newbie handsaw sharpener, I go to the internet for help. Another woodworker that has a great many instructional articles and videos is Paul Sellers. He’s a UK woodworker with over 50 years’ experience. A short search produces a number of articles he’s written about saw sharpening plus a few videos. I have nothing to lose since spending so little on the saw, so I grab a triangular file, clamp the blade between two pieces of hardwood in my vise and prepare to give it my best shot.
Six minutes later I set saw to wood again and Oh, the difference a few minutes of time makes!
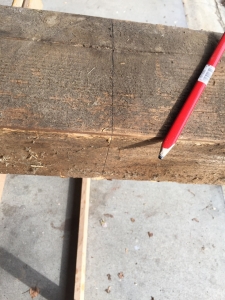
Even though this is rough wood, I follow the same procedure that I would cutting a piece of nicely dimensioned wood. First, I mark my cut lines (as square as possible, mostly eyeballing it) on three sides of the timber.
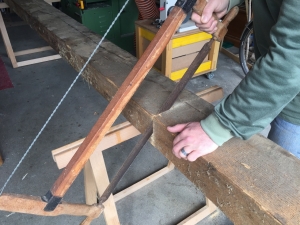
Then saw the kerf on each side starting on the edge farthest from me and “nibbling” back, and then working my way down one side and across the top at the same time diagonally. I switch positions and work diagonally on the other side:
Now I can saw straight down without worrying about keeping the saw on the line:
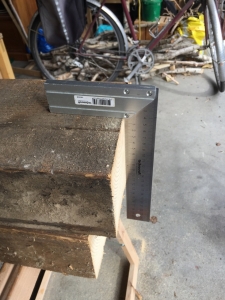
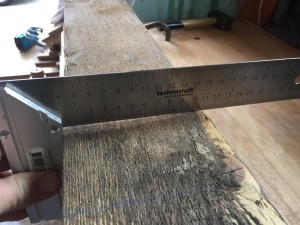
The result is fairly square from top to bottom and I’m happy with the result. It’s absolutely not necessary to do this for rough dimensioning but the more you saw, the better you’ll get at it.
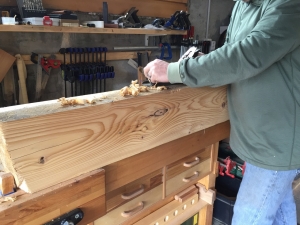
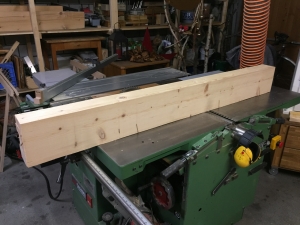
In order to re-saw the beam on the bandsaw I need two jointed faces square to one another so I first run one face across the jointer to flatten it. The beam is not square at all in its cross-section, in fact, there’s a pronounced high spot on one edge. Rather than trying to tilt this heavy piece square as I run it across the jointer, I use my jack plane to knock down the high edge. That way it will be more stable and safer on the machine.
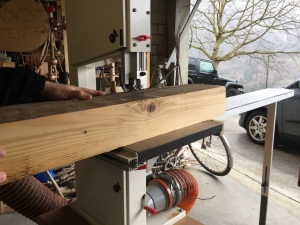
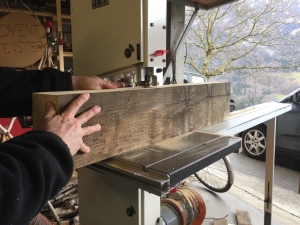
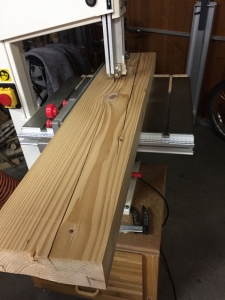
At this point, I still can’t re-saw in the direction I wish because the tall side of the timber is about a half an inch too high to fit under the bandsaw’s blade guard so I rotate it 90 degrees and shave of the excess. I don’t mind this because I would have to remove almost this much anyway to get down to really useable wood.
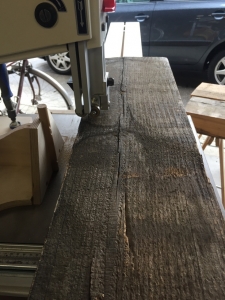
Now it is just short enough to fit and I get two nice 3 inch thick planks out of it. Unfortunately, one of them contains the pith (which was the very center of the tree), which is not stable or strong and almost always cracks, as this one did. I’ll cut away the pith and still have a nice piece to use as a foot or brace.
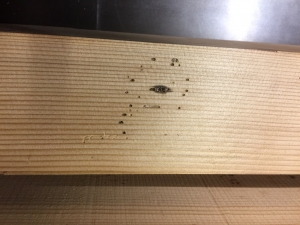
An unfortunate point, the massive timber (about 8 x 8″, 21 x 21 cm) has a few spots where woodworms have been active (and may still be). The majority of worm holes have been cut away along with the waste around the outside of the timber however, there are still a few spots that show wormholes. I’m not too worried about the look since I’ve informed my son that this table is being made from recycled wood. In addition, with the holes filled with epoxy, they add some character. What I am worried about is any live woodworm larvae still in the wood, so when the pieces are milled to final dimensions if any holes are still evident, I’ll treat the wood with a non-toxic woodworm treatment, specifically, Boron Ultra 12.
After I’m finished preparing the timbers for dimensioning, I have some nice, large pieces, enough for the feet, legs, braces, and stretcher. I’ll have to bring in another timber for planks to make the tabletop but I’ll do that once I’ve rough-milled these pieces. Not counting breaks and planning sessions, I’ve put about 4 hours of actual effort into these timbers and ended up with about $80 worth of wood (this is Switzerland remember) so you might think it was not worth it. Think of this, I would have spent an hour driving to and from the home center and probably another hour picking out the pieces , waiting to get them crosscut so as to fit in the car, and checking out. But now I can feel good about recycling this wood for a table; wood that otherwise would just get burnt in the winter.
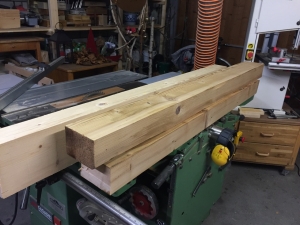
Still using mostly the bandsaw/jointer/planer, I mill the timbers down to almost finished dimensions; width plus ½ inch, thickness plus ¼ inch, and length plus 2 inches.
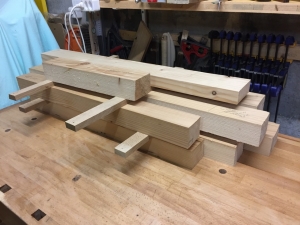
And I sticker the pieces to allow airflow. While these acclimate to their new environment, I’ll pick out a timber to use for the tabletop.
Next Chapter: cutting joinery for the base.






Your son
Very cool ?? I’m excited to see how it comes out