
Now that the e-bike conversion is finished, and I’ve replaced the brake discs and pads on our car, it’s time to get back to Monika’s sewing center. The pieces I cut weeks ago for the rails and stiles are ready to be milled to final dimensions but before I start that, I want to have all the center panels re-sawn so they can “acclimate”.

I’ll start with the doors. Each of the two doors will have two panels approximately 21cm wide. With a large professional bandsaw this would present no problems however, my bandsaw is only capable of re-sawing an 18cm-wide piece, so I have to think carefully about how I will accomplish this in order to produce the best looking panel. The two planks above will provide two panels the correct width so I start by laying out an 18cm portion that will show off the nicest part of the grain. I then rip the two side pieces off of each plank and I now have six pieces that will all fit in my bandsaw stood up on edge.
I mark the pieces so as not to get them confused and then joint one edge of each piece on the jointer.
By marking the edge with a pencil, I can see the progress as I pass the piece over the cutter a number of times till a completely fresh edge is now square to one side.

Once a single edge is jointed and square, I can run it through the tablesaw in order to produce a second clean, square, and parallel edge.

Now, I lay the pieces back in their original positions. Since a bit of wood was removed from each edge, I have to shift the pieces a little in order to achieve the best grain match. As you can see, it will be difficult at first glance to see that the panels are actually 3 pieces that were ripped, and then glued back together.

In order to get the best possible re-saw, I put a special blade designed for this purpose on the bandsaw and carefully “tune” it so that the blade runs smoothly and accurately. This includes applying a special, space-age, super-secret lubricant to the saw blade…..

Unlike some other oils, Pam vegetable oil will not stain the wood. It helps reduce the build-up of residue during sawing. This not only improves the cut, but reduces heat and helps keep the blade from becoming dull too quickly.
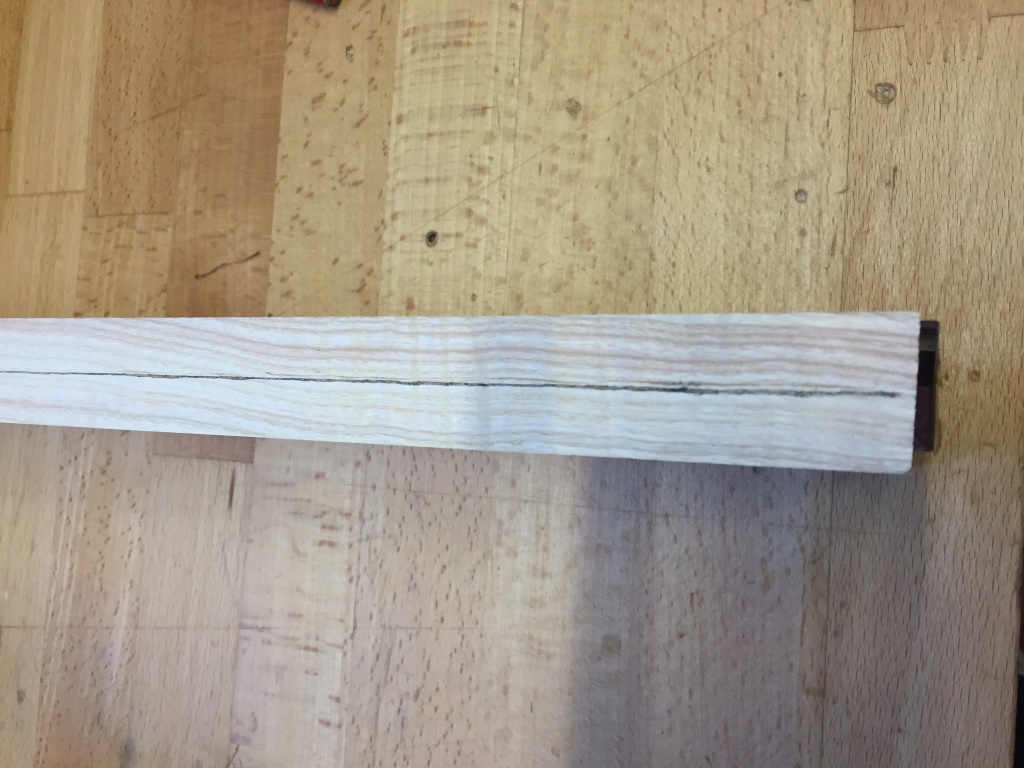
I need to have an accurate line to cut to, so I use a marking gauge. Since the plank is 26mm thick, I set my gauge to 13mm and, being careful to keep the fence flat against the side of the plank, I scribe a line down the center of the edge. This is a store-bought marking gauge which has pins mounted to each side. The pin “scratches” a line which in this case is easier to see on edge grain. My other marking gauge is one I made many years ago out of a precious piece of Brazilian Rosewood. It has a small blade instead of a pin and is better for marking across the grain.


In order to make the line even easier to see while cutting, I run a pencil down it and try not to think about how my eyes were so much better when I was 19.
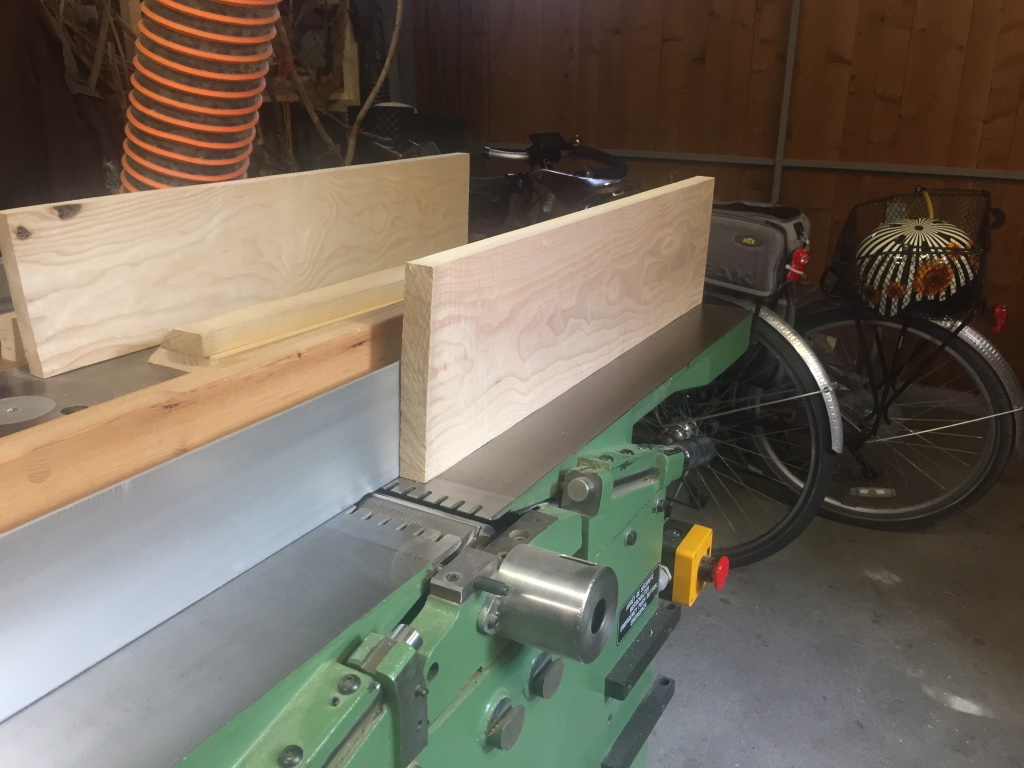
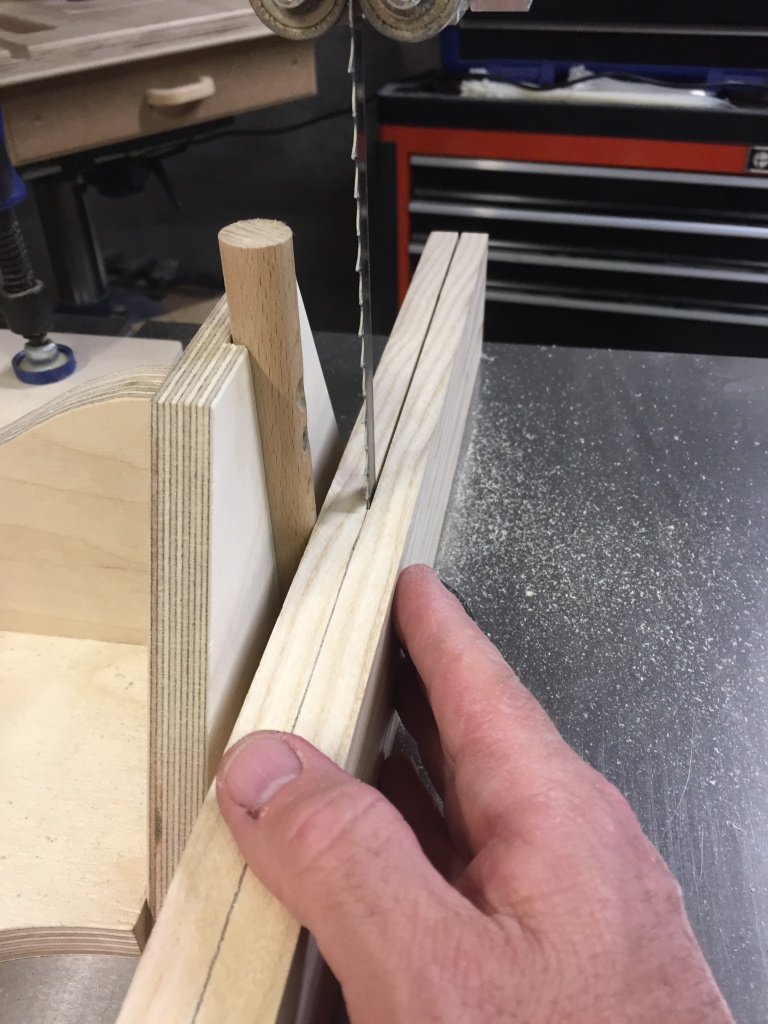
As a plank is re-sawed, there are a number of factors that affect how the blade “tracks”, or drifts from side to side. A normal straight fence is fine for cutting strips of small or narrow pieces however, it is not suitable for re-sawing large, thick planks so I built a re-sawing jig that provides a center point close to the front edge of the blade. In this way I can control the direction of the cut as I saw. Since the cutline is 13mm from each edge of the plank, I use calipers to set the center point of the jig 13mm from the blade. Prior to this setup, I already ensured that the bandsaw’s table is set square to the blade.

The first piece is ready cut and I only have to apply gentle sideways pressure in order to keep the wood flush against the centerpoint. You’ll notice that my thumb is on the cut line; be assured that I never let my fingers get close to the blade! In fact, as I get near to the end of the cut, I always stop pushing and instead pull the wood through from the other side. I think the bandsaw is one of the safer wood machines to use however, it still commands respect.

That first piece went easily however, the larger piece requires that I cut very carefully. You can’t rush this, slow and steady wins the race. One of the reasons to make sure that the plank is oversize when re-sawn is that sometimes tensions in the wood cause the two halves to cup, especially in plain-sawn wood such as this. I’m lucky, probably due to the fact that the wood has had so long to dry and plenty of time to acclimate in my garage. As you can see below, no cupping (yet). Hopefully after a few days the pieces are still stable. If not, I’ll have to joint that face again. I ended up with almost 3mm extra thickness on each half just in case.


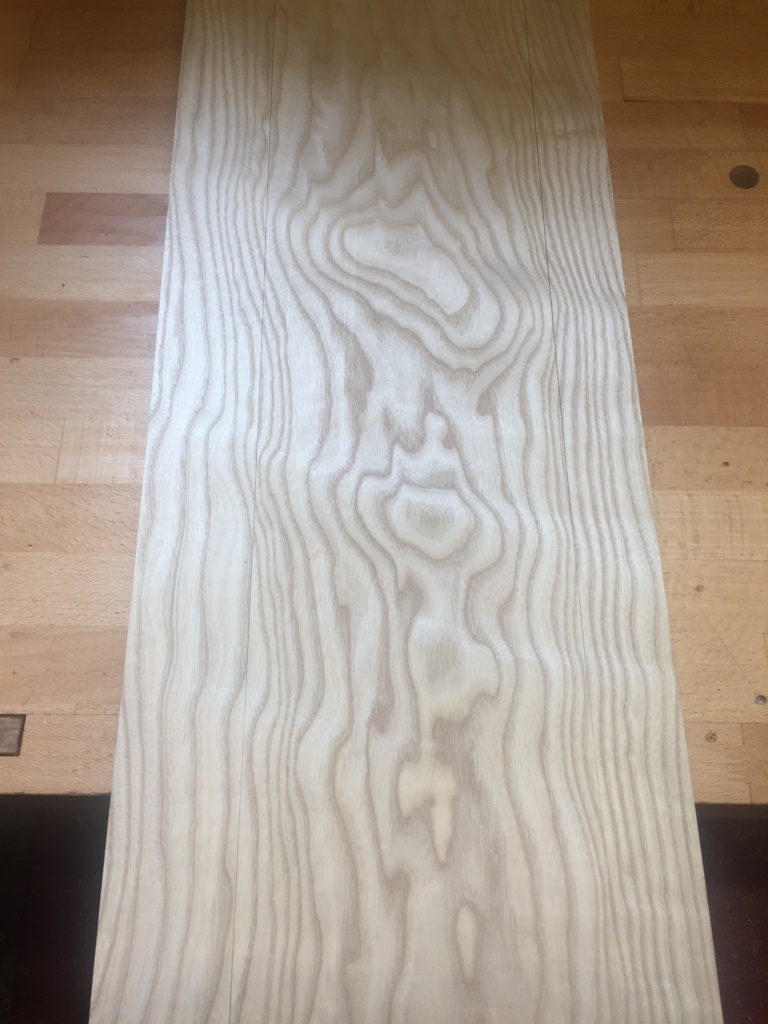
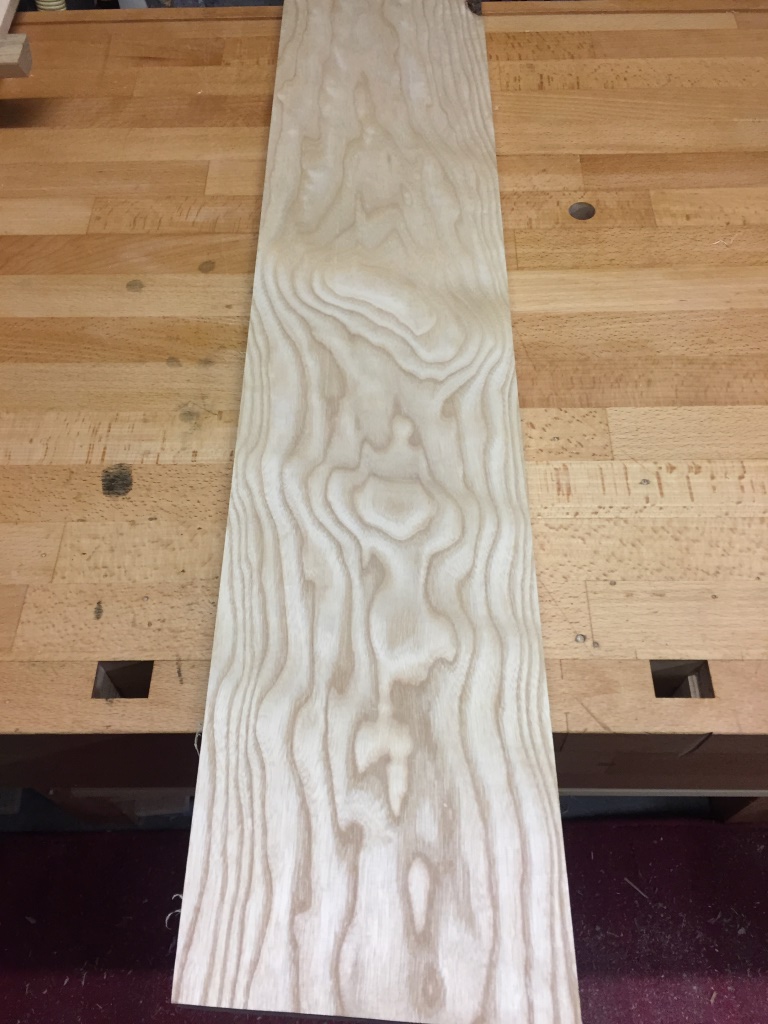
Now the moment of truth, we open the two halves like a book and inspect the internal grain:

I think this looks quite nice and will make for attractive door panels. I then re-saw the next piece. One face of this plank has nice clean grain figure however, the other side has “defects” of darker wood.
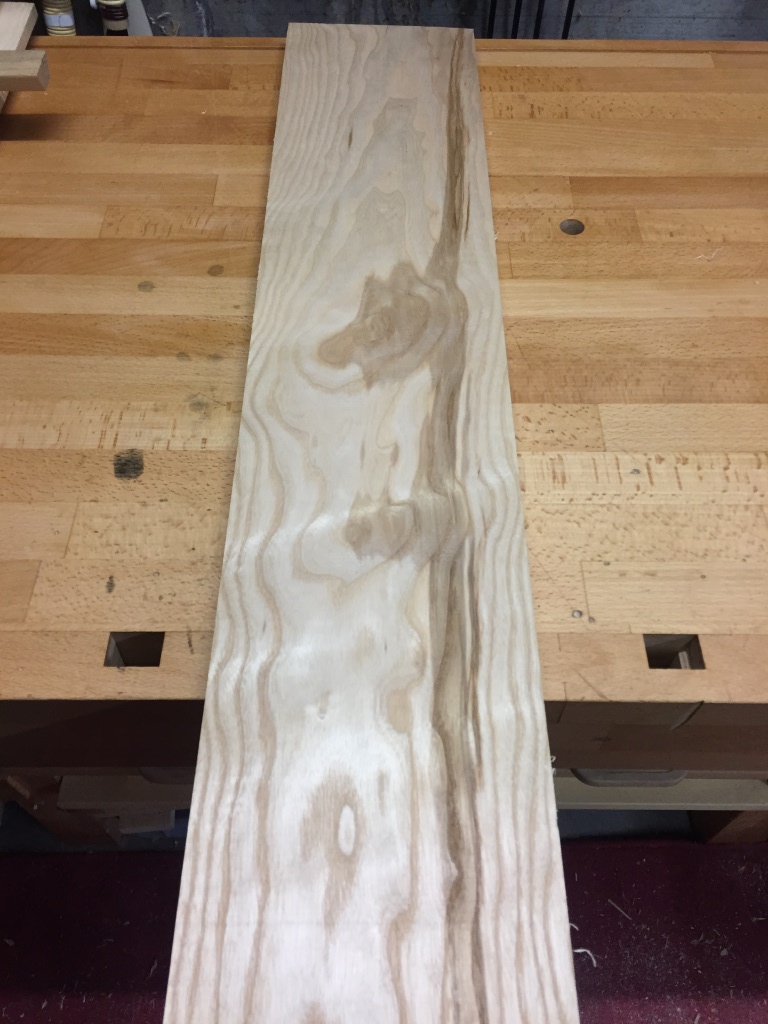
This is not necessarily a problem. I check the ends and it looks like the dark spots don’t reach very far towards the center.

Unfortunately, you can never tell till you actually saw. This is what the book-matched halves look like after the cut.

If it were just me, left to my own horribly fore-shortened sense of artistry, I would probably only use this piece for panels on the inner pedestal sections that would not be seen. Monika however, likes the streaks of dark grain, and we discuss balancing these pieces against the first set to achieve a nice visual effect. Yes, this is why I keep her around….. 🙂
This will give you an idea, picture 2 doors, each with two panels:

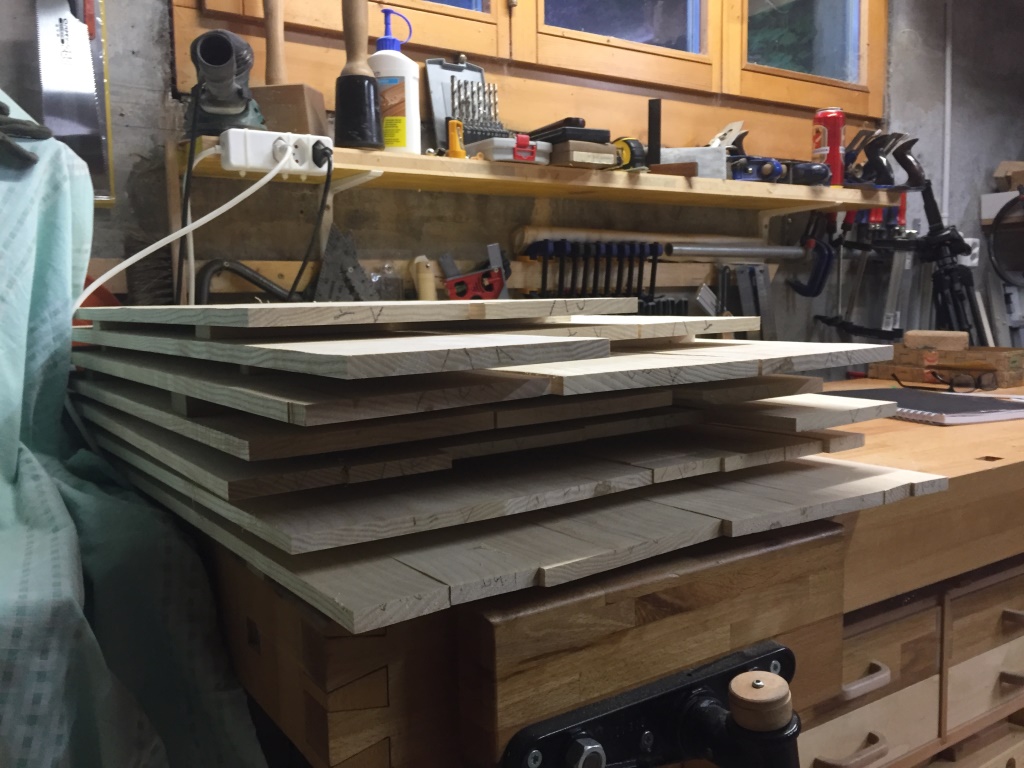
This is just the start, I have pieces to re-saw for 7 more panels. Monika and I will then look at each one and decide where they will all be positioned in the final product.
A couple hours later:
Glue-up the panels:
After trimming the edges and squaring up the ends, the grain isn’t in exactly the same place as before so now I carefully match the grain on each pair of panels to get the best effect. Even a few light passes on the jointer to prepare the edge for gluing may alter the effect and so I double check and mark the panels before setting up the glue job.

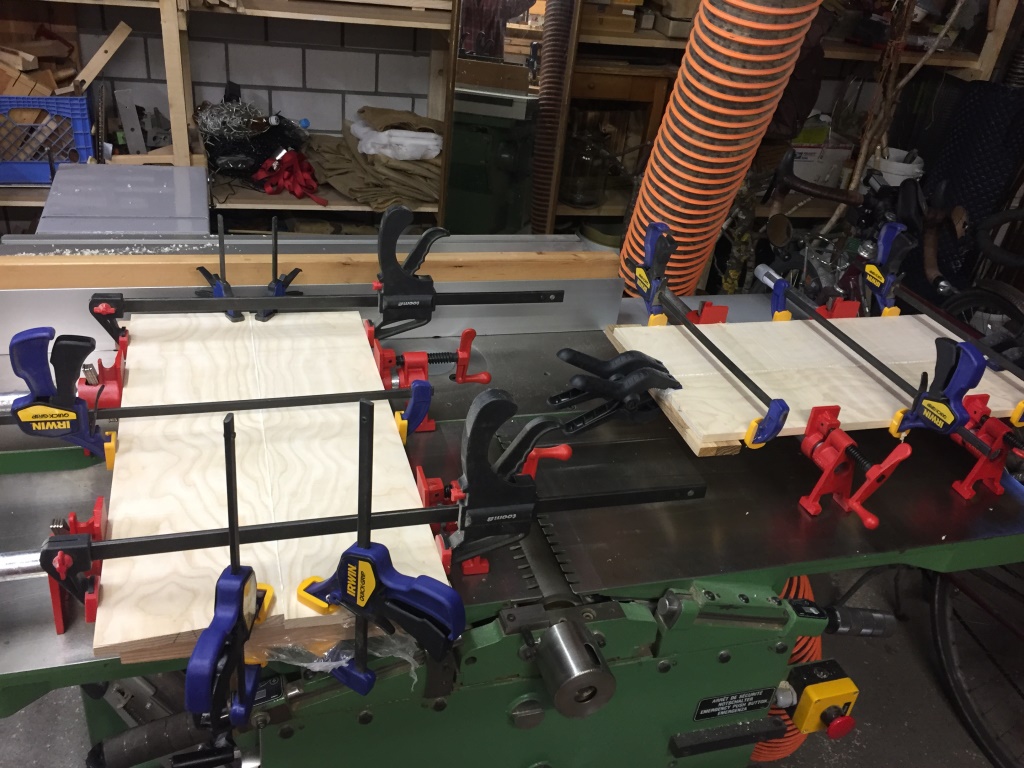
Using two pipe clamps underneath helps align the edges as each panel-half can then lay on the straight pipe below. Remember that I jointed and planed each face flat before re-sawing so each half has one flat face. Since the complete panel is less than the 31cm capacity of my planer, I can send it through after glue-up otherwise, I would plane the rough saw marks before the glue-up. I use a pair of alligator clamps at each end with a flat piece of scrap underneath to further keep alignment. Alternating clamps across the top helps keep the clamping forces from “buckling” the panel.

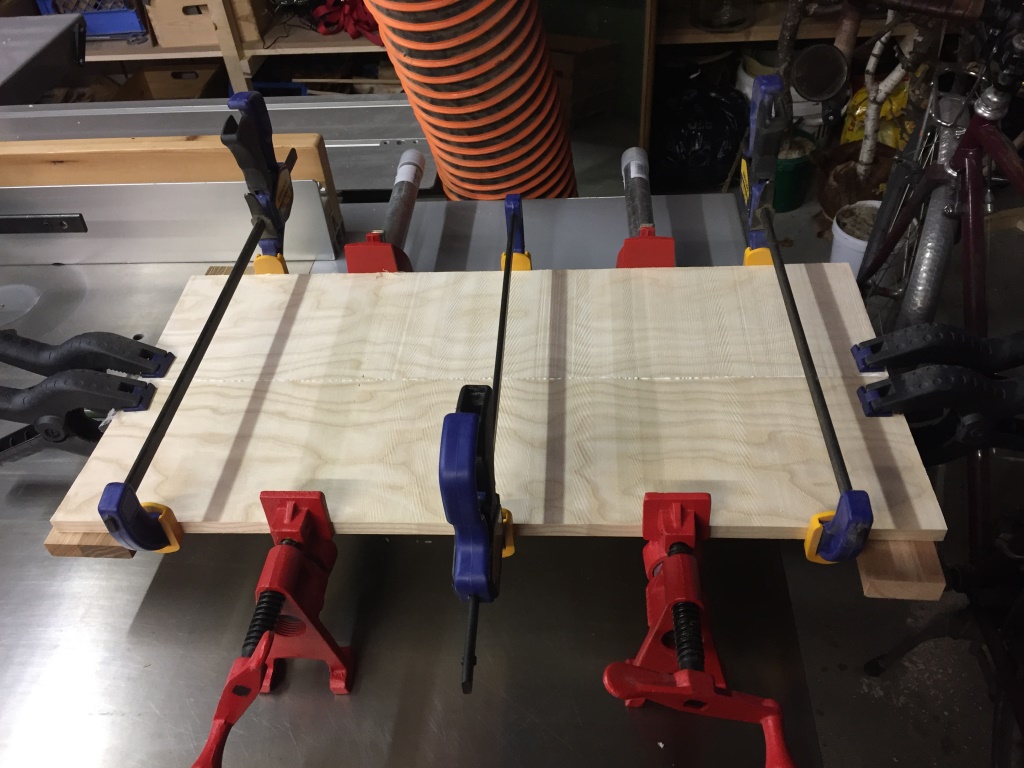
It looks like a lot of clamps, but this ensures even pressure all along the glue joint. They say that a woodworker cannot have too many clamps and this is true, the bottle-neck is definitely the number of clamps. With my current stock, I can glue up only two full panels at a time.
After the glue has set, I use an older block plane I keep rough tuned to remove most of the glue squeeze-out. I follow this with a hand scraper. I prefer to take this extra step because hardened glue is not good for planer knives and will at best dull them prematurely, and at worst nick them. The planer has a quick-change knife head however, knives are not cheap and I want to prolong their life as much as possible.

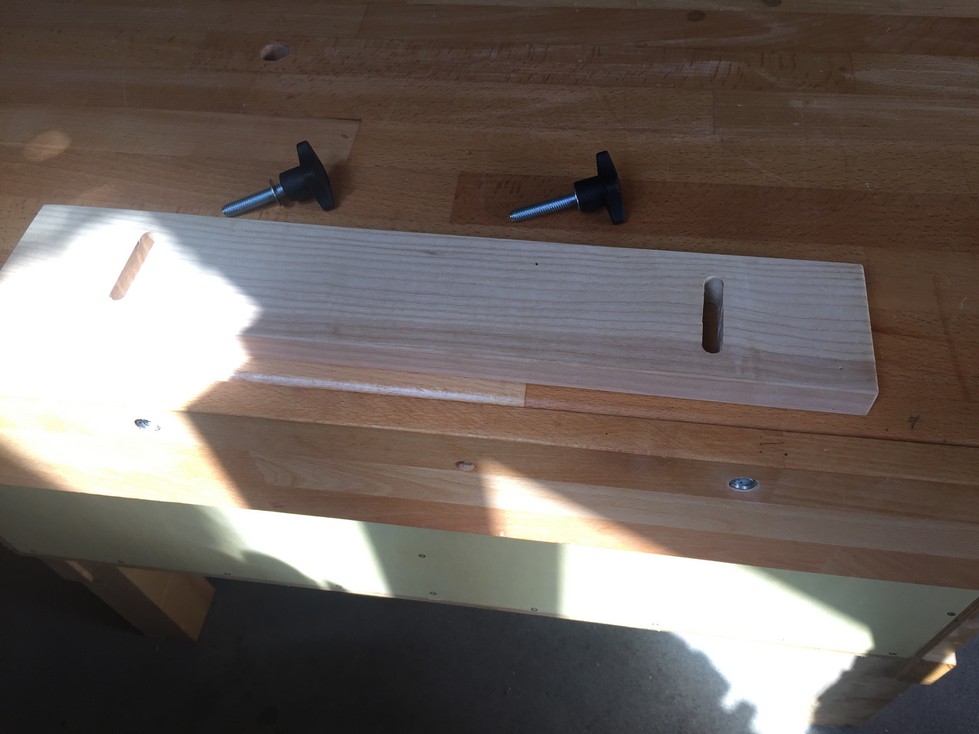
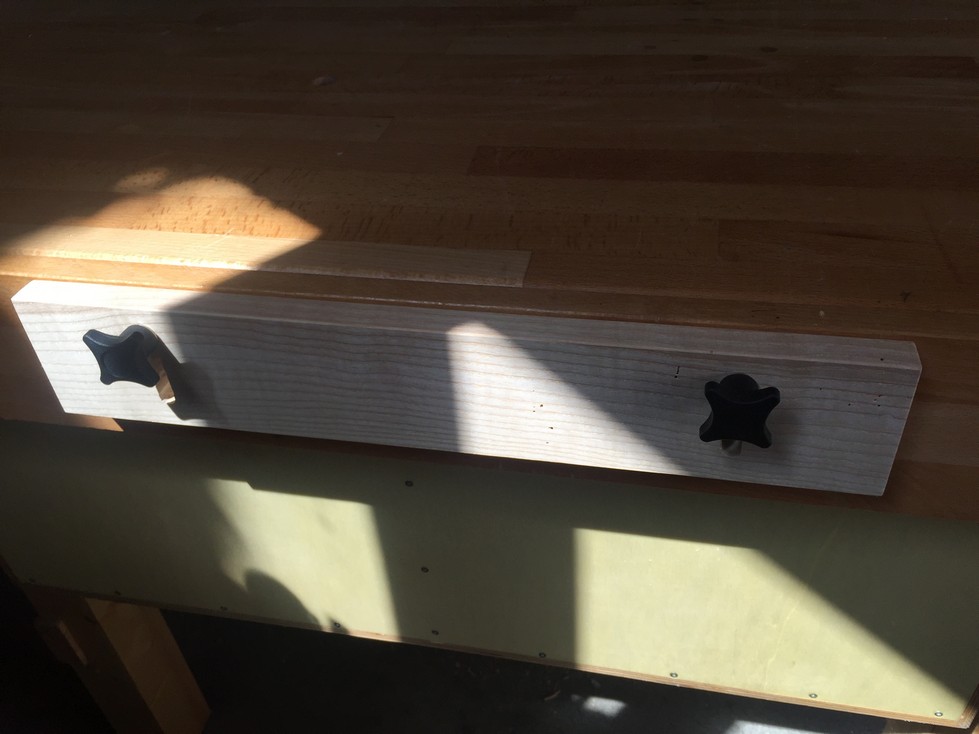
While it is simple to clamp a stop block to work wide panels, it occurs to me that now is the time for an easy upgrade to my workbench. I’ve been wanting to install an adjustable planing stop to the back edge of the bench for some time but have been putting it off.
First, I rout two vertical slots into a piece of scrap. Then I mark and drill holes to accept threaded inserts for the holding knobs and attach the stop. Now I can raise and lower it easily to match the thickness of whatever stock I’m planing, in this case, the 11 panels for the sewing center.


After a few evenings, I have all the panels glued up. I won’t trim them to final dimensions until I have the frames complete. That way, I can fit them each exactly to the groove they will slide into. In addition, with the frames complete, I can lay them on top of the panels so Monika can arrange them (panels) for best aesthetic appeal. I’ll then mark the panels so when it’s time to trim them, they’ll remain in the position she chose.
Up to this point, I’ve jointed and planed with the same knives installed because most of this was “rough” planing. Now that the panels are glued up, and I will plane them to final thickness, I want to have the best possible job with the least amount of tear-out so I replace the knives with new ones. As mentioned, this planer uses a quick change knife-head. Tap on the holding blocks to release them and the knife slides right out.

While I lean towards “traditionalism” I have worked with a standard jointer/planer back in Albuquerque and I can say that this system saves an incredible amount of time. With standard jointer/planer heads, you remove the knives, sharpen and hone the edges, re-install them, and use a special jig to set them in exactly the right position. At best, I would say goodbye to at least an hour of my time. With these Tersa knives, it takes less than a minute to swap them out. Also, they are double-sided so one set of knives is effectively two. For $10, I’ll gladly save two hours of time and effort (and cursing). Because there is still life left in one side of these knives, I mark the good side with dashes and the dull side with a solid black line.

Slide in the new knives and presto! I don’t even have to tighten the holding blocks; by turning the machine on, the centrifugal force generated by the spinning head forces the holding blocks into position. Easy-peasey.
I run the panels through with the flattened side down to first remove the saw marks and then achieve the final thickness of 10mm. It may take a number of passes because if I try to take off too much wood at once, I’ll get tear-out even with sharp knives. It might take three passes to remove a little over 1 mm but in the end, I have a nice smooth panel that only needs some fine sanding before it is ready for an oil finish.

That’s it for now. Next time, frame and panel joinery!
Leave a Reply