
(And oh yes, I seem to be writing again)
So the last year and a half of Covid has actually seen me much busier than normal both at work and at home so this blog has been neglected for quite some time. (I’m sure all 7 of you that actually read some posts have been on the edge of your seats) And a heads-up, this is mainly just a pictorial post with a story rather than a full-on article of “how I built it”. Part of the story the pictures tell is how disorganized my garage can get…..
While I currently live in Switzerland, this workbench was conceived, built, and still resides in Albuquerque, New Mexico. Currently waiting on that Star Trek transporter device…..
So for 8 odd years I’d been working on a ramshackle base (originally 2 heavy duty sawhorses) topped with a particleboard door. To be fair, a particleboard door has a lot going for it. It’s heavy, stable (changes in the weather won’t cause it to distort), and because it is what it is, you can beat it up and put all kinds of marks on it and you won’t care.
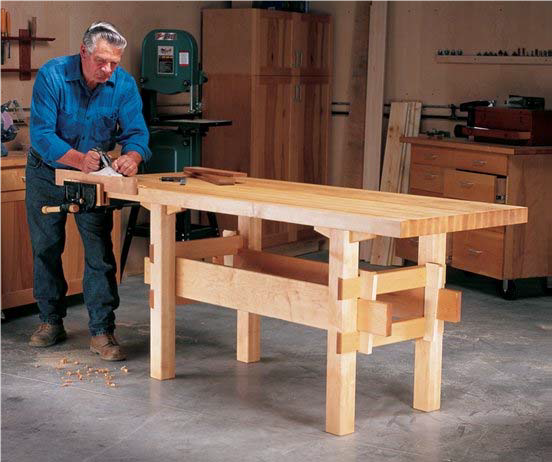
I don’t regret those years as it gave me time and experience to figure out exactly what I wanted in a workbench. If I had built one in the beginning, it probably would have ended up falling short of my ideal. Around 1999 when I had first started thinking about a “real” bench, I purchased “The Workbench Book” by Scott Landis (since re-printed by Lost Art Press). It is an amazing book full of different styles of benches for different purposes. Since then I’ve read a number of other “workbench books” simply because I’m interested in the topic. Recently Christopher Schwarz published “The Anarchist’s Workbench” which is the book I wished I had back in ’99 (If I had, I might have designed the bench a little differently) although I still would have purchased the Landis book. An extremely wonderful thing is that the AWB is available for download free of charge although I paid for a hardcopy because I like to have an actual book in my hands when I read.


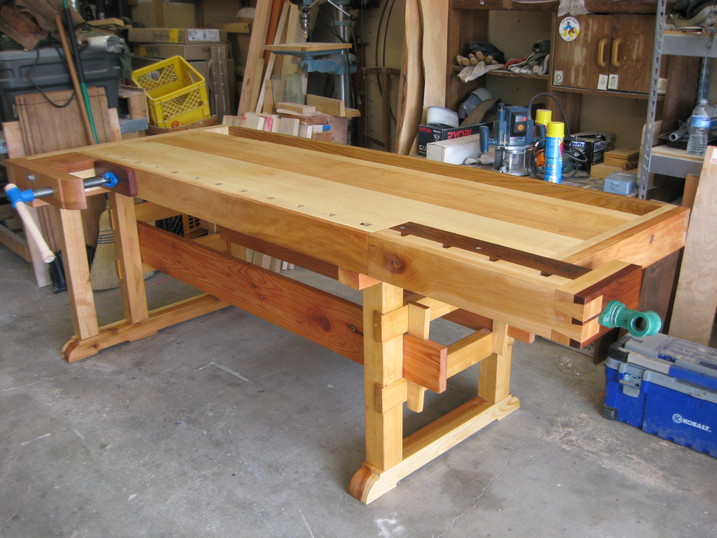
Since by the late 90’s I had already started gravitating towards handwork for joinery (mortise/tenons, dovetails etc.), I decided that I wanted a traditional Scandinavian style bench with a tail-vise and a shoulder vise. And as the typical American DIY’er, I figured whatever is worth doing is worth overdoing (phrase borrowed from a friend of mine in ABQ (thanks Kevin!)) and made it bigger than average. It’s a beast at about 30” by 96” (76cm by 244cm). The design of the top and vises came the Workbench Book, specifically the chapter on Frank Klausz’ bench. The base, on the other hand was inspired by an article called the “Wedged-Base Workbench” by Tim Johnson so I made that my guide and modified the dimensions to suit my plan.
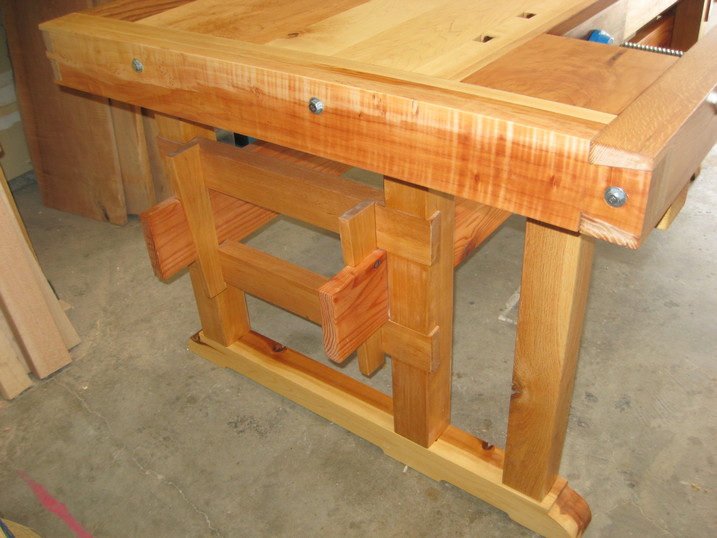
I really liked the dovetailed end frames held together by wedged stretchers. Here’s what I ended up with:

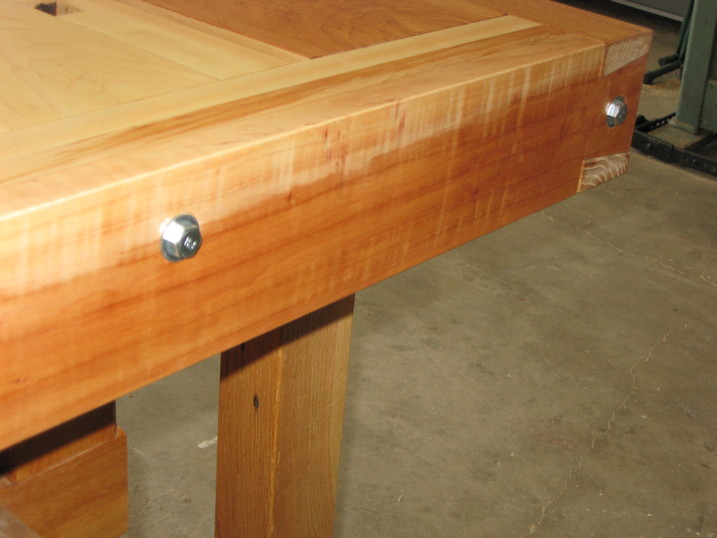
The legs and feet from pine scraps, stretchers are Douglas fir as are the top supports and the wedges are ash. One leg that you can’t see (there is an extra leg to support the shoulder vise) is oak from a pallet.
For constructing the top, I borrowed some (okay, a lot of) construction techniques from Garret Hack’s article in Fine Woodworking here. The top is a sandwich of three 1” thick layers of hard maple with a row of dog-holes across the front and a tool till along the back. If I were to do this again, I would lose the till as I prefer to keep my most used tools above or below the bench. If I hadn’t made it so deep, I might have used the till more often.

The shoulder vise is a mish-mash of woods, the piece that extends it from the front is a layer of maple with a layer of elm on top. The arm for the vise screw is oak (from a recycled pallet), attached to the left apron piece by a single massive dovetail. The clamping board is a precious piece of Honduran rosewood. I had to have a couple of fancy touches. Finally, a threaded rod extends through the bench to help provide additional strength for the whole shoulder vise assembly.


The tail vise is another indulgence, utilizing a second piece of rosewood on the end and a piece of bocote covering the vise mechanism. The front apron piece is elm that blends into the front apron of the benchtop which is also elm. A couple large dovetails make is strong and give it some “cool” factor.
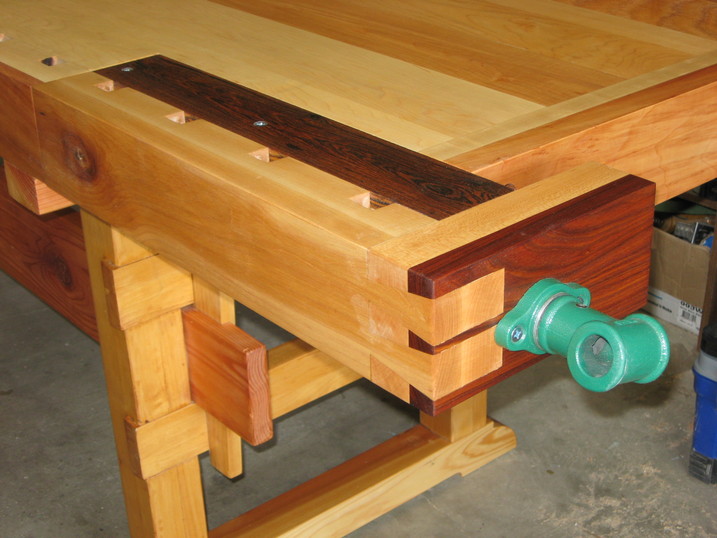
Both side aprons are also elm, with some nice tiger-striping figure.
All in all, a beastly workhorse of a bench. It has a good home for now, living with my friend Javier. He makes beautiful guitars so the bench is a bit overkill for him. Besides, if it was here in Switzerland, it would take up literally half my garage, but that’s another workbench story…..
Leave a Reply