
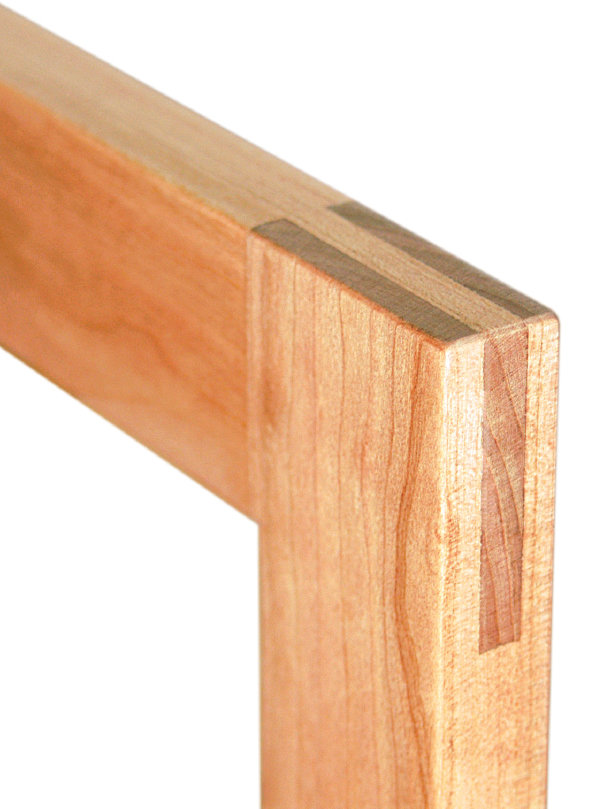
I really like frame and panels. For their size and weight they can make a piece of furniture incredibly strong, and they look nice too! The joinery used to make a frame is also one of my favorites, the humble mortise and tenon. While dovetails are the traditional mark of the skilled craftsman, I think mortise and tenons should be right up there with dovetails. Unfortunately, I think the M&T gets a bad rap because they are just as difficult to do as dovetails and yet, in most cases, will remain unseen.

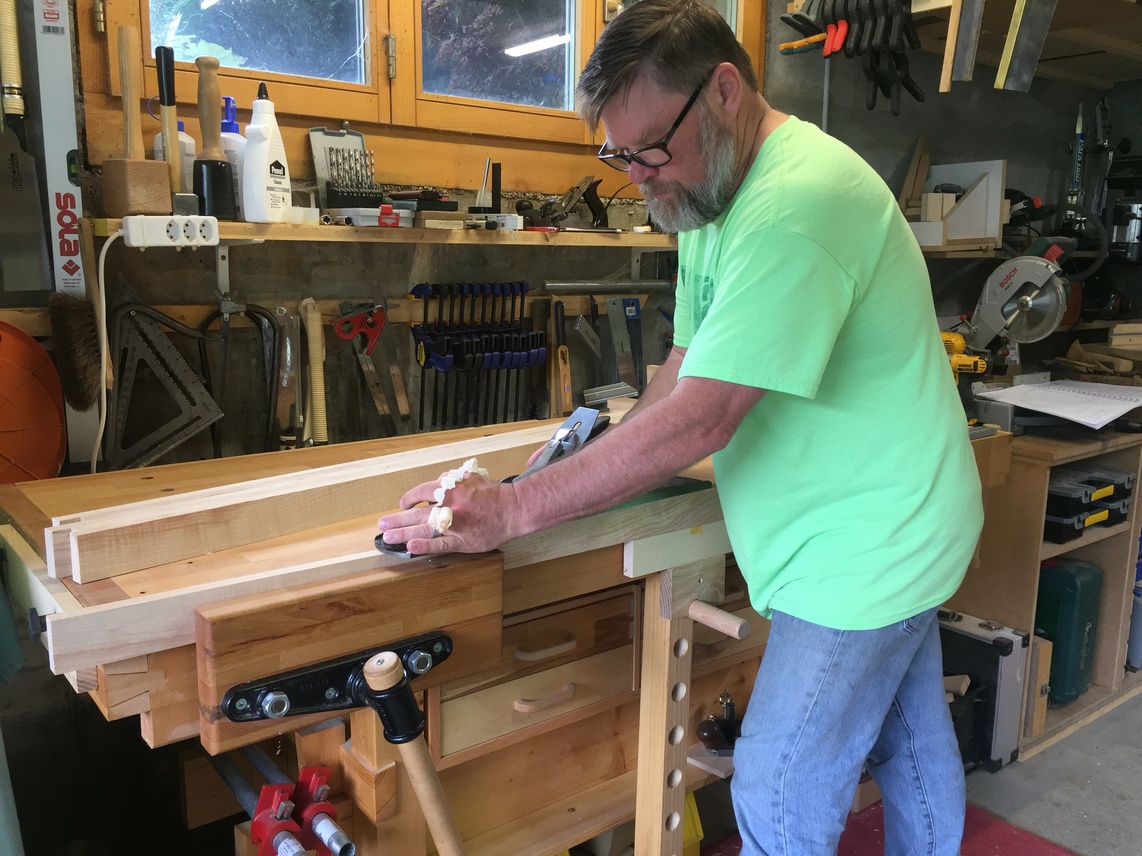
I wrote about constructing frames in fair detail in this Sewing Center post however, since then I have acquired a router plane. This is definitely one of those tools that I wished I had purchased a long time ago and makes fitting tenons perfectly a cinch. Prior to this tool, I used a low angle block plane to shave the cheeks and chisels to pare to the shoulders. This is still a great method but the router plane allows me to micro-shave both cheeks to ensure the tenon remains absolutely centered. Paul Sellers describes the method here.
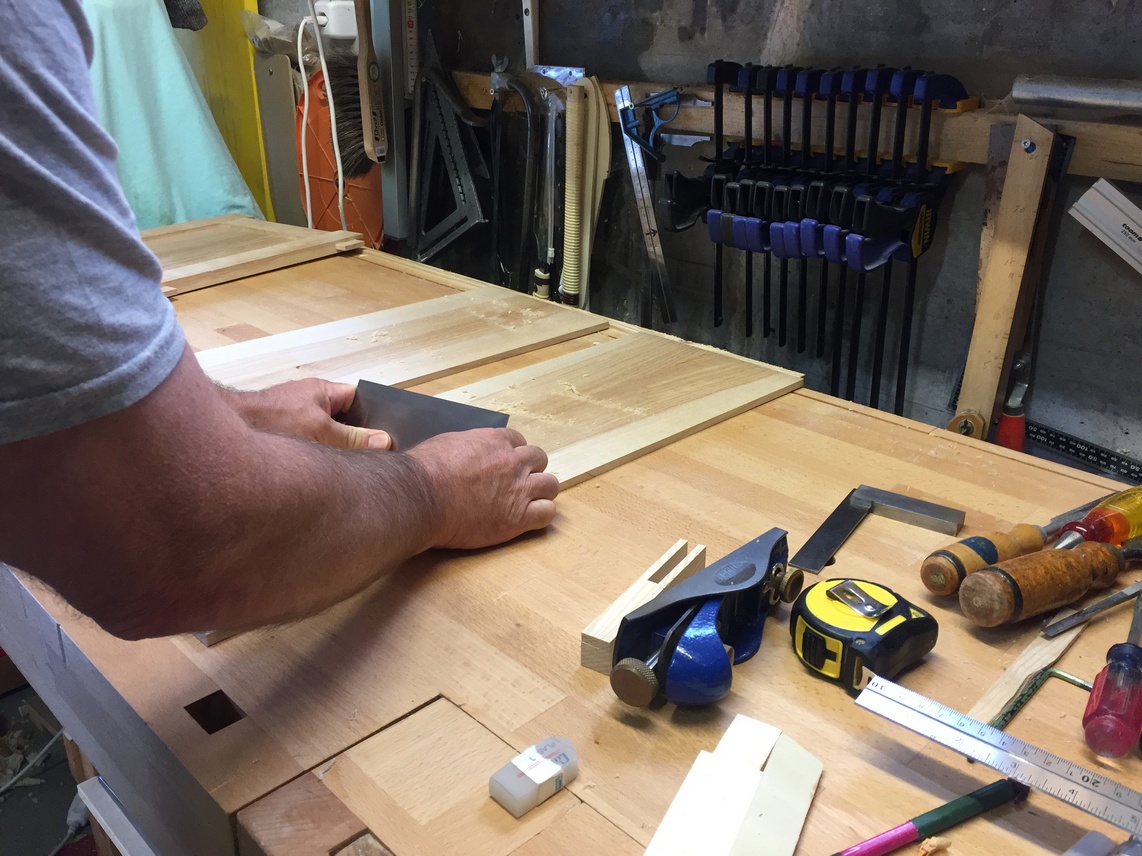
While I use machines to prepare the parts and remove the bulk of the waste, I still finish with hand tools to clean up mortise walls, adjust tenons, and pare the shoulders when necessary. With hand tools, I can creep up on the perfect tenon thickness. The same goes for prepping the stock. I have jointed square edges on all of the frame and panel parts using the machine, but since the reference edge (the square edge I will use as a baseline to mark all the joinery) will also be a “show” edge, I use my jointer plane to remove the machine marks and provide a silky smooth, tearout-free edge.
Once I have decided which face of each part will show and squared an edge to it, I mark this reference face/edge and stack all my parts in the orientation they need to go through the tablesaw for cutting to final width. Square edge to the fence, and show face up.

During the detailed design phase, I attempted to have as many of the tenons as possible the same width and length. In so doing, I don’t have to worry about the overall length of each rail and can use a stop block clamped to the fence to register how far from the end where the shoulders are to be cut.
I have cut all the rails to exact length and the stiles to length plus 4cm to allow a 2cm “horn” on each end. This is handy to tap the assembly apart the multiple times necessary during the fitting process and removes the need to glue-up the top and bottom rails perfectly flush with the ends of the stiles. It’s more important that everything is square, and after glue-up, the little horns can be sawed off and planed smooth.
I’m getting pretty confident in my hand-sawing technique however, in this case I want very crisp shoulders so I’m going to define them on the tablesaw the same as I did for the sewing center frames. First, I use some scrap to ensure the blade is raised at the correct height. It’s very handy to have some scrap that is exactly the same dimensions as the actual pieces and I purposely mill a few extras for this purpose. Now I can cut a groove, flip the scrap over, cut a matching groove on the other side, and measure what will be the thickness of the resulting tenon accurately. I’m shooting for a 7.5 – 8mm tenon so I can creep up on the final thickness (about 7mm) using the router plane.

Each rail shoulder, with the exception of the doors, will be 70mm from the end of the piece, regardless of the piece’s overall length. Now I can cut the shoulders for all the rails at the same time referencing against a block clamped to the fence.

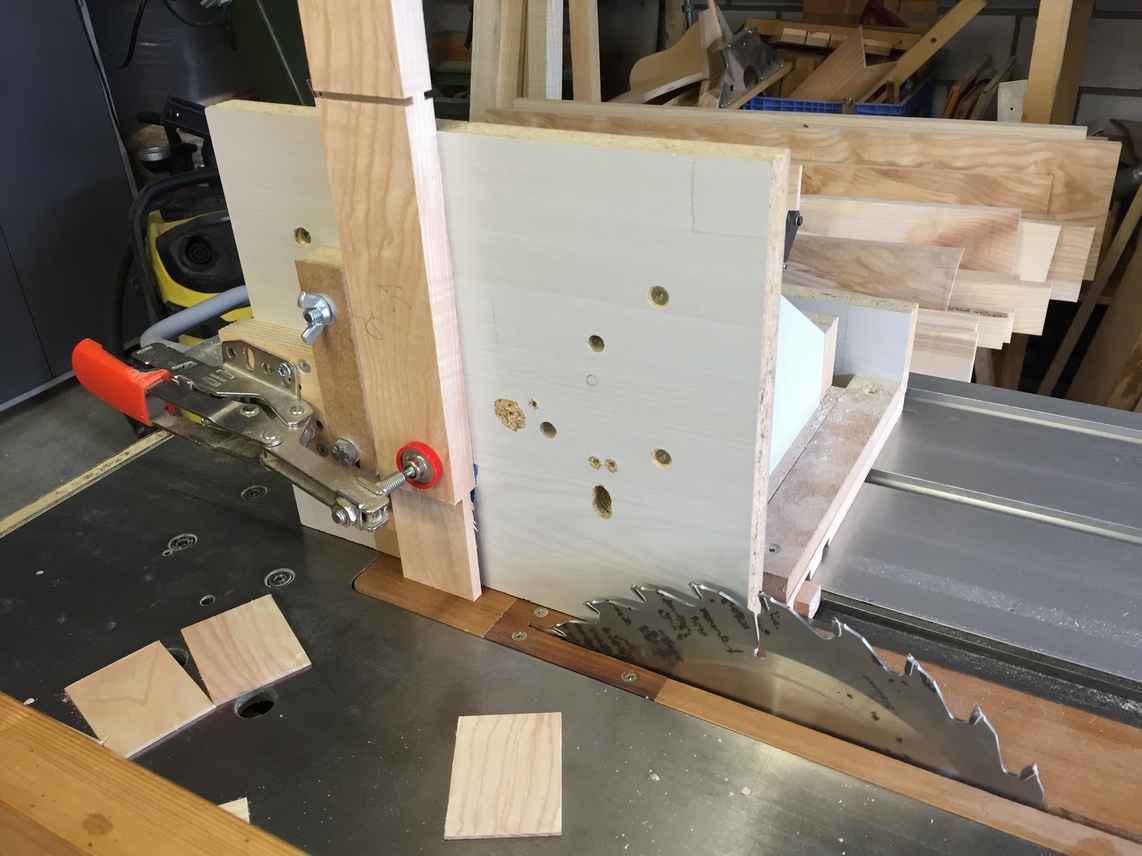
Once the shoulders are defined, I cut a few of the tenon cheeks by hand to further my “1st Class Sawcut” skills however, the rest I run through the tablesaw using my tenoning jig (I’m not ready to cut 20 tenons by hand this evening). I’ve got a ripping blade installed and squared to the table; I then adjust the jig to cut away the waste pieces. It’s probably obvious, but safety sense says to cut the outside waste, not the inside, so that the cutoff doesn’t get trapped between the blade and the jig. If you haven’t read it already, please check out my Disclaimer.
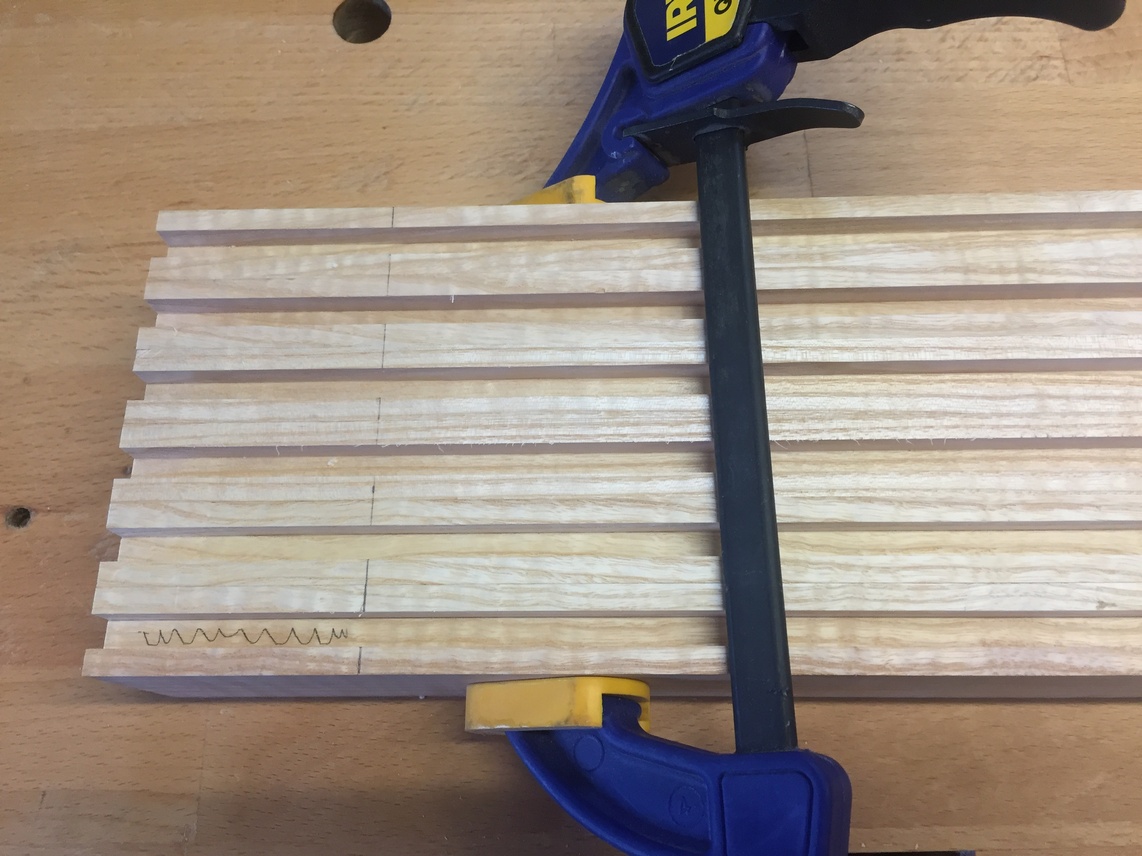
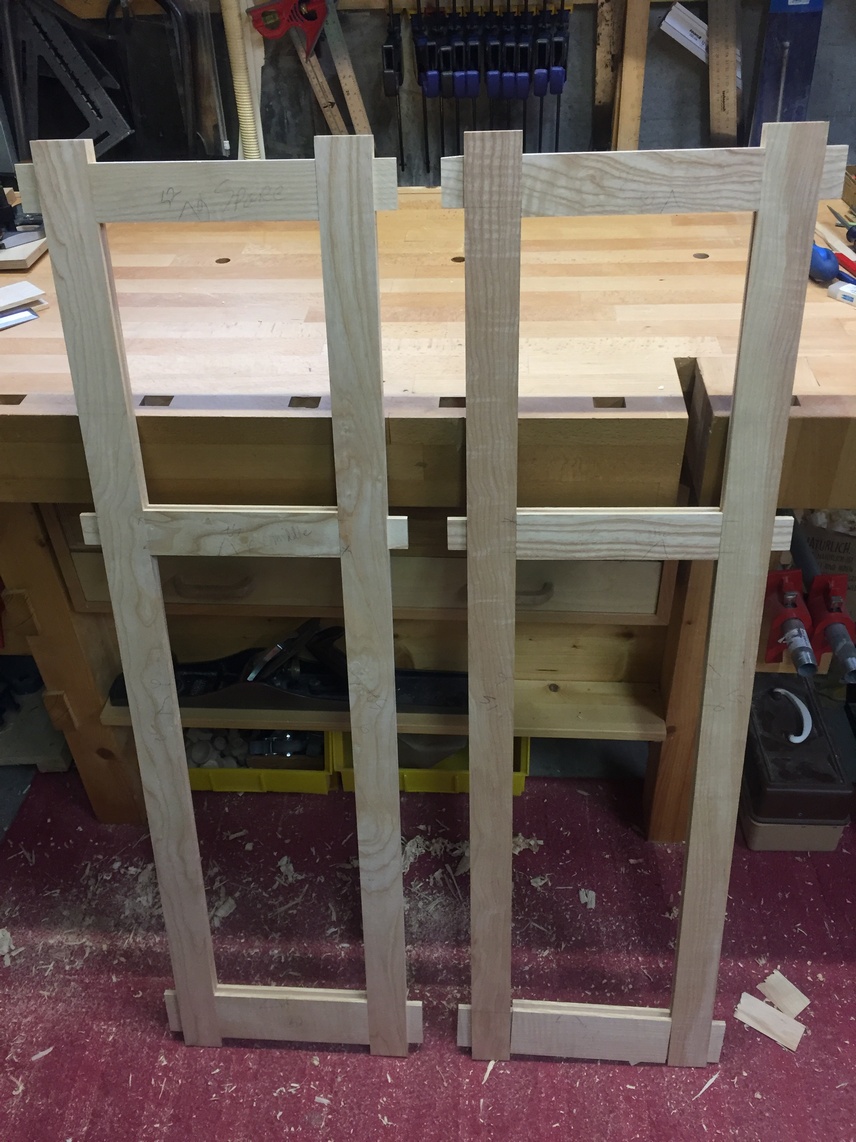
Here are the side rails with tenons cut. The tenons look long and that is on purpose. All will become clear shortly…..

With the tenons cut, it is easier to arrange the frames and see how they will look with the current grain orientation. Two of the rails I decide to flip around but mostly it looks okay to me. The viewer’s eye will mainly be drawn to the grain patterns in the panels but if the grain in the rails/stiles is not pleasing, then I think the whole effect is diminished. This step also gives me a comfort level that the joints are all going to line up nice and square.

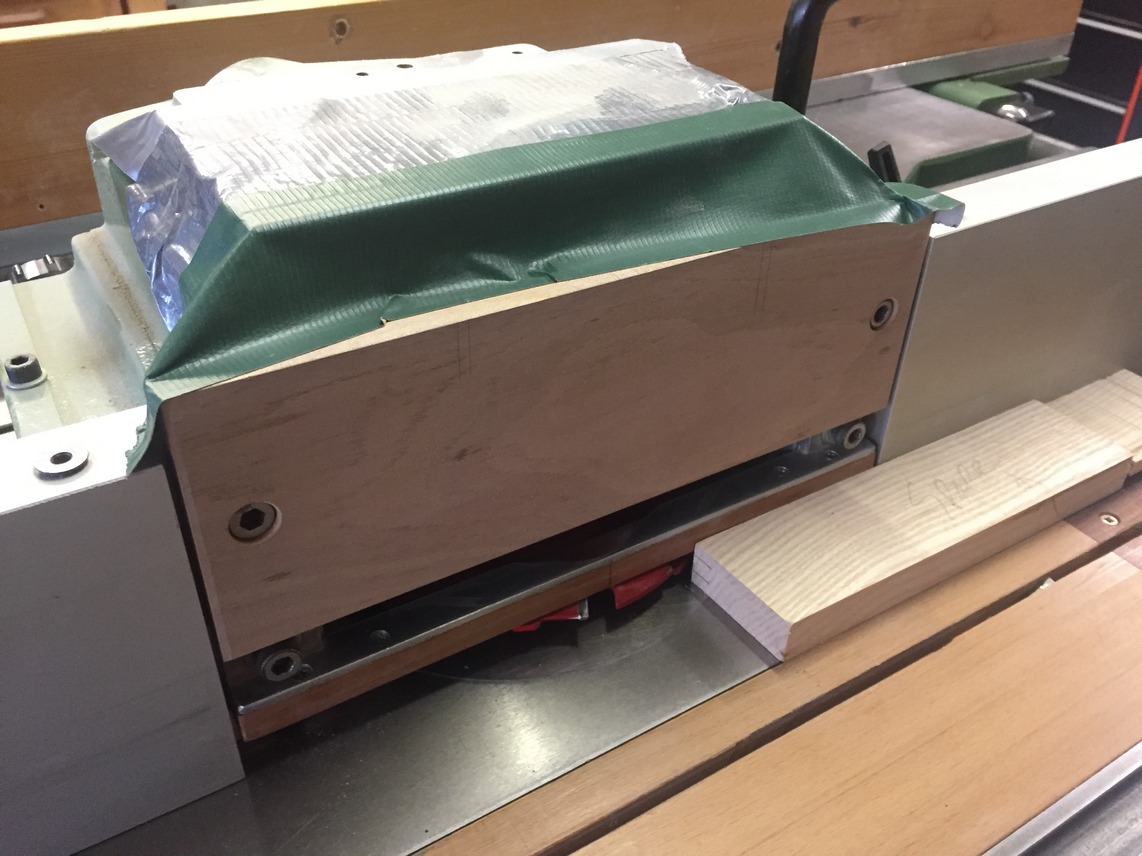
At this point I could cut the mortises and then the panel grooves however, I think it would be better to do the grooves first. I set up the spindle moulder with the adjustable cutter set to 7mm, mark the location of the groove on a piece of scrap to test, and install the wooden fences. The duct tape is to help concentrate the air flow from the dust collector. I had previously planned for the reference edges to be facing inward to the panels so these are the edges to receive grooves. I carefully stack the pieces in the correct orientation so they all go through the moulder efficiently.

All the tenons and grooves cut, now for the mortises.

First, I mark the outside ends of the stile to match the overall length. As mentioned previously, I leave a little bit extra until the frame is glued up, a little horn to help disassemble the pieces without marring the work, then I’ll saw it off and plane the tops smooth.

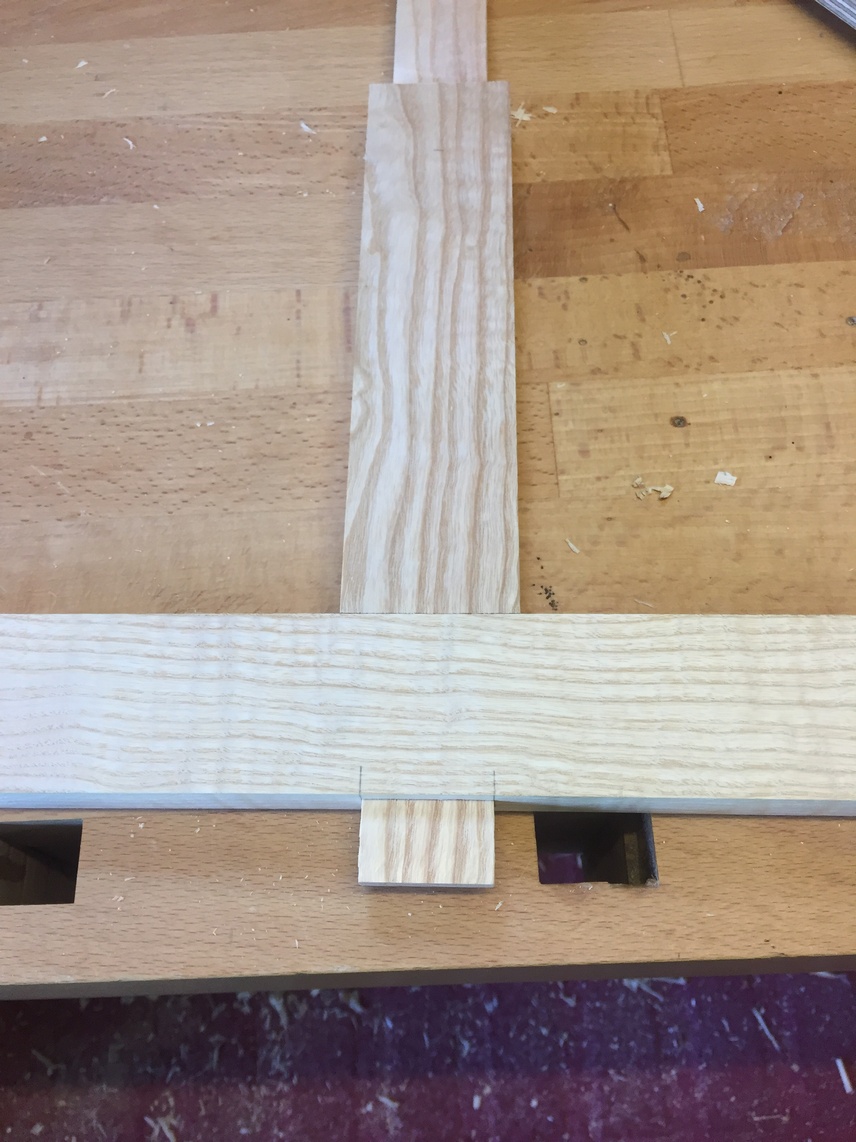
I put the top rail in place right up to the outer mark I just made and use the tenon to mark the location of the mortise. A scribble mark in the groove helps these aging eyes to see where the waste is.

I do the same for the middle and bottom rails and then, with all the stiles together with their top edges flush, I clamp them and mark across all the remaining stiles using the first one as the master.

The corners of the side and back frames will be a bridle joint which has an advantage of lots of glue area and strength, like this:
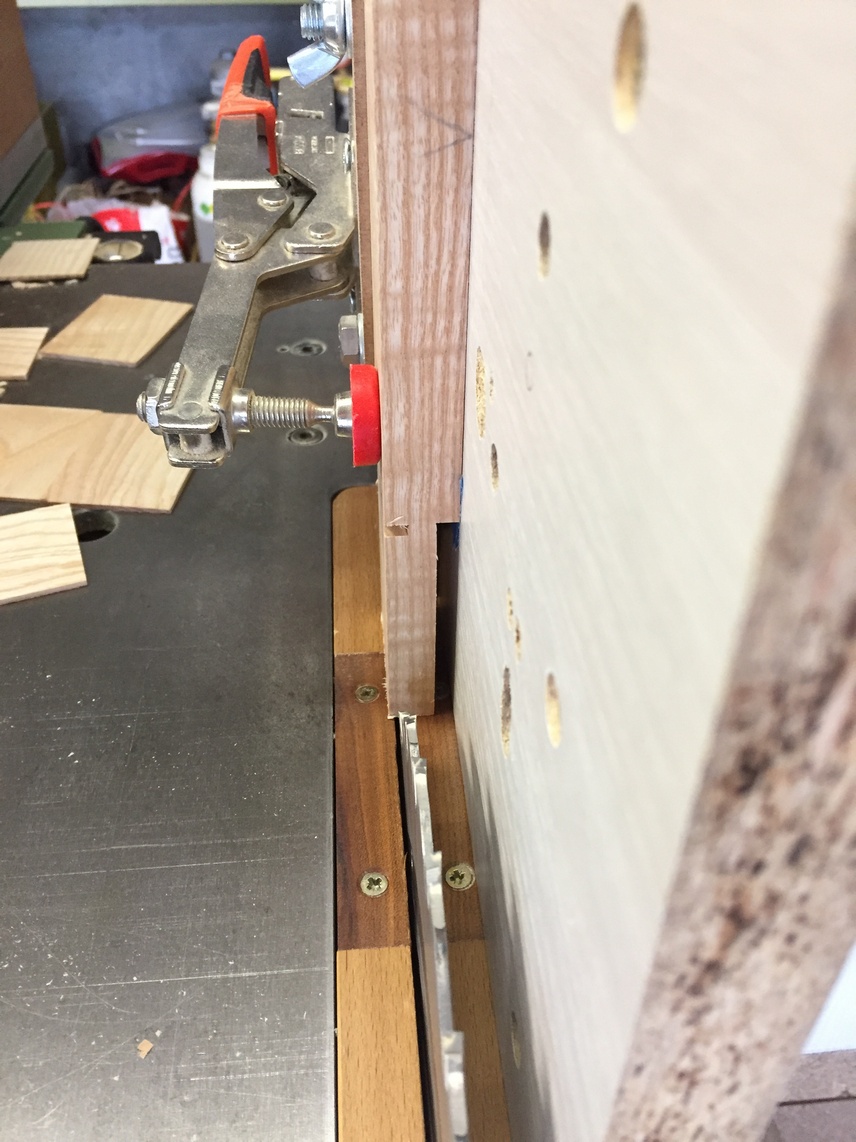
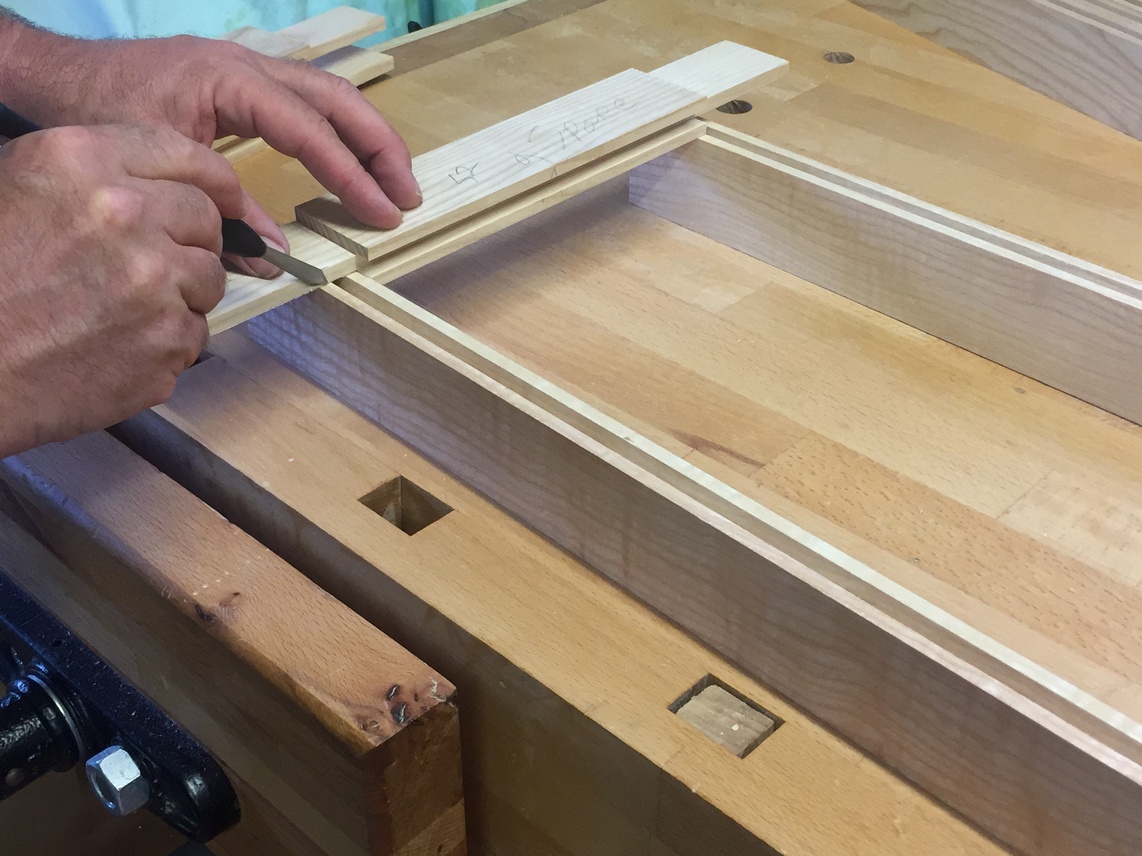
I’ll cut the mating half of the bridle on the tenon jig with the difference that I’m cutting out the center instead of the reverse like before. Again, a test piece to set the width and height, and it goes together nice and square with a rail.


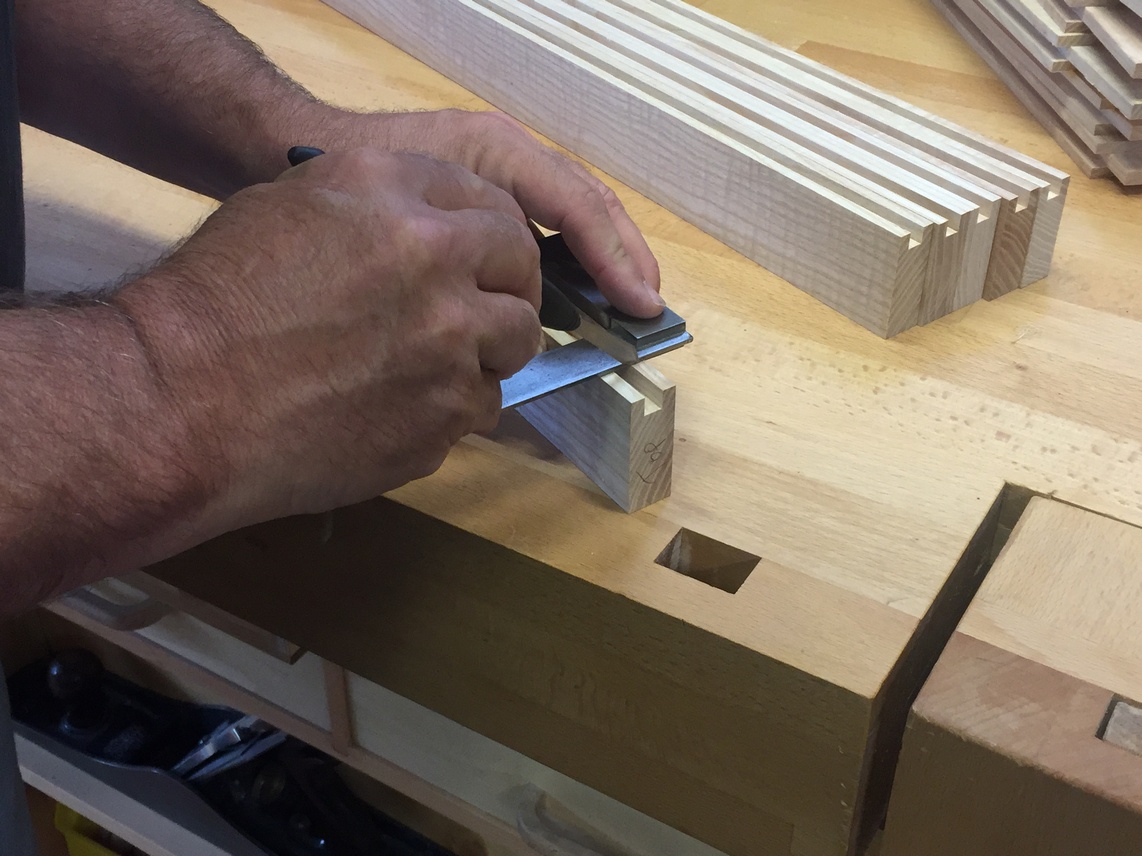
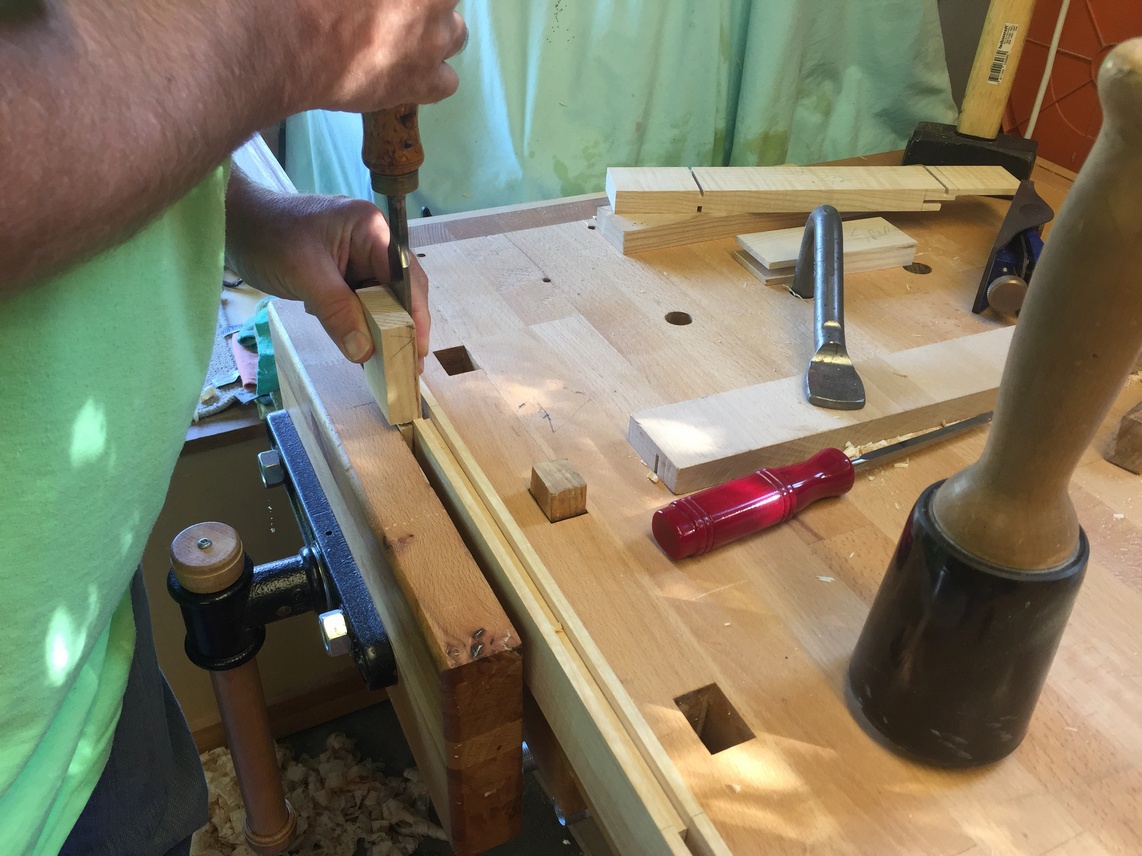
To achieve the perfect fit, I use the router plane to just ever so slightly shave a tenon cheek, then flip it over to shave the other side. A piece of scrap the same thickness as the rail registers the other end of the plane so it doesn’t inadvertently dip and take more wood off than needed.


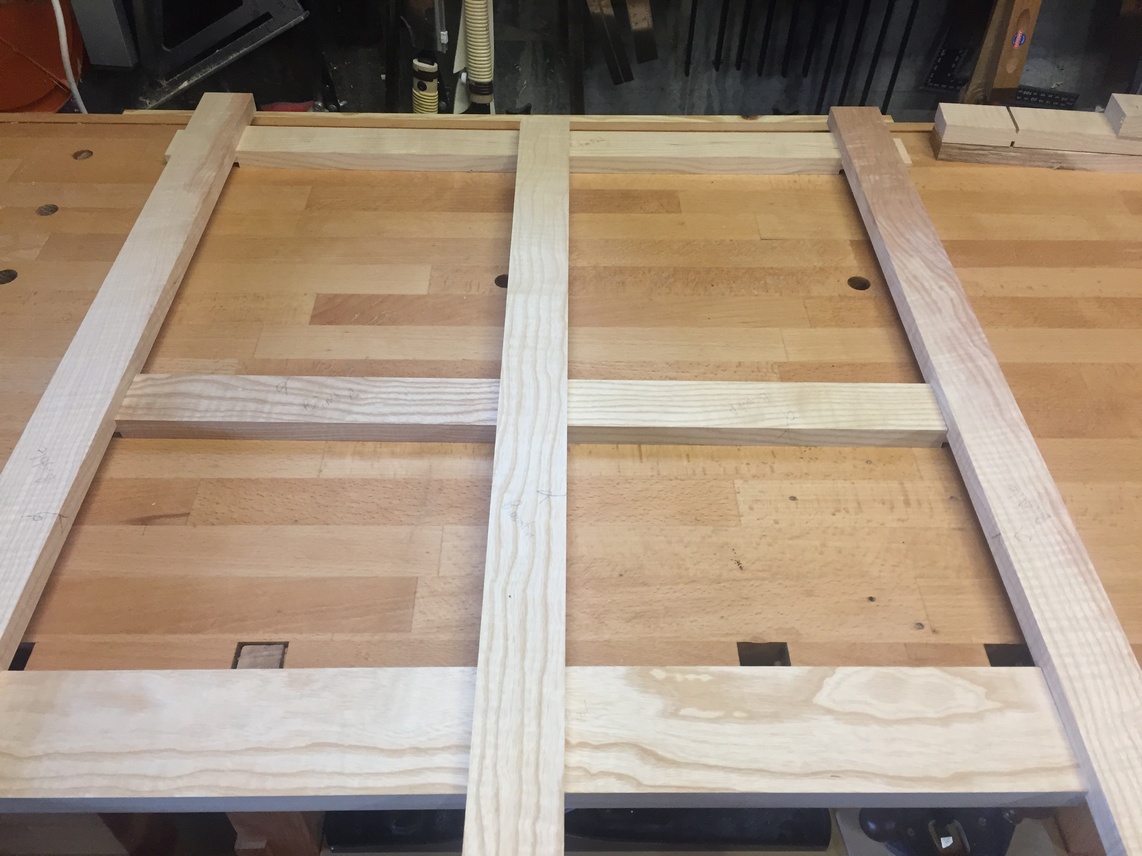
With all the corner bridle joints fitted, I’m ready for mortising for the middle rails:

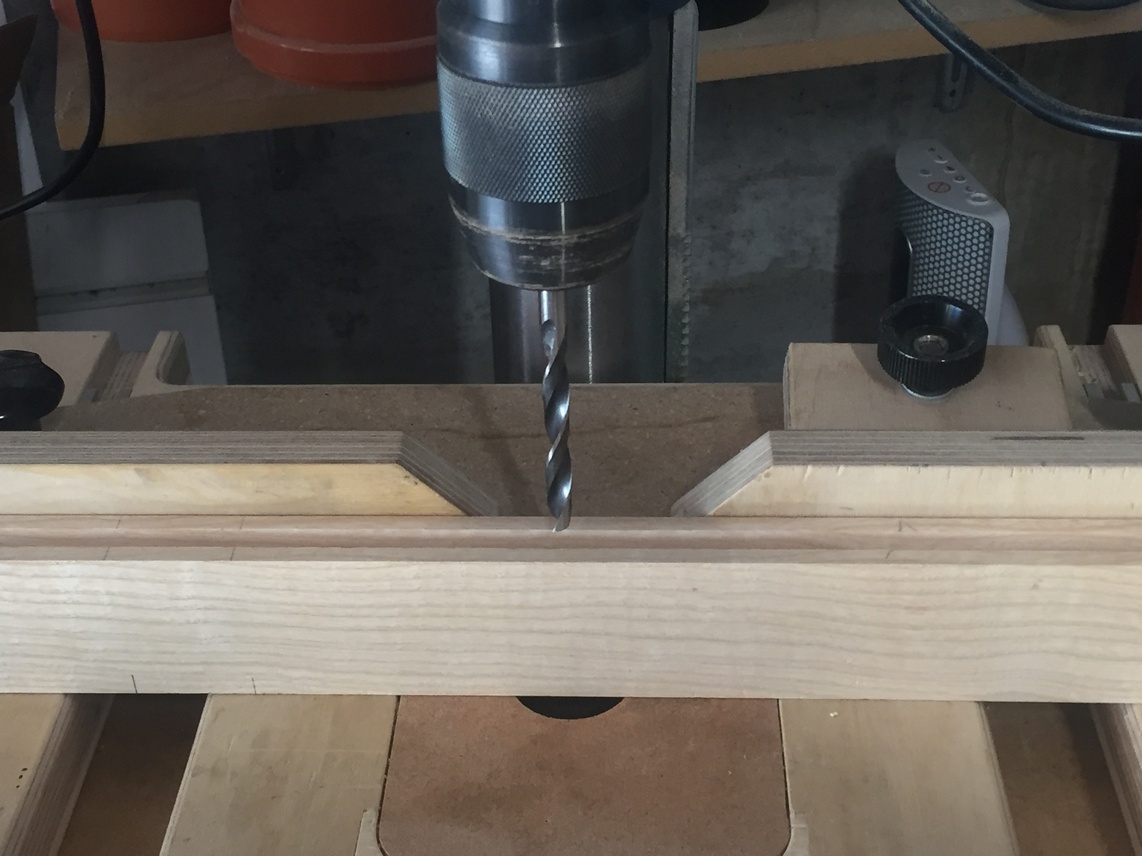
I’ve previously marked for these mortises and since the groove is ~7.5mm wide, I chuck a 6mm drill bit into the drill press and use that to remove the bulk of the waste.

I still have my test tenon, and by clamping it against the face of the stile I can use it as a guide to chisel in paring the inside faces of the mortise flush with the inside edges of the groove. The result is a flat, square fit with no unsightly gaps.

Even though I have to perform this operation 10 times, it goes quick enough so that I decide to leave my horizontal borer alone. If I used it, I wouldn’t have needed to drill out the waste on the drill press however, it would take me at least 20 minutes to install the attachment on the machine and set it up to drill the mortises just right. In addition, I still would have had to use the chisel to clean up the mortise walls for a nice fit.
The result is two side frames and a back frame ready for panels. By the way, the reason I left the tenons 2cm longer than necessary is so I can use them to join the frames to the legs. Dominos, biscuits, dowels, or other types of “floating joinery” may have been easier but these tenons remain integral to the rails and will provide a much stronger (in my opinion) result. My other argument is if I were to install floating tenons I would have to mark and chop two mortises instead of just one for each joint and fuss around with marking their locations just right. Either that, or I have to have another machine like a biscuit joiner.

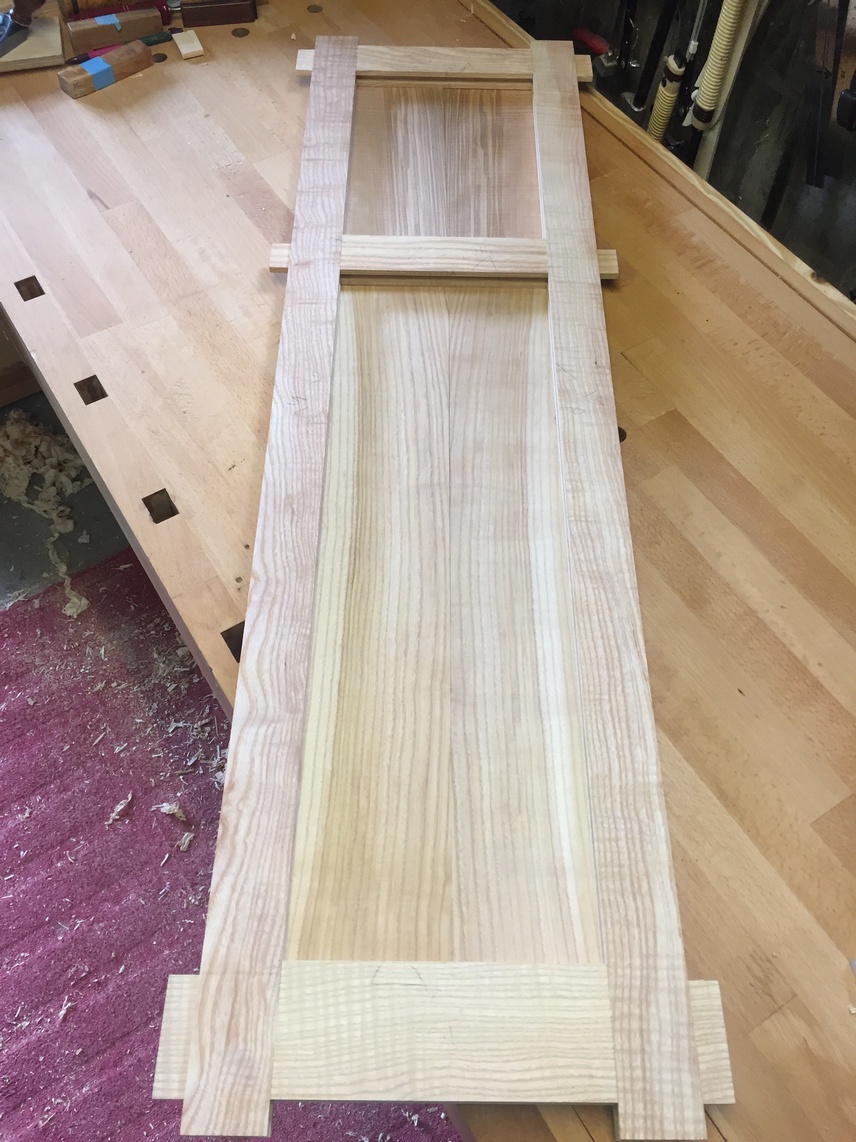
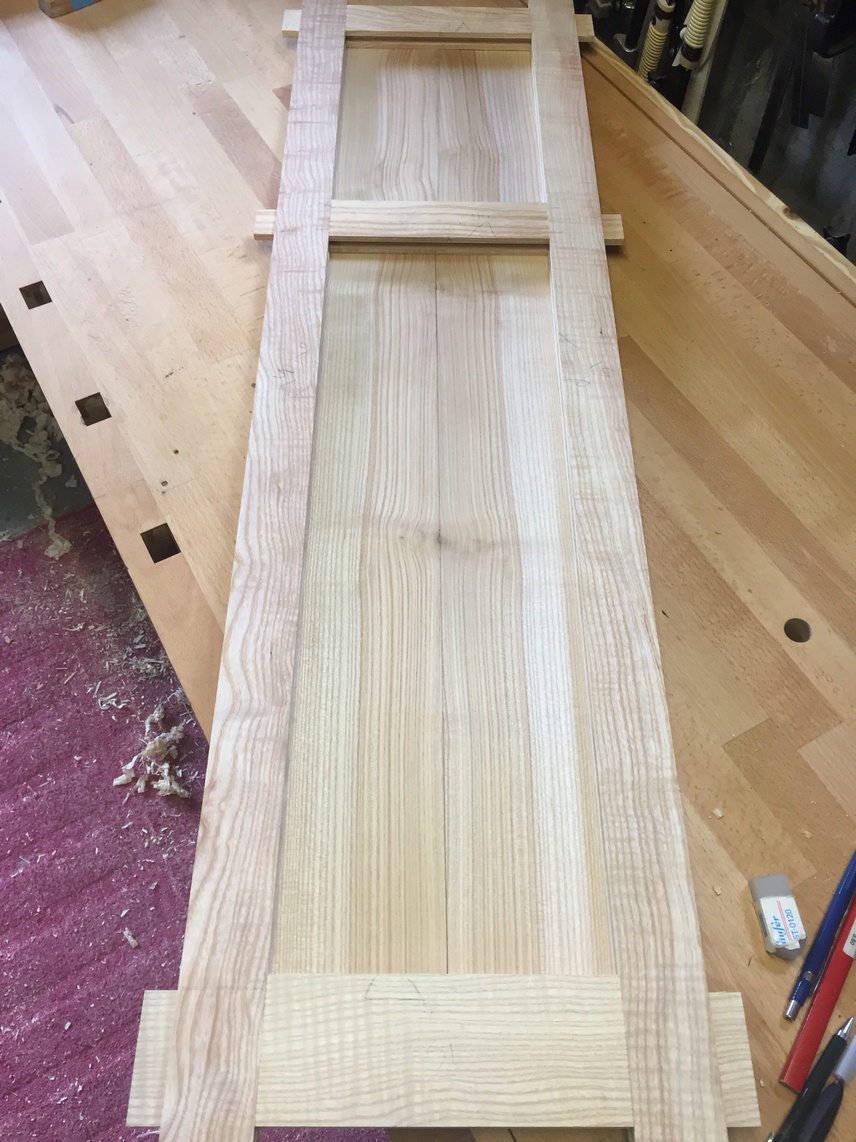
Now I can lay my panel halves underneath the frames to get a final look before I glue them up and trim them to fit in their grooves.
Panel halves glued and in the clamps. On the show face, I take a damp rag and wipe any glue squeeze-out from the panel before it sets up. If left to cure, there is a danger of wood tearout when trying to scrape or plane the glueline.

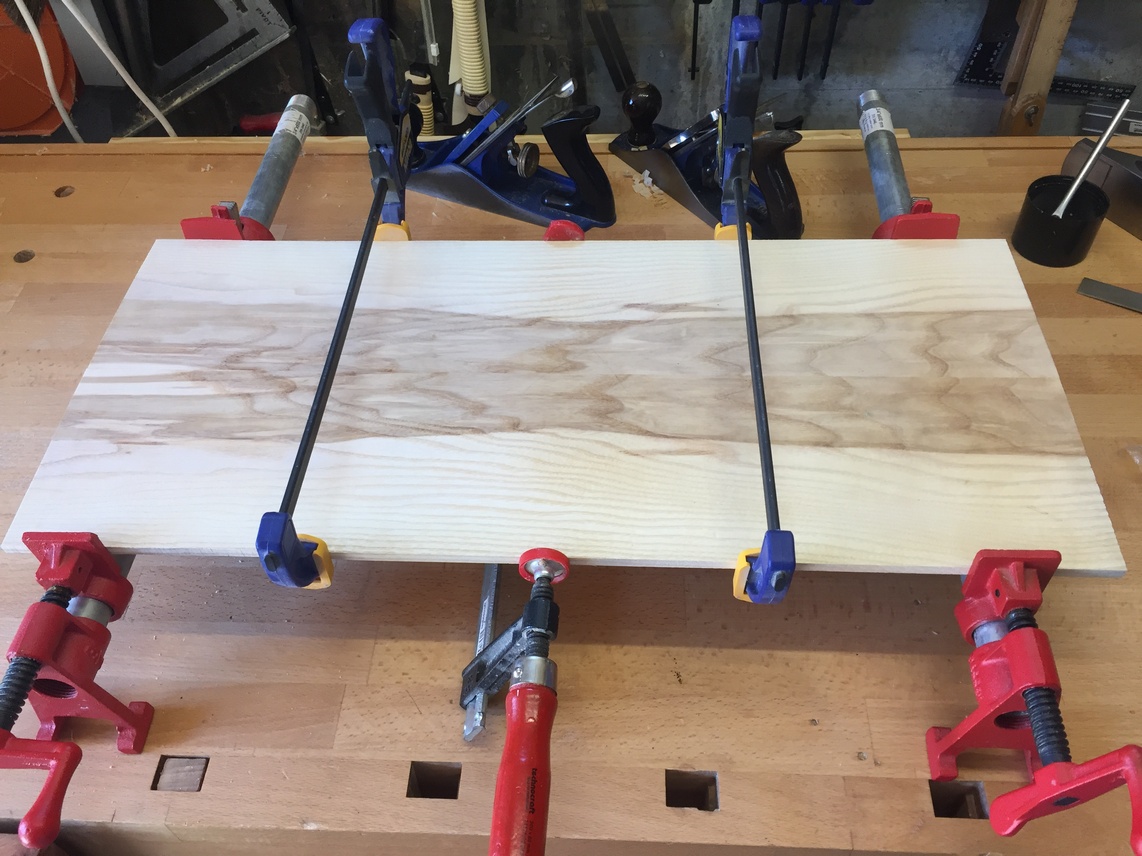
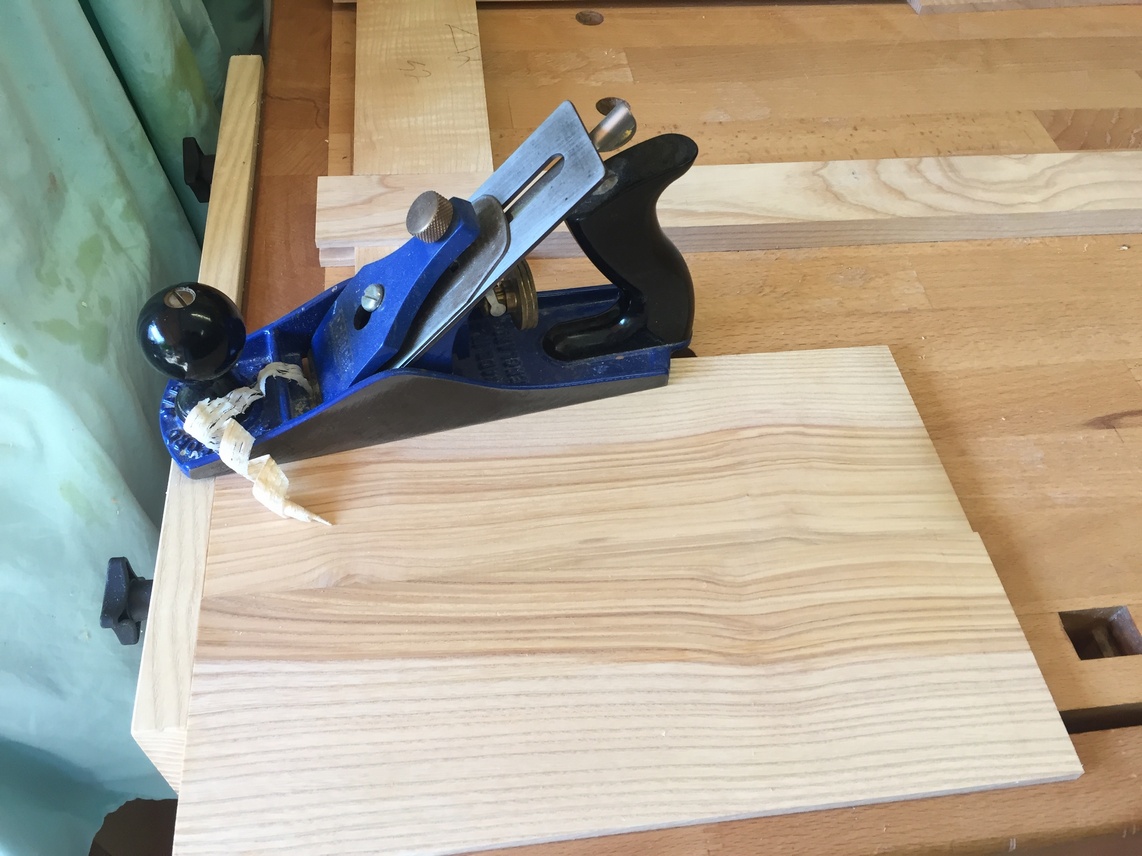
After the panels come out of the clamps, I use a coarse sharpened scraper to remove any remnants of glue on the inside face. I want the panel’s height to fit very close (there is little to no movement lengthwise with the seasons) so a block plane makes nice work of the endgrain edge.

The thickness of the panels is very close to that of the groove but a plane allows me to get the fit just right without the danger of overshooting and ending up with a loose panel.
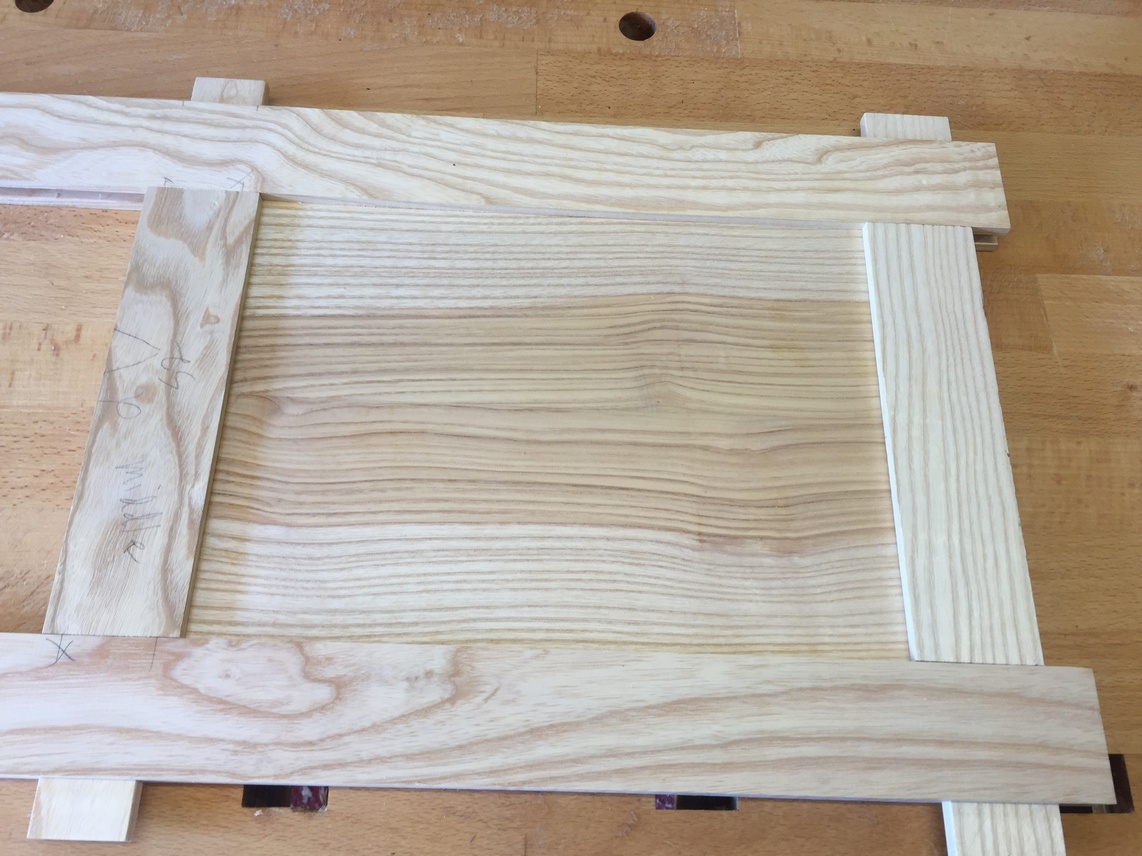
And now, all the panels are fitted.
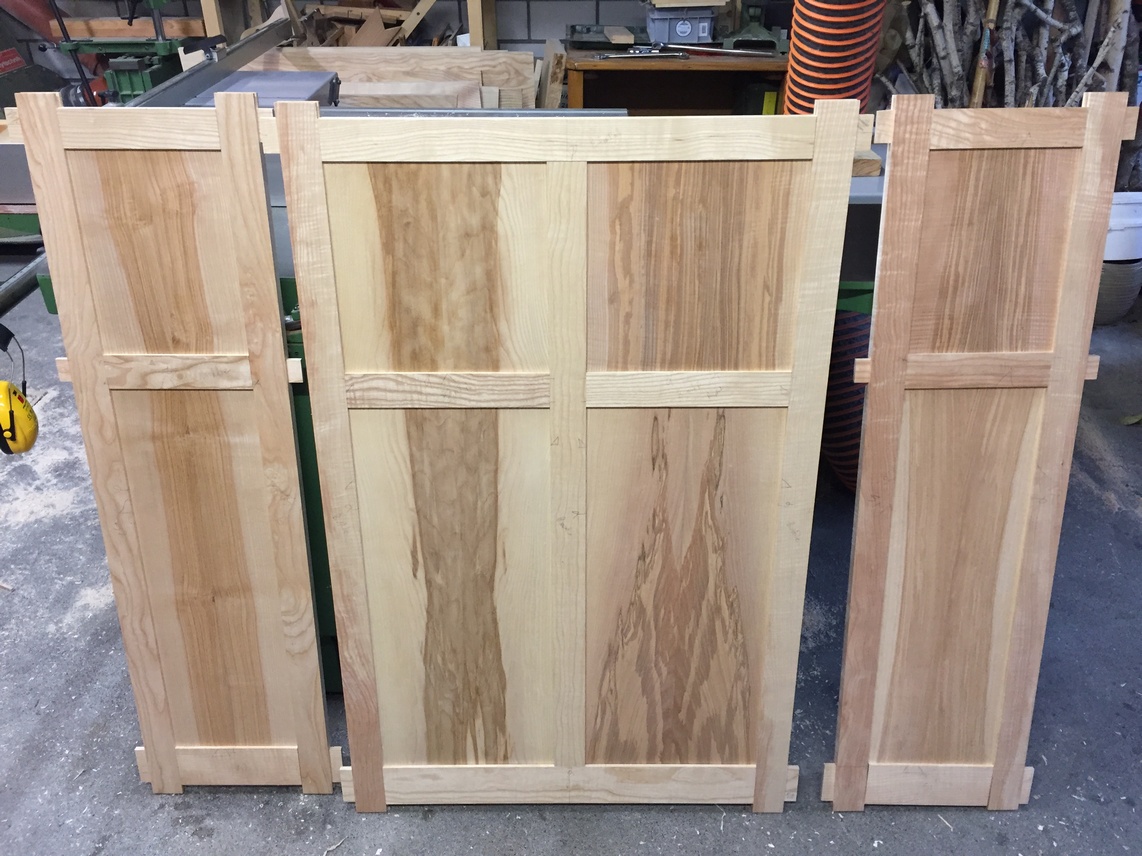
I’ll now engage with the client so he can help me decide the final placement. Which side F/P will be on the left of the cabinet and which on the right. Also, the back panels can be oriented different ways. Most cabinets such as this spend their lives up against a wall however, in the future, it might be placed at the transition of a room where the back will be seen. In this case, the extra effort taken to make the back pleasing will be well spent.
Next chapter: Marking and mortising the legs.
Leave a Reply