
Now that the panels are finished (but not yet cut to width and length), I start on the frames. As mentioned previously, the stile is the vertical member of the frame and the rail is the horizontal member……..

The traditional method of joinery for frame and panel, and the strongest (in my opinion), is the mortise and tenon joint. The mortise being a slot cut into the side of the stile and the tenon being a “tongue” cut on the end of the rail.

There are a lot of variations on this joint that make it much easier to build a frame and panel using either dowels, biscuits, or special router bits. For cabinet doors, any of these solutions would be fine depending on preference however, the frame and panels we are building now will become the structural integrity of the sewing center’s carcass. I want them to be as strong as possible.
Now is a good time to stop and think about some “production efficiency”. There are a total of 14 stiles all the same length, three sets of rails (8 for pedestals, 4 for doors, plus 2 for the back) and a set of four “inner” stiles for the back and doors (also the same length). Believe it or not, for this design, it is not critical that each of these pieces be an exact length (e.g. the plan calls for stiles that are 640mm tall). It IS critical that every piece in a set is the same size so those stiles could be 639mm, as long as ALL 14 OF THEM are 639mm. The same goes for the 8 pedestal rails etc. With this in mind, I need to setup to cut each set all at the same time.
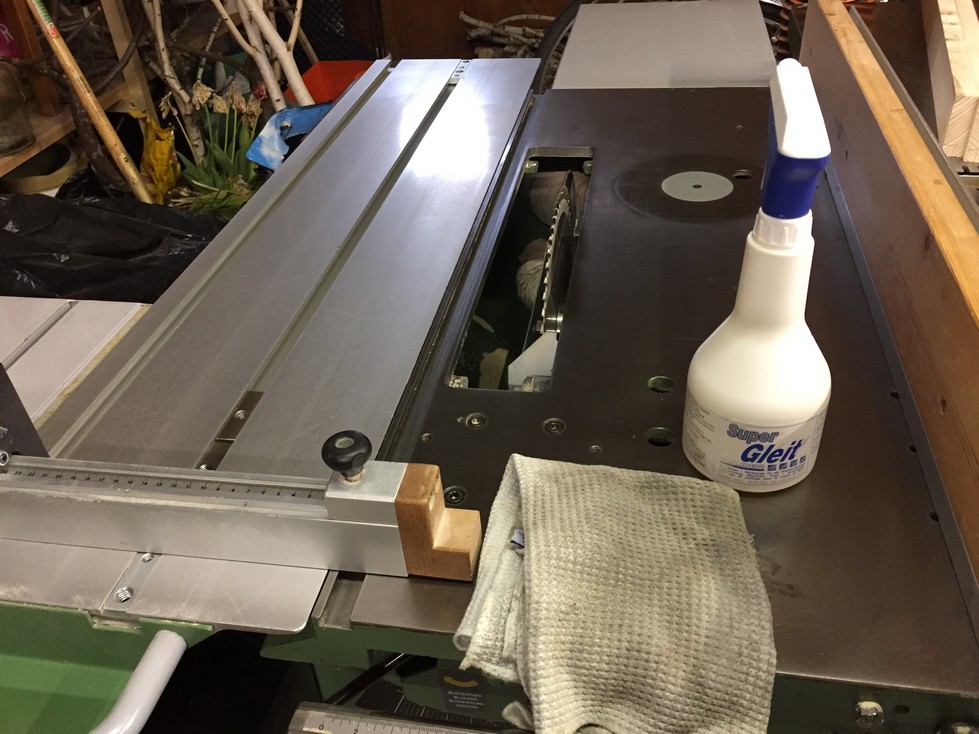
A little preparatory work is in order before cutting critical dimensions. I clean all the errant sawdust from the saw and swap the 28 tooth ripping blade for a 60 tooth crosscut blade that will give me a very clean smooth cut. Then I wipe the whole surface clean and apply a non-staining lubricant.
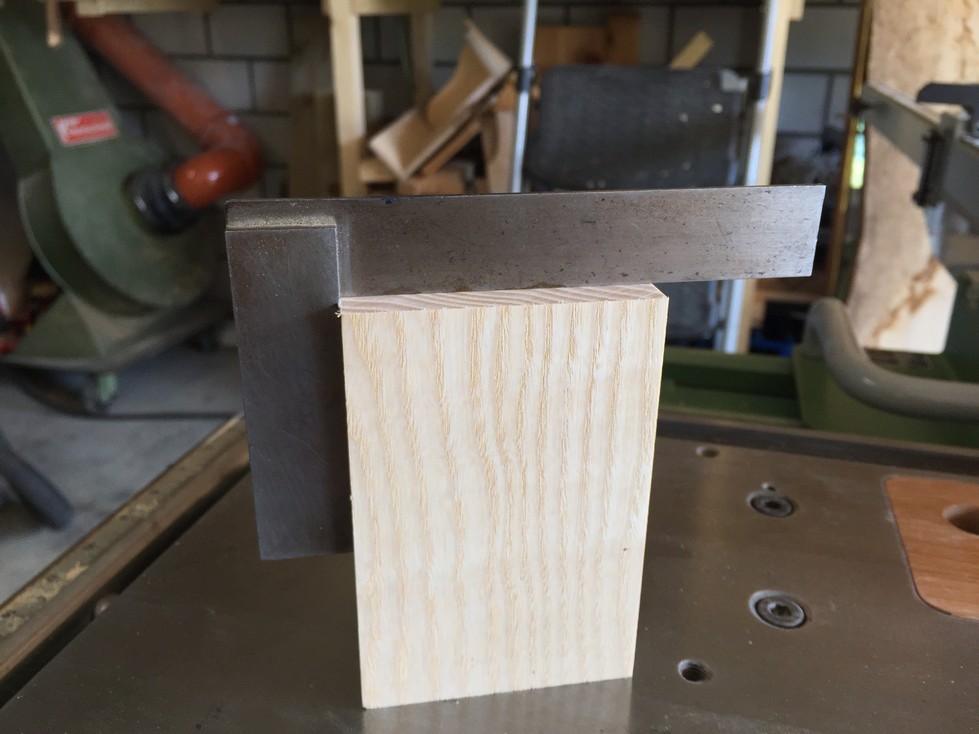
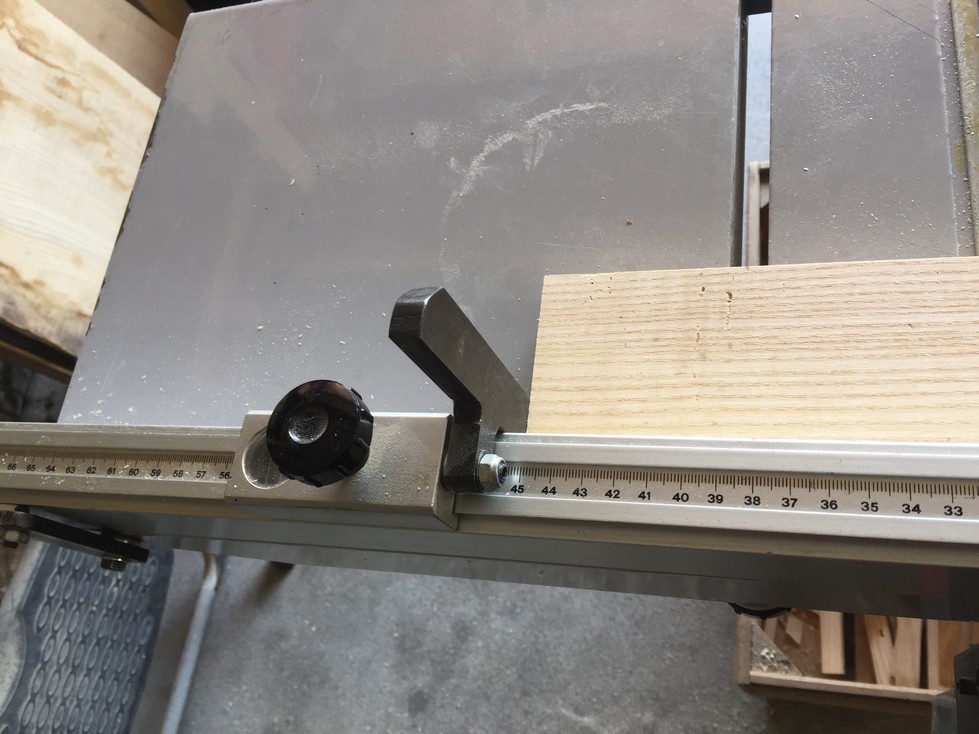
I ensure that the sawblade is adjusted so it is square to the table and then do the same for the crosscut fence, square to the blade. It takes a few cuts with a scrap piece and some minor tweaks before I’m happy with the result.

The crosscut fence has a sacrificial wooden end that I adjust so that the first pass through the sawblade cuts just a tiny sliver of wood off. Now, I can line up a scribed line to the end of this piece and cut with confidence.

Finally, I apply a coat of wax and buff the wooden blade insert and the bottom of my tenoning jig.
The rest of my garage may be a mess sometimes but I like to keep my tools and work surfaces clean and neat (I’m not always successful). They always say to “work clean” and they are right (They? Who are they? Noone knows. Only them know who they are…..).
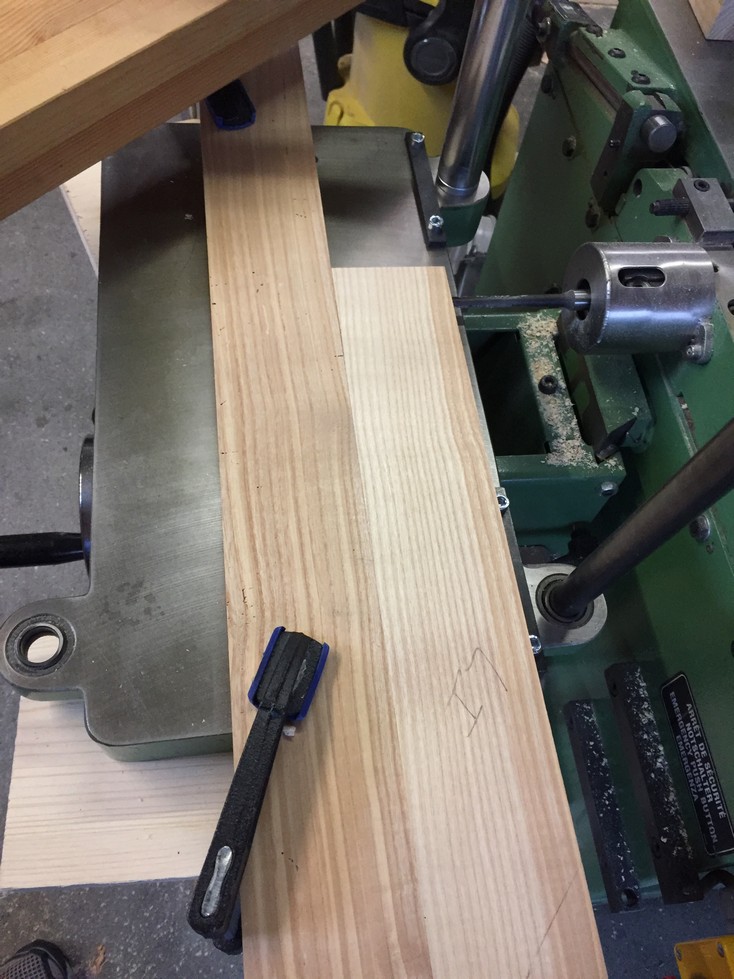
At this point the stock is already at final width (70mm) and about 20mm longer than needed. I need to cut one end of every piece square and this can be done quickly but carefully. Then, I separate all the “sets” of pieces and orient them with the square ends away from the blade, set the stop on my crosscut fence, and cut all the pedestal rails to dimension at the same time.

I line them all up on the left of the sliding table so that the procedure is simple and natural. Grab a piece on the left (already oriented the right way), put it against the stop, cut, and then stack the cut pieces to the right out of the way.

I reset the stop and repeat the procedure for the stiles, door rails, and back rails. Once all the final dimensioning is done, I prepare to cut tenons onto each end of every rail. Again, by design and prior planning (it took me 20 years of woodworking to learn the benefits “planning ahead”), every single tenon is the same length, 45mm. What that means is I can now set up the saw to define the shoulders of the tenons and cut every single one to the exact same dimension. I set my marking gauge to 45mm and scribe a line on one end of a rail. This is the setup piece that I use to adjust the stop.

Since the tenons are all 8mm thick, I raise the blade to about 7mm above the table (23mm stock thickness, minus 8mm tenon thickness, divided by 2, equals 7.5mm on each side). I use a piece of scrap, and after a few tries raising the blade a tiny bit each time, I get the 8mm in the center that will become the tenon.
Using the scribed line on the first rail, I set the stop and I make a cut on all 4 faces of one end. Now the shoulders of the tenon are nicely defined and all I have to do is flip the piece end for end and do the same thing on the other end. I can cut the shoulders for every single tenon and never have to change the stop. By the way, this stop is set on the opposite side of the blade so that no matter how long the rail is, I can cut a 45mm long tenon on the end. This first piece is one of the scrap pieces but I don’t consider it a waste in order to ensure complete accuracy.
The shoulders for all the tenons are finished and it’s time to stop and think again about “production” activities. I have a total of 36 mortise and tenon joints to do. As I mentioned before, I planned for all of the tenons to be the same thickness (8mm), the same length (45mm), and all but 8 are the same width. This will vastly reduce the amount of time for setup of machine and jigs. In addition, since the horizontal borer (basically, a drill press on its side) and the table saw are on opposite sides of my machine, I can set up the borer to cut the mortises and the saw to cut the tenons without interfering with each other. There are two reasons this is an advantage: I will set up to cut a mortise first and use it as a guide to cut the tenons to thickness, and also, I can alternate between the two jobs as I get tired. One of the main dangers to safety and accuracy when cutting a lot of parts is to get tired, bored, or complacent around sharp spinning blades. I’ll cut 5 or 6 tenons and then I’ll drill 5 or 6 mortises.
The horizontal borer is actually an extension of the planer/jointer head. On the end of the head is a chuck used to hold various types of drill bits and, in this case, slot-mortising bits.

For shallow mortises, less than 30mm, I might set up a jig to use a router to cut them but in this case it makes more sense to use the horizontal borer since I can cut up about 60mm deep with an 8mm wide bit. I start by using my marking gauge to scribe two lines 8mm apart and centered on the edge of a piece of scrap.
During the dimensioning process, I purposely made a few extra pieces in case I made a mistake or to use in setting up for cuts. This is a great habit to get into and took me a long time to form. The table of the horizontal boring attachment adjusts up and down so I can center the bit in the middle of the edge, right on the scribe marks. I then lock down the height adjustment so it doesn’t creep on me.
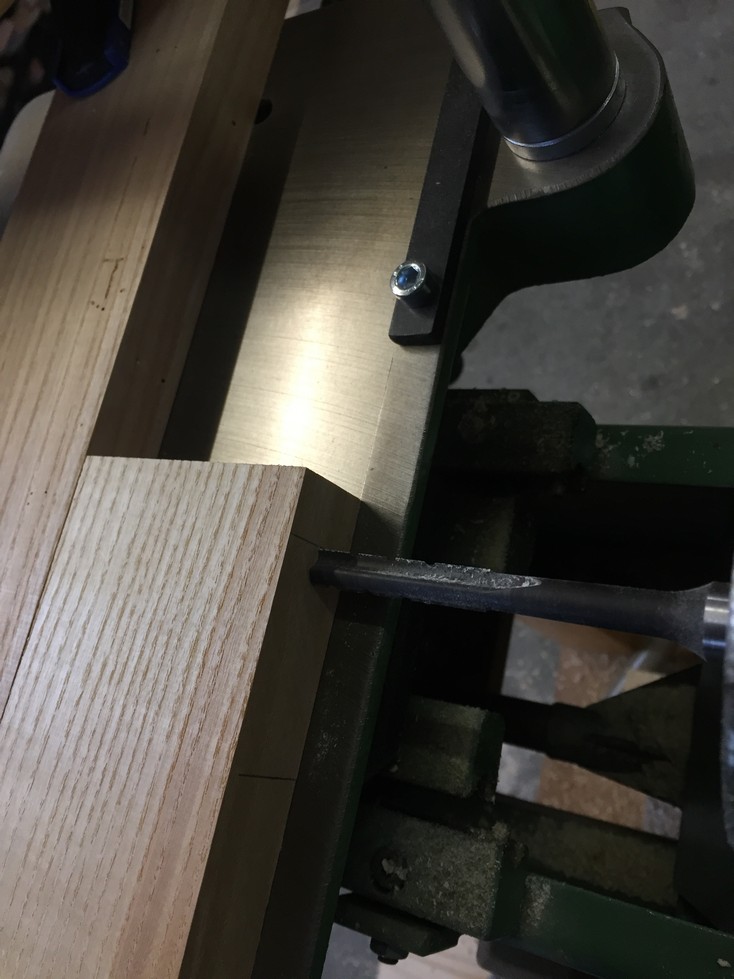
Next, I set the side to side travel (X-axis) so that from left stop to right stop, it will cut a 47mm wide mortise and I set the forward travel (Y-axis) in order to cut 45mm deep. It’s a good idea to leave an extra millimeter of space in case some glue needs a place to go so the depth is actually set to 46mm. As you can see, I’ve clamped a long scrap piece to the table to be used as a fence. A quick release hold down keeps the stock flat on the table and further ensures accuracy.
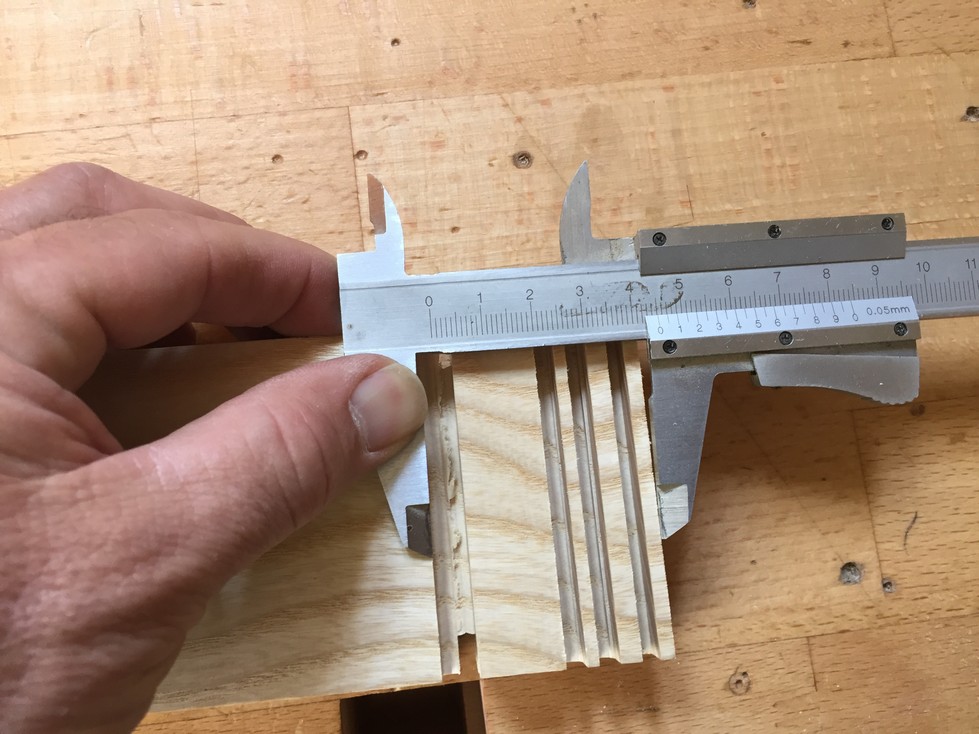
Here are a few practice mortises I cut. Two of them have been squared off with a chisel however, I think for these 36 joints it will be more efficient to round off the edge of the tenon instead of squaring the mortise. This way, I cut the time and effort by about 75% and only give up a very small amount of glue surface versus a square tenon and mortise.

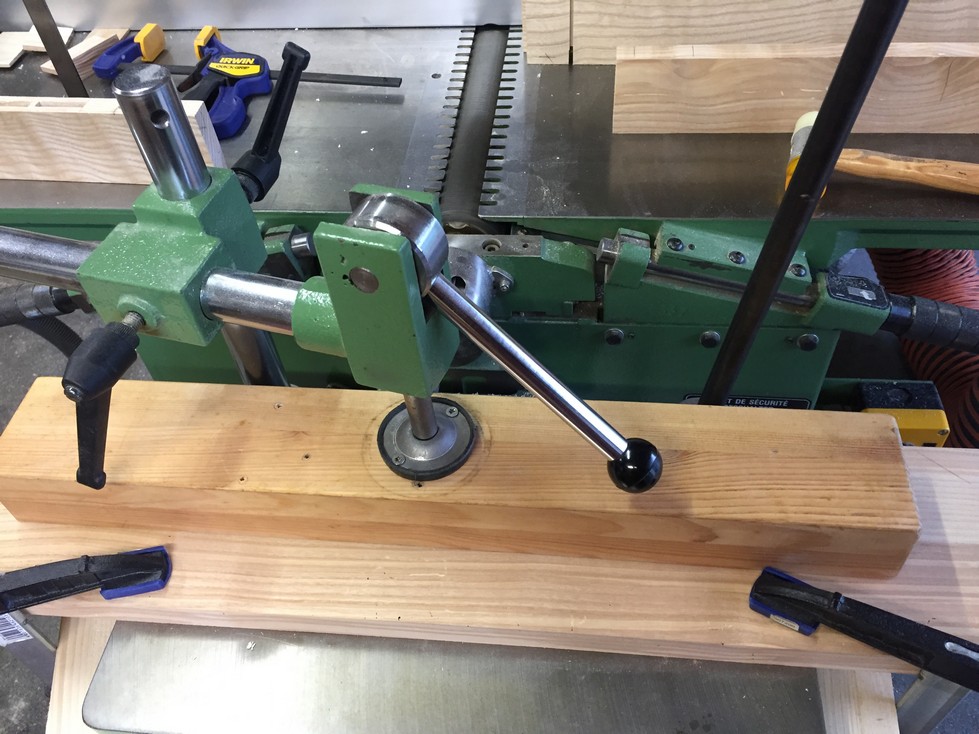
Now that I have a mortise cut to the proper size, I can set up my tenoning jig on the table saw. By the way, it is much easier to fit a tenon to an existing mortise than to try and enlarge a mortise to fit a tenon. The trick is to shave off only a tiny bit of wood but on both sides of the tenon equally. One of the golden rules in woodworking is that it’s better to remove wood a little at a time than to take off too much (and try to put some back).
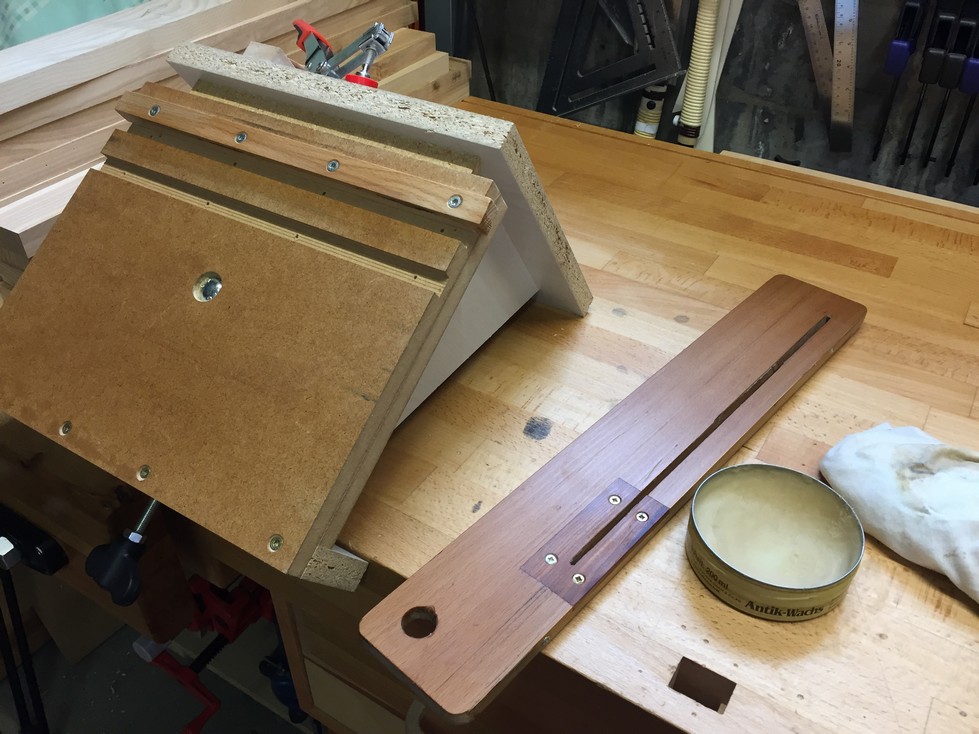
Previously, I built a tenoning jig. It allows me to safely stand a piece of wood on end to run through the saw and then flip it over to cut an equal amount from the other side (automatically keeping the tenon exactly centered). The two pieces of blue tape you see were necessary to exactly square the piece to the table. I use a scrap and cut a few tenon “cheeks” until the result is a tenon exactly 8mm thick from shoulder to end. If the jig did not hold the piece exactly square to the table, the result would be a tenon that is a little bit thicker at one end. Not good.

The blade is raised to almost the height of the shoulder. I have a nicely defined shoulder now and don’t want to take a chance that the blade will cause any tear-out there.

And with the fine adjustment, I can remove a very small amount of wood at a time.

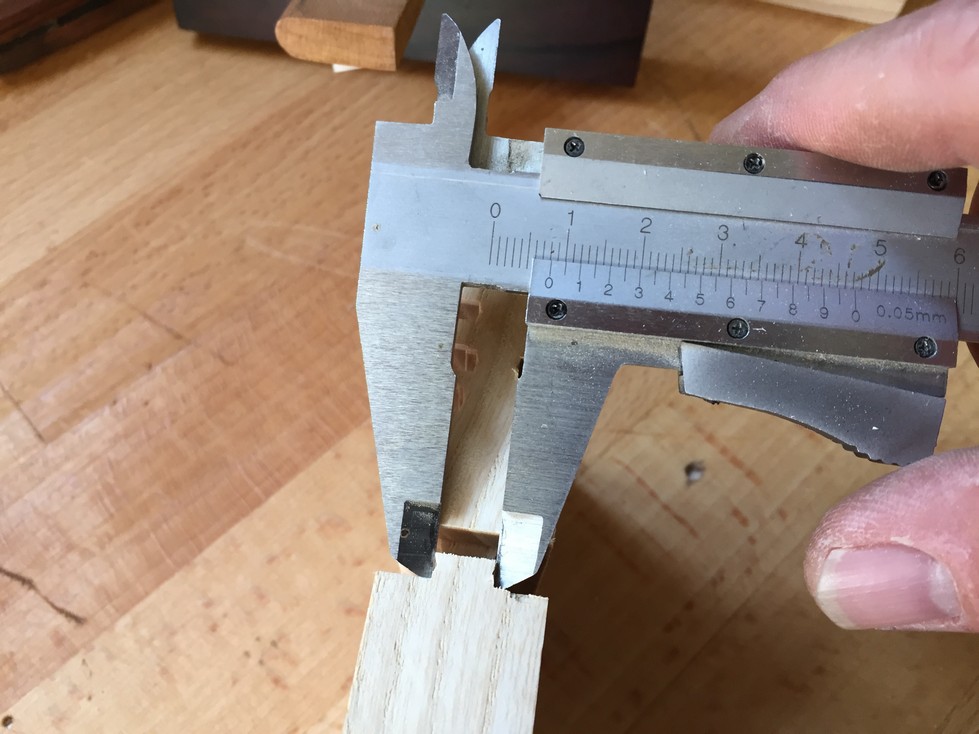
Theoretically, once the jig is set up, I should be able to cut all the tenons at once but real life is seldom the same as theory so I always start just a “hair” larger and fit each tenon to the sample mortise for a very snug fit. Later I will fit each tenon individually to its matching mortise by fine tuning with a block plane, file, or sandpaper. Here is a tenon trial-fit before the haunches (waste wood on each side of the tenon) are cut away with the bandsaw:
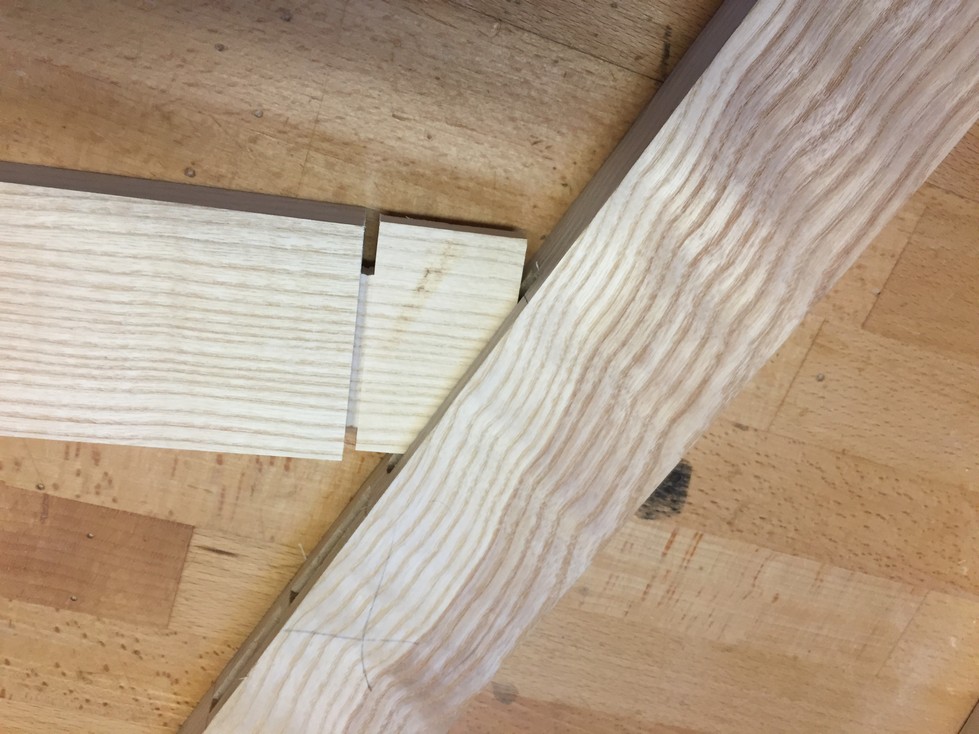
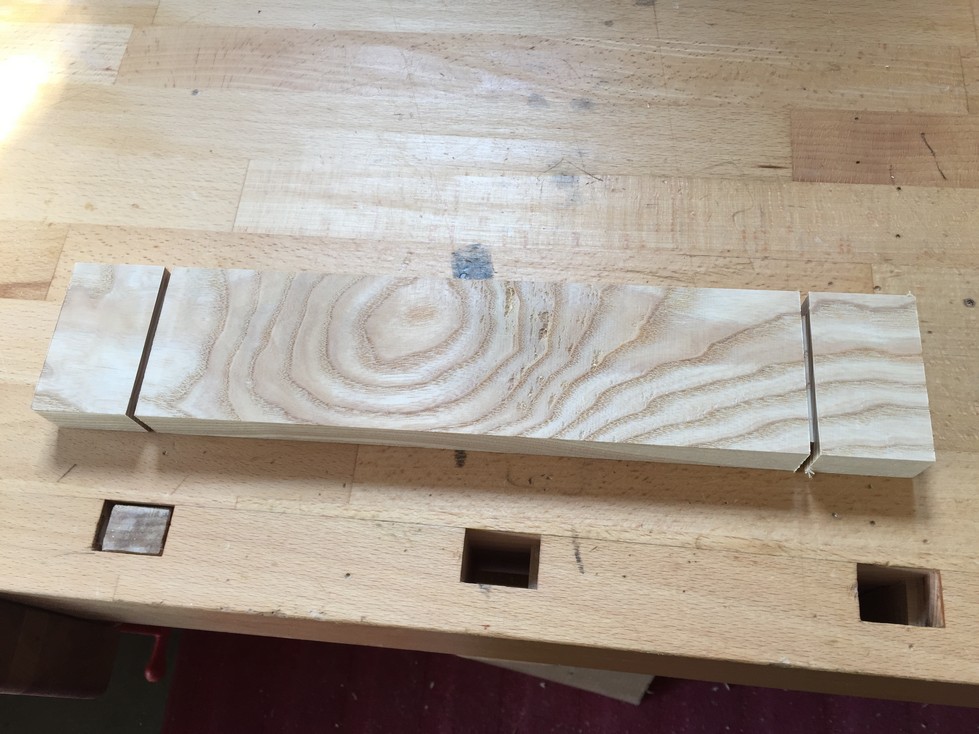
You’ll notice that one haunch is larger than the other. For joints at a corner, this is on purpose for strength. The inside haunch is 8mm, which will match the depth of the grooves holding the panel (also on purpose). The outside one is 15mm which will allow more solid wood between the tenon’s edge and the end of the stile. If you do the math, this is why I mentioned above that the tenon width is 47mm; a method to my madness…..
I set the bandaw fence to 8mm and cut all the inside haunches at once, then 15mm to cut the outside haunches. Efficiency.

Here is the first completed tenon with the edges rounded over:
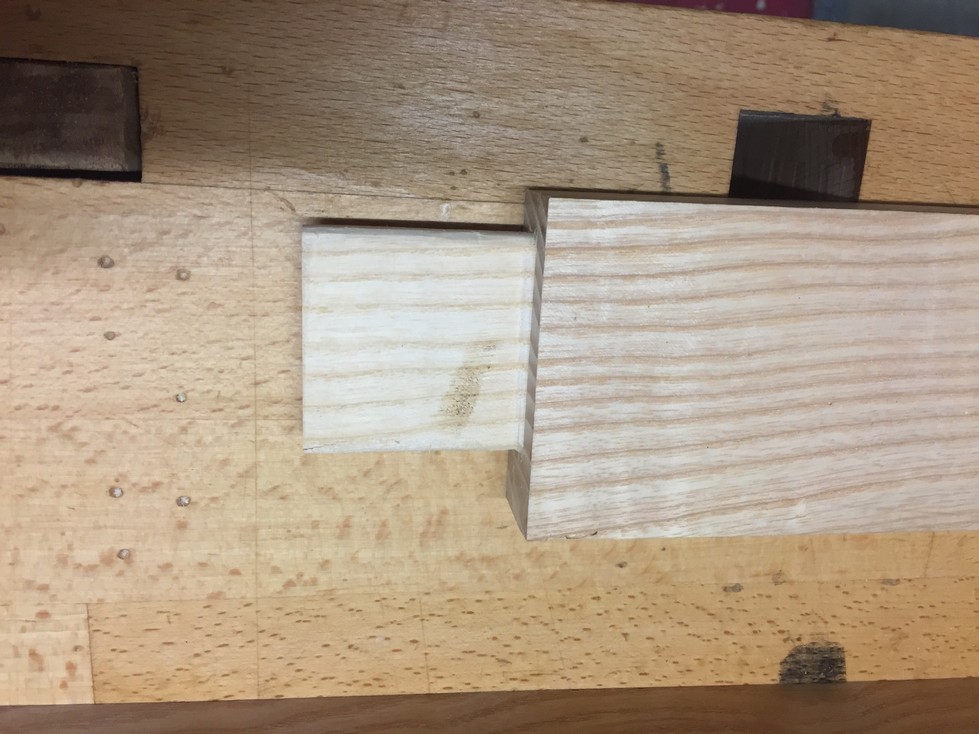

And the joint goes together nicely with a little bit of fine tuning, square and flush:


So now I buckle down and start cutting and boring, alternating between the two when I find myself getting tired. I want to get one frame finished and checked before I cut all 36 joints willy-nilly.
These are the “implements of destruction” used to fine tune tenons and clean up the mortises:


After I cut the first two rails and stiles, I’d like a sanity check so that I know everything will go together properly. I tune the joints and check each of four corners for square:

Then I clamp the pieces in place and measure between each pair of corners (if both measurements are the same, the frame is square). It is only about 1/2 mm off and I am very pleased. I can now cut the rest of the mortise and tenons with an easy mind.

About half way through the joints, my chisels need a quick honing so I pull out the waterstones and spend about 15 minutes putting a sharp edge back on the ones I use the most.

Time well spent; a sharp tool is a joy to use and helps do good work. I’m not a sharpening guru, and I don’t obsess over achieving the perfect edge. If I can shave a few hairs off my arm then it’s good enough :-).

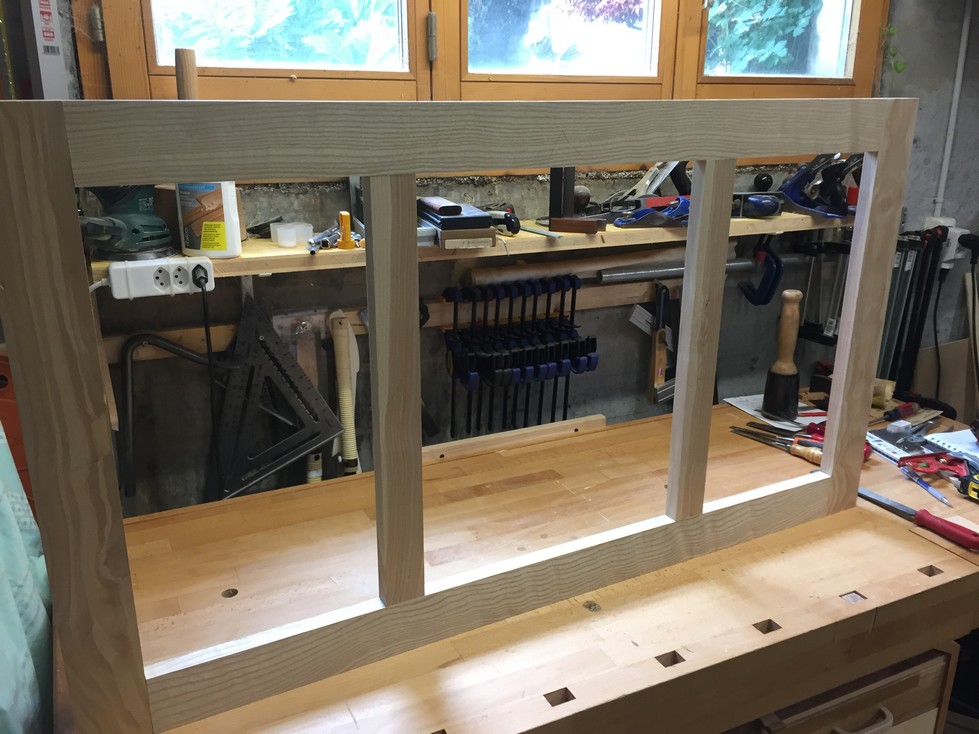
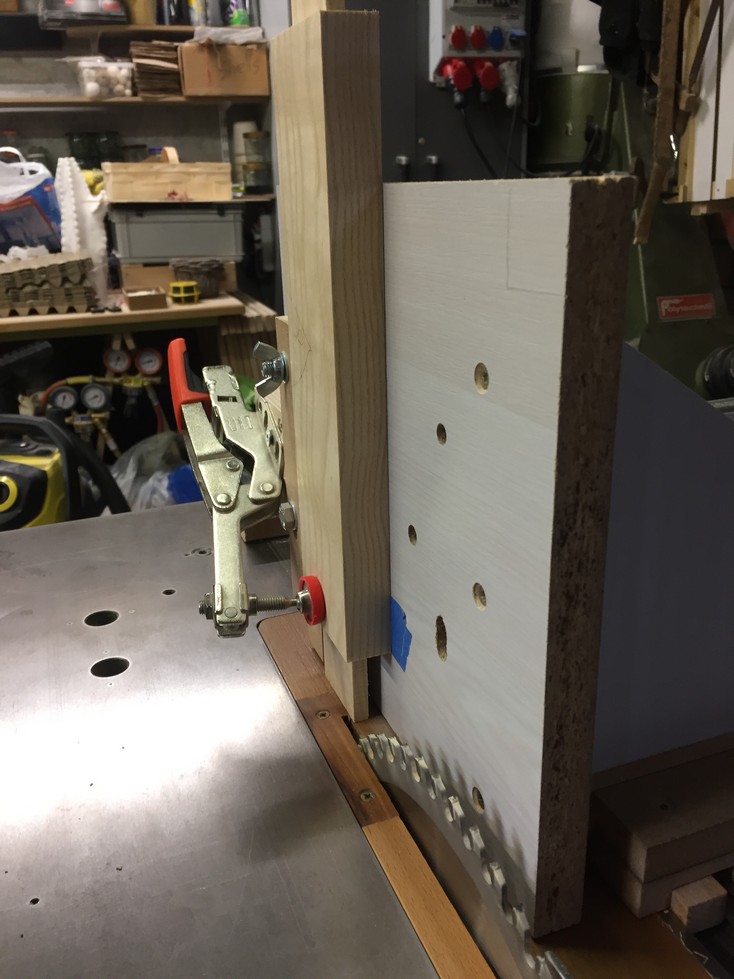
And when I’m finished, I put each frame together and check it for square and flatness. If the assembly doesn’t lay nice and flat on a flat surface, then one or more of the joints needs to be tweaked. Here is the back frame assembled; it almost looks like it belongs on a piece of furniture!
 So Ciao for now, next time we will delve into making grooves, rabbets, and dados!
Leave a Reply