
Phew! I think we’re ready to take the plunge…..

So with the major cutting complete on all the parts of the frame and panels, it is worthwhile to take a moment and consider some final actions that make sense to complete before we go past the point of no return (glue).
Incidentally, the above graphic comes from the album cover of Kansas’ “Point of Know Return“, one of my favorites from them.
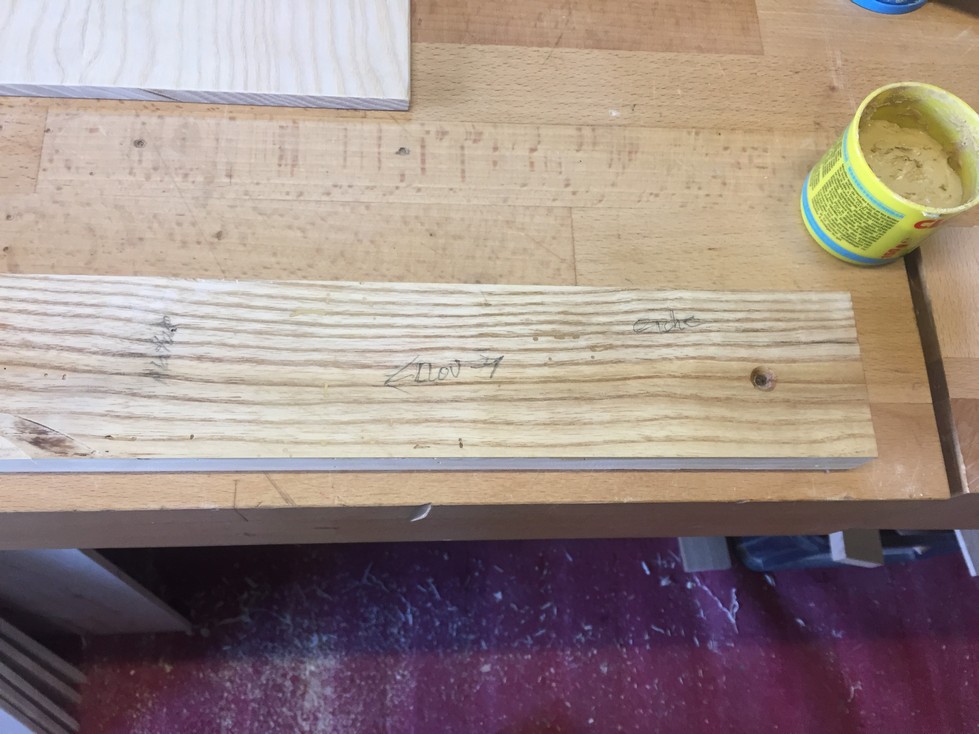
My first step is to fill any deformities like pits or checks with wood filler. I don’t particularly care for filler because it’s difficult to exactly match the color of the wood. The downside however, to not filling, is that pits/checks will stick out like a sore thumb after the finish is applied. Someday, my planing skills will be such that no checks will be evident J. Skills aside, and depending on the species of wood, there are usually some number of natural deformities to account for.
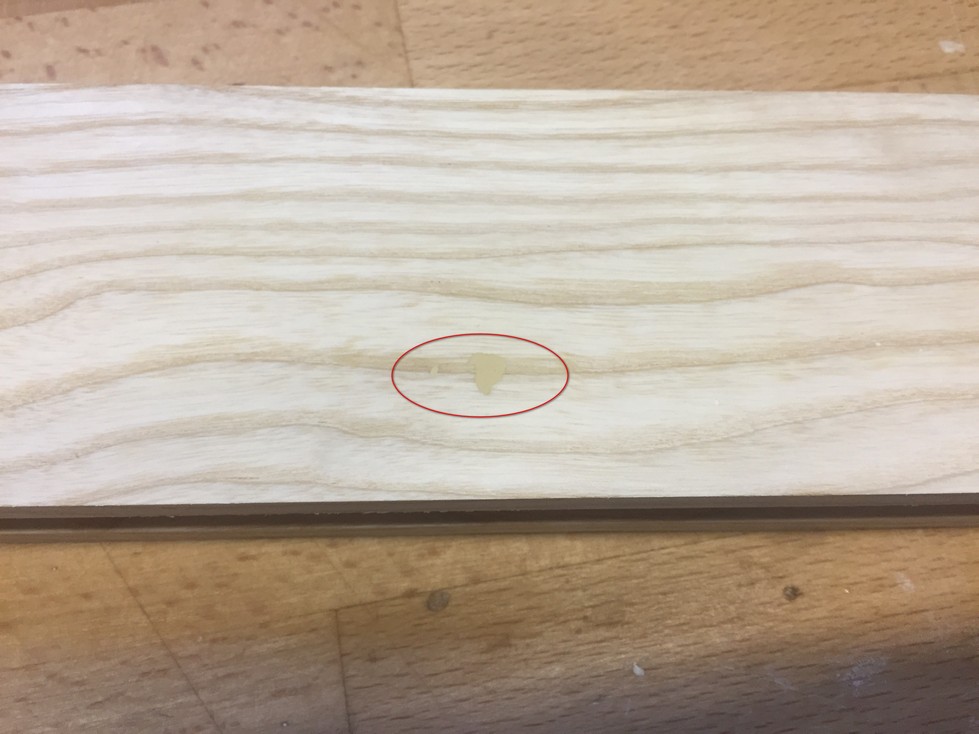
Here again, the scrap pieces I set aside come in handy. I have 4 different fillers that are close to acceptable: Natural, Beech, and 2 different Oaks. I apply them to different areas of the scrap that has a range of grain color, label them so I don’t forget which is which, and wait for the next day when the filler is completely dry. I then sand the scrap piece and see how the filler looks when dry and smooth. Finally, I apply a coat of the same oil I plan on finishing the whole piece with to see what it will look like at the end. I’m never satisfied, but I get as close as I can.
On the left is a lighter fill, on the right a slightly darker one. When oiled, these will blend in better than they look now.

I use the appropriate filler on any rails, stiles, and panels that might need it. The next day I sand the filler smooth with 80 grit, then 100 grit sandpaper. The panels themselves I sand to 120 grit because it is easier to do it now then after the glue-up. Later, before oiling the entire piece, I will hand-sand everything to 150 grit.

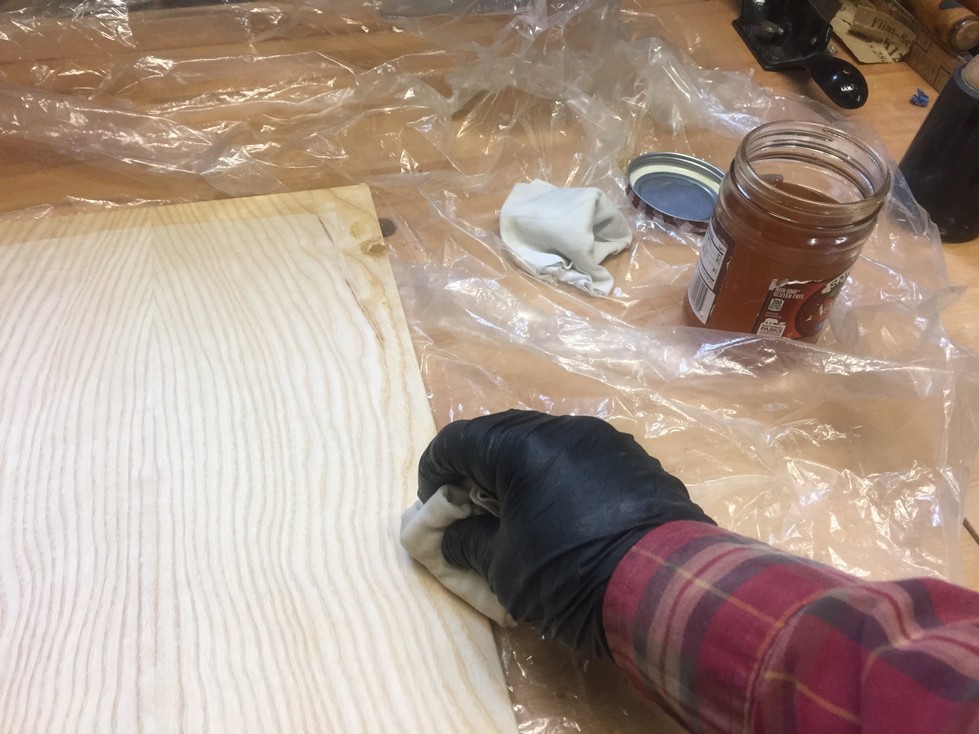
I do a little bit of oiling now. Because the end grain of the panels will absorb and release moisture much faster than the edge grain or face grain, there is a chance that eventually, with humidity swings over the year, the panel may crack at the end grain. To prevent this, I mix up a thin batch of the oil finish I’ll be using and apply it to the end grain at the top and bottom of each panel. End grain soaks up oil like a sponge which is good. This will dry overnight and tomorrow will be ready for the glue-up.
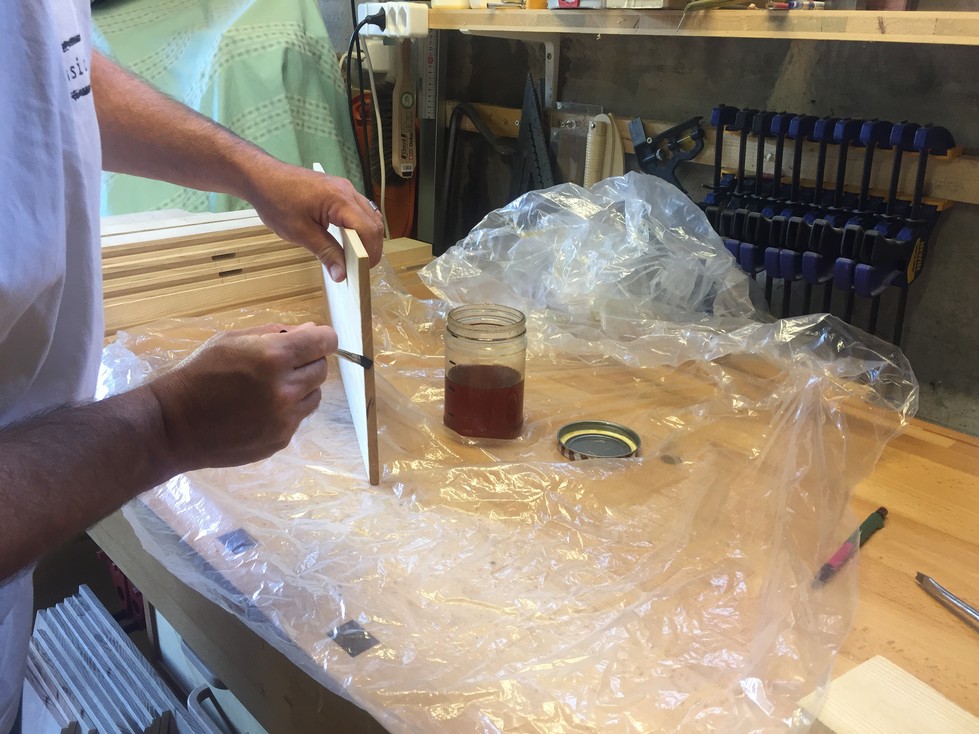
Before I put the oil away, I “pre-finish” the edges of each panel. The reason for this is because in the winter, when humidity is very low, the panels will shrink. If I don’t pre-finish the edges that are buried in the grooves in summer, we might get an unsightly strip of bare wood that shows up in winter.
It’s the next day, and the oil is dry so I gather everything I need for the first glue-up. For me, this is always the most stressful part of any project so I do everything I can to make it go smoothly. First, I do a dry run and clamp the frame together, ensure everything is aligned, and check for square. This isn’t just a light clamp, I apply the same pressure as during the final clamp. I like bar clamps for this glue-up because they help to ensure the assembly remains flat during clamping.
The dry-run goes well so I mix up a small batch of urea-formaldehyde, or “plastic resin glue”. Normally I use typical yellow wood glue (aliphatic resin) because it is convenient, easy, safe, and has a quick initial bond. It’s that last bit that makes me nervous when gluing an assembly like a frame and panel because you have to work fast and have everything exactly right. The plastic resin glue comes in powder form and mixes with water so clean up is simple, both the “squeeze-out” from a joint, and off of hands if I’m messy. It dries very hard and can be sanded or planed and takes a stain or an oil finish. Yellow glue can be painted over but will not accept stain or oil. Last, and best, plastic resin glue has a long working time. Once I apply it to a joint, I’ve got a good 20 minutes for any last adjustments that may be necessary. In addition, the batch that I mix up in a little container will be workable for about an hour if I give it a stir once in a while.

Of course, the downside is that I have to leave the assembly in the clamps for at least 4 hours. For someone working a steady day-job, this means overnight. It also highlights my clamp bottleneck (it’s true that a woodworker can never have too many clamps). Unlike in Albuquerque, I only have 2 pairs of pipe clamps here so I can glue up only two panels an evening, and I’ll need all of them for the back piece. With yellow glue, an hour and a half in the clamps is sufficient in most cases.
I use a small brush to apply the glue to the inside of the mortise and the face (edge). On the tenon, I only apply enough to wet the wood and then wipe off excess. The reason for this is two-fold. First, as the tenon slips into the mortise, all the excess glue on the tenon will squeeze-out, be wasted and make a mess. Second, I have to be very careful and not allow any squeeze-out to touch the panel in the groove. Remember that the panel must be allowed to float and expand/contract at will. If the panel accidentally gets glued at the corners, it’s a crack waiting to happen.

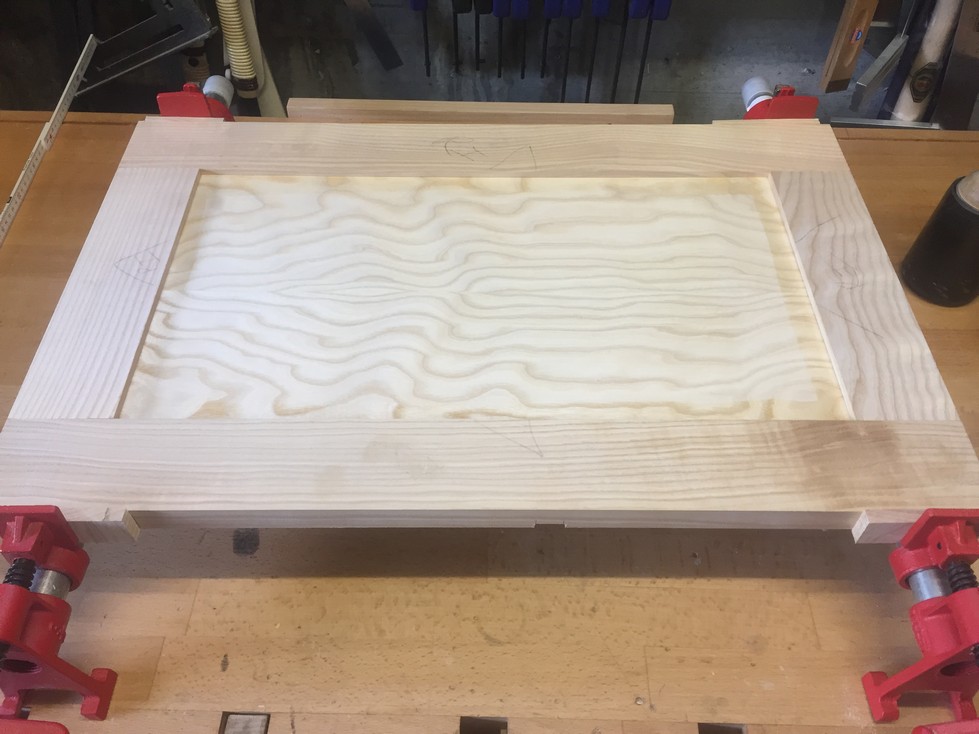
So using a scrap at each corner to protect the frame from clamp marks, I clamp the assembly, ensure it is flush with the bar underneath, and check for square. The first one was only about 1/2mm out. No problem!

The second assembly was out of square about 1mm so I pulled it in with an extra clamp. Most advice is to clamp across the long diagonal however, the technique I use is a little different. According to some of the “old school” cabinetmakers, this way is better at preventing any unwanted twist that sometimes happens when clamping across the diagonal. Also, I don’t need an extra-long clamp.

The four side pieces go well and are small and simple. A good warm-up for the main event: the back piece and the doors.
Here is the glue-up of the back piece and it had to be accomplished in a specific order: 1) two center stiles inserted into bottom rail 2) center panel installed 3) top rail attached to tops of both center stiles 4) each side panel inserted and 5) end stiles attached. I make sure every piece is flush where appropriate and apply a little pressure with the two long clamps top and bottom. I then tap each corner gently until all four are resting firmly on the bars of the clamps and install two shorter clamps for the center stiles. A little more pressure on each clamp until I’m satisfied that everything is where it needs to be and here is the result:
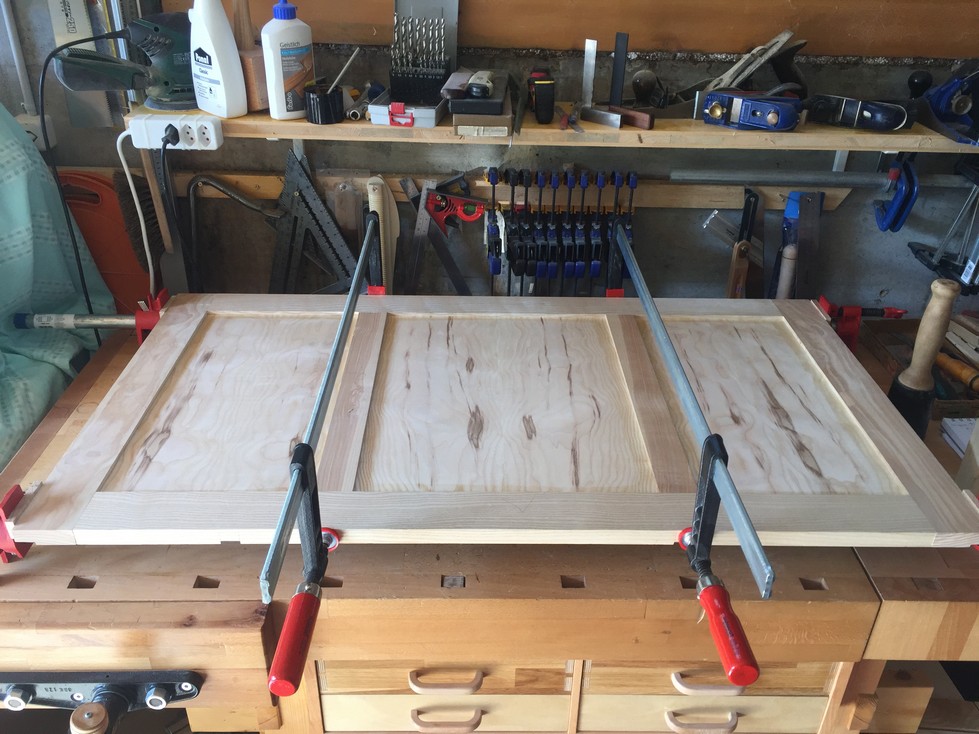
Finally, I measure diagonal to diagonal and find that this large assembly is just slightly less than 1/2mm out. I’m pretty ecstatic about this and attribute it not to luck (or even skill), but to a methodical approach that started months ago with the proper dimensioning of the stock, both flat and square. That’s not to say that everyone can achieve greatness through square stock, but that if you don’t start square, it is all the more difficult to end up where you want to be. In the immortal words of Huey Lewis, It’s Hip to be Square!
For those that may be wondering, I’m not a purist to be using a traditional carpenter’s folding rule, it’s just that in many cases I find it quicker and easier for me. Mine has a sliding extension at one end that is especially useful for measuring inside dimensions or depth of mortises and such.

I may have mentioned this before but it bears repetition; I advocate using the best tool for the job whether it is a hand tool, a machine or a combination of both. A piece of string or a laser level. I enjoy using my hand tools but if I have quick access to a machine that makes the job quicker (like for the 36 mortise and tenon joints a couple chapters ago), I will use it.
After the back panel is ready to be removed from the clamps I can glue-up the two doors using the same procedure, but with just one center stile this time. I set them out of the way and begin preparing the end panels for pocket screws.

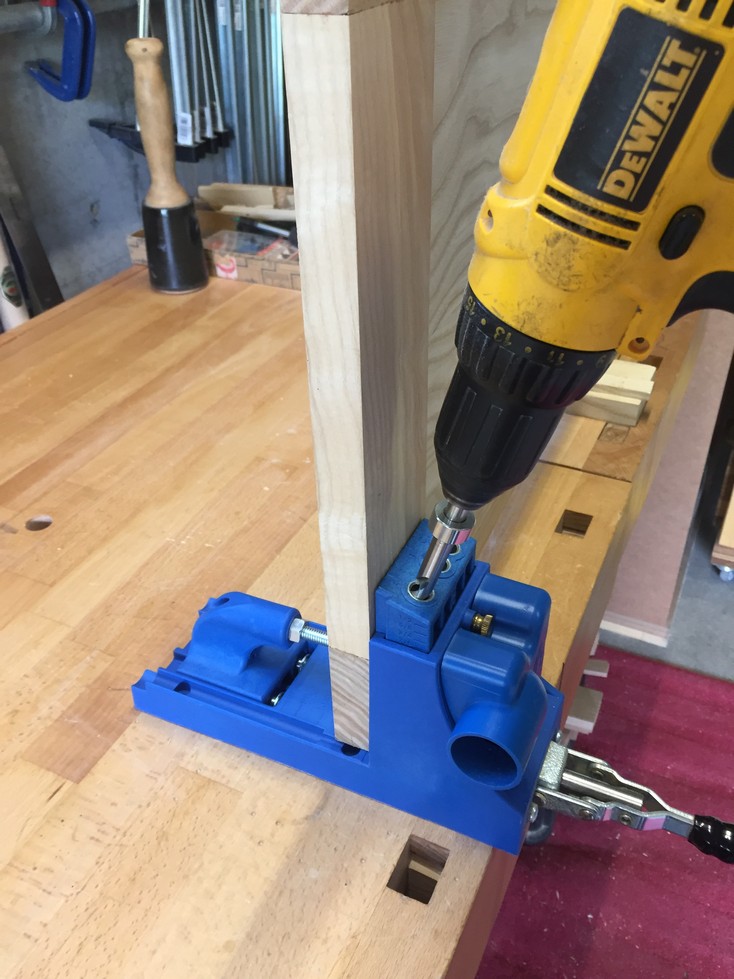
While I will be gluing the end panels into their dados, a few strategically placed pocket-screws lend quite a bit of extra strength. The beauty of the pocket screw is that it can be used in out of the way, or hidden locations and prevents the need to drill in from the visible portion of the cabinet. Here is an example of using pocket screws:

Another convenience of the pocket screw is I can now assemble the carcass without glue in order to fit other pieces easily. Then, when I’m sure I have done everything possible, I can apply glue and make it permanent.
I usually prefer building my own jigs and fixtures however, I have to say that the Kreg Jig was well worth the money. It allows for quick and precise drilling of pocket holes both for new assembly and for repairs of older furniture.
First, I clamp the end panel (the inner right hand panel as in the picture) in position, ensure it is square (:-)), and mark the locations for the two holes I will drill at the bottom of the stile. The holes at the top, and on all subsequent panels will be spaced the same.

I mount the jig to my workbench and drill 2 pocket holes approximately 4cm apart.
The result before cleanup with chisel and sandpaper:

Speaking of “cleanup”, now that all the dados, rabbets, and now pocket holes are done, I look over each panel closely and where necessary, use a block plane, chisel, and/or scraper to prepare the assembly for sanding. Actually, with sharp tools and skill, sanding is quite often unnecessary. Give me a few more years or so of practice…..
Segway to the scraper:
Since I am using the scraper, I have to comment that while this is an incredibly useful tool, I neglected it for a long time simply because I was not able to properly prepare the edge and “draw the burr” necessary for proper cutting. Despite articles in Fine Woodworking magazine and on websites/blogs, I could never seem to get it just right. An applicable chapter in one of Tage Frid’s books set me straight and again I discovered that you don’t need fancy jigs or expensive methods to get within 5% of perfection. Just a little perseverance. And when you finally get that edge just right, and experience the pleasure of a truly sharp cutting tool, you’ll walk around the rest of the day with a big smile on your face (enough to make your family worry).
Here is the scraper in action, pulling micro-thin wood shavings instead of dust:


I won’t attempt to explain the process of achieving the “scraper burr” here, suffice to say don’t give up. Also, when drawing the burr, use light pressure. You’d be surprised to find how little pressure you need, this was my own main problem. I highly recommend Book 2 of “Tage Frid Teaches Woodworking”, see the chapter on scrapers. The set can be had for a reasonable price at Highland Woodworking and comes with a DVD (no, I’m not getting a commission. Rats.).
So, till next week, “Same Bat-Time, Same Bat-Channel”!
Next Chapter Tentatively Titled: “It Almost Looks Like a Piece of Furniture….”
Leave a Reply