

So the bike has been in operation for a little over a week. Monika has taken it to work 4 or 5 times and I have tested it quite a bit myself. We are both very pleased so far. Here are some details:
Factory Settings and Operation
The first thing I discovered is that the factory default only allows you to use PAS levels (pedal assist) 0 – 5. While PAS 5 is pretty good, with the hills we have locally, I wanted Monika to have the full options so I went into the settings and enabled the remaining PAS levels 6 – 9.
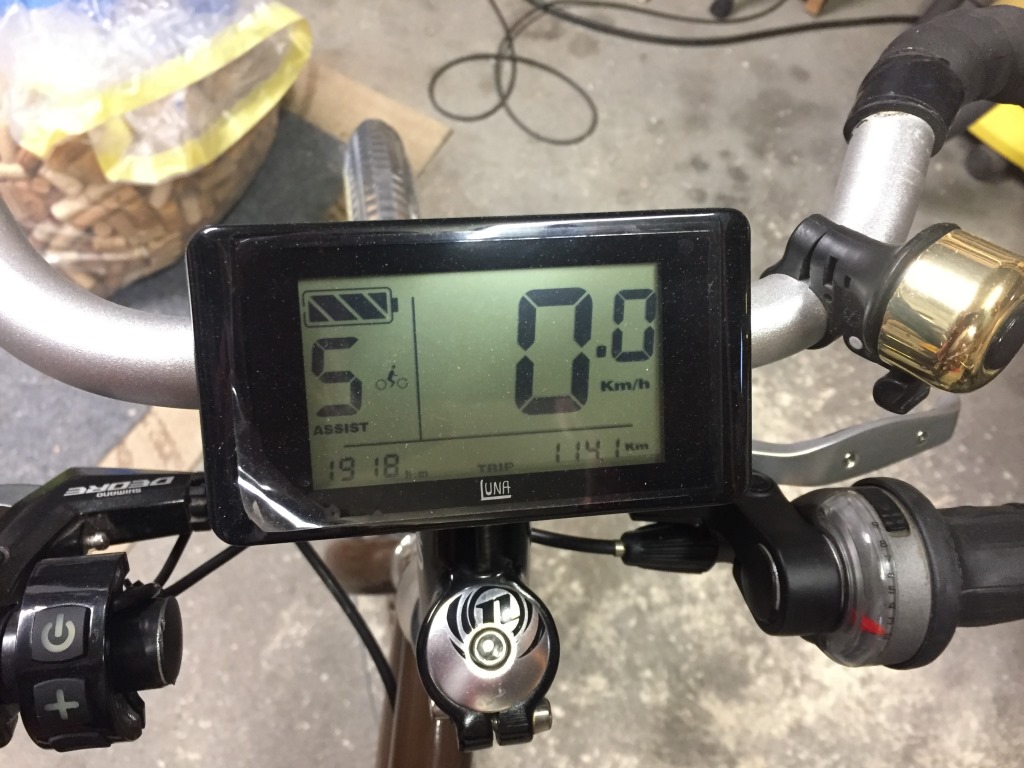

The basic (typical user available) settings allow you to select the PAS levels, set your wheel diameter (important for the speed sensor), set the time, and adjust the maximum speed limit. Wheel size default is 26” so I didn’t have to change that. The default maximum speed is set to XXkph. For the purposes of testing, I wanted a bit more so I set it to XXkph. I’m happy to say that on flat ground, with only a little bit of effort pedaling, and the throttle all the way engaged, I easily hit the maximum. At XXkph, the motor did indeed cutoff so that test passed. The picture only shows 30 because I was not comfortable taking a picture with one hand and steering/throttling with the other hand all the way up to XXkph. I must be getting old…..
New entry: the “XX”s above have been put in to avoid prosecution…….

A bit about the law: In Switzerland, an e-bike cannot exceed 25kph and still be treated as any other bike. From 26kph to 45kph, you have to get a registration plate and purchase additional insurance, similar to owning a moped. Above 45kph is straight-out forbidden on an e-bike (crap). Probably the thought of a bunch of young hooligans racing around on e-bikes over 45kph wasn’t palatable to the “safety-minded”. Personally, I still have a bit of the American mindset; I want a lot of power, I want it, and I want it NOW! However, I do realize that a fast e-bike on a path with pedestrians (where motorcycles are not allowed) could be a recipe for disaster. So…..I promised Monika I would set the max speed to 25kph. The police (what police?) aren’t going to be out with radar guns checking e-bikes however, if she were to get in an accident, that would be the first thing they would check.
The speed aside, what I’m really concerned about is the ability to climb steep hills (and leap tall buildings in a single bound) while not stressing the motor. As mentioned in a previous post, the beauty of the mid-drive system is the ability to use all your gears to benefit the motor. So far, I’ve climbed the hill from Dallenwil towards Wirzweli in 2nd gear with no strain on the motor. The way to determine this is to try and pedal to keep up with how fast the motor is spinning the chainring. If your feet can’t keep up, it is a good indication that the motor is happy. The motor likes to spin fast and as long as you are not trying to climb hills in too large a gear, it should be fine. I was able to hit a top speed on the steepest part of the hill at 19kph. Monika hit 23kph in the same gear. Probably due to my growing mid-section….
Speaking of gears, the stock chainring is a 44 tooth count. I mentioned that I have a Lekkie Bling Ring on order to help with the chainline and that one has 42 teeth, slightly better for the hills. In 9th gear (12 teeth in the rear), there will still be plenty of speed even with the slightly smaller chainring in the front. It’s always a trade-off depending on what kind of riding you want to do. If you never get out of the city and are on mostly flat ground or gently rolling hills, a 52 tooth chainring would probably be fine, as long as you have a decent granny-gear on the cassette for emergencies. In Monika’s case, we’re more concerned about the ability to climb and so I made sure she had the 34 tooth granny in the back and opted for the smaller, 42 tooth chainring in the front.
For now, I don’t see any problem with sticking to the controller’s factory settings and not modifying the programming. Originally, I was researching how to optimize the programming to get the maximum power (see here for an introductory article on “Guerrilla” programming) and may still play around with it in the future, however, I’d like to have Monika use the system as-is for a while before I void the warranty.
The Verdict
Shipping: I was able to get everything here without too much hassle and to give the guys at Luna Cycle credit, they have a detailed write-up on shipping issues to Europe. I had a few questions which they answered promptly and the time it took the battery to arrive was very close to the estimated time on their website.
The Kit: With the exception of the crank arm bolts, the kit contained everything necessary. I did have to buy connectors but it makes sense that the individual user may want a certain type of connector. If it were me, I might include a set of basic connectors with the kit just in case. The finish and paint looks to be good quality and for a standard bicycle frame with a 68mm BB shell (and many non-standard) there shouldn’t be any major issues with installing the drive. The kit comes with extra washers that allow you to install the drive on a 73mm BB shell. For non-standard frames it looks like the concerns are mainly involving fat-bikes. Fat bikes have a much wider BB shell (up to 110mm) and chainstays that bend outward quite a bit more than normal frames. There are however, adapter kits and special hardware available for this drive unit in order to allow installation on fat-bikes. A good thing, because what I’m reading from the U.S. is that E-fat-bikes are becoming hugely popular (actually, they have been the rage for some years now).
Documentation: There is no documentation of any worth from Bafang itself and Luna Cycle hasn’t created an installation manual however, between the support links on Luna’s website, the BBSHD video they posted and the forums available, not to mention the amazing website ElectricBike-Blog, there is a ton of information available for doing your own e-bike build utilizing a number of different drive units.
Performance: Assuming that your e-bike needs are in the realm of commuting or getting around town, I think you will be more than pleased with the ease of use and performance of this drive given the stock factory settings. If you are interested in “hot-rodding” your kit for single-track mountain biking or playing in the snow or sand, then I would recommend you do your research (see “Guerrilla programming” above) and after the build, at least use it for a while before hot-rodding to make sure there aren’t any factory defects that would require a warranty replacement. Remember, if you mess with the factory programming, YOU VOID THE WARRANTY!
Overall: So far, we are very happy with the drive and controller. I recommend anyone that considers themselves “good with tools” and have done bicycle repairs in the past (especially BB removal and replacements) to give it a try if you are so inclined. Just remember that you are trading off ease of procurement and repairs with that of saving lots of $$ and receiving the satisfaction of doing it yourself. Whatever drive unit you decide is right for your bike and riding style, just make sure you have an idea of where to get spare parts if necessary or, that there is a local bike shop familiar with the drive that can help in a pinch.
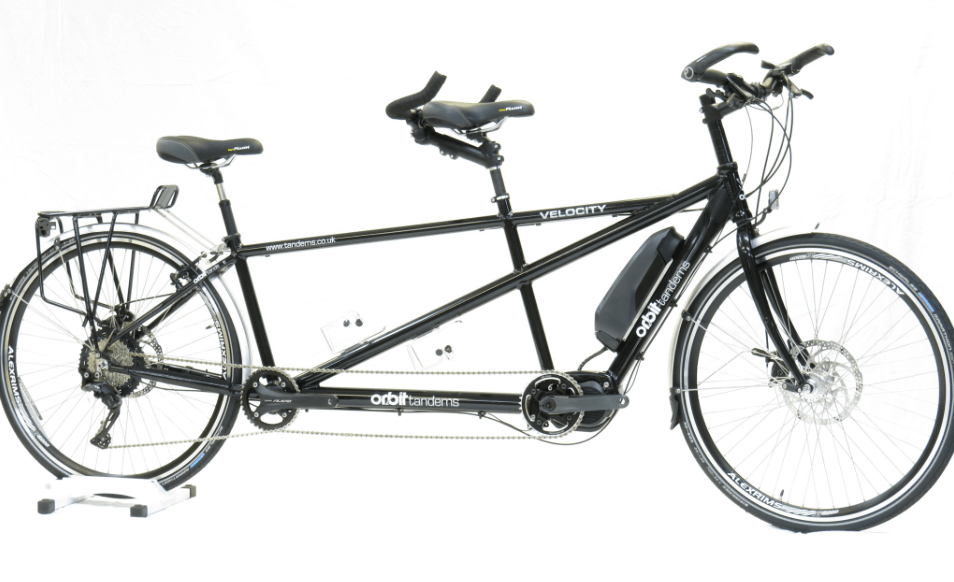
Last but not least, I’m already thinking of getting the 1000W BBSHD for the tandem, plus two batteries. 🙂
New entry: probably not. I just found out that Electric Tandems are illegal in Switzerland and the EU. 🙁
Tandems equipped with mid-drives, both at captain’s and stoker’s BB:
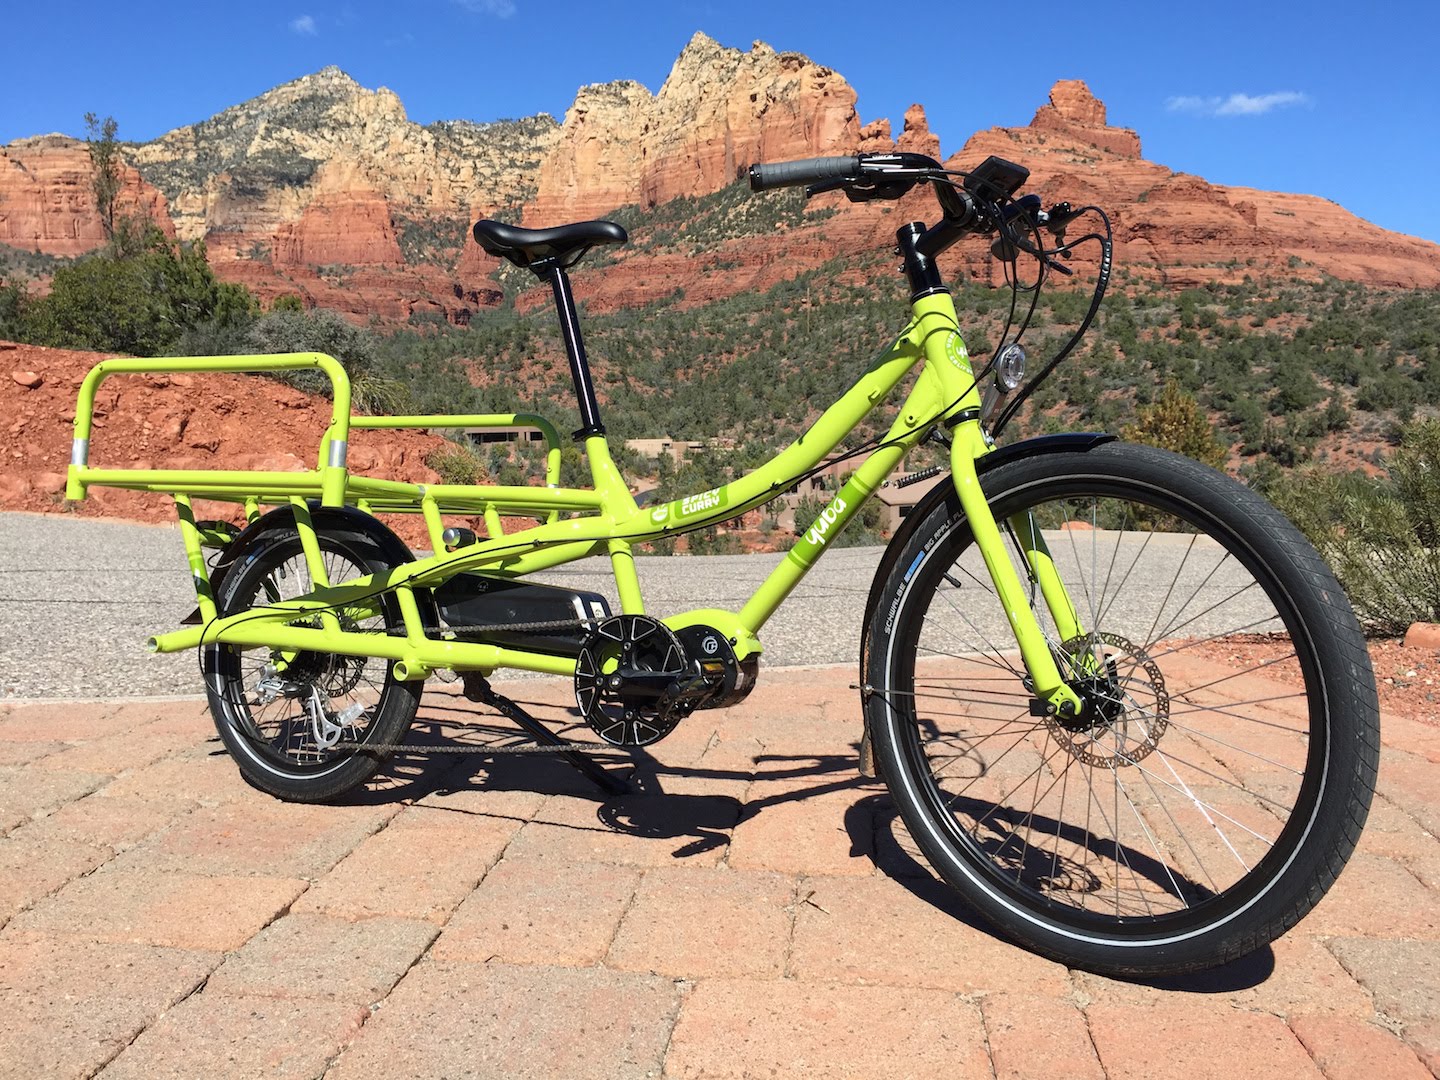
Or how about an E-Cargo-Bike? I could totally see my wife tooling around town on one of these, and it would be fun to build after I get better at fillet brazing.

 I hope this series of posts was helpful and at least gave you enough information to get started. As always, we appreciate your comments and feel free to send this link to friends or family and register for our newsletter!
Leave a Reply