
Table tops….. (cats like them too)

So we’re approaching the end-game: table tops, door hardware, and sewing machine lift. I might get this done before Christmas 🙂 . In the early days of my woodworking, I was always a bit intimidated by gluing-up large panels but I learned that if you follow a straightforward process and prepare the stock properly, good results can often be obtained.
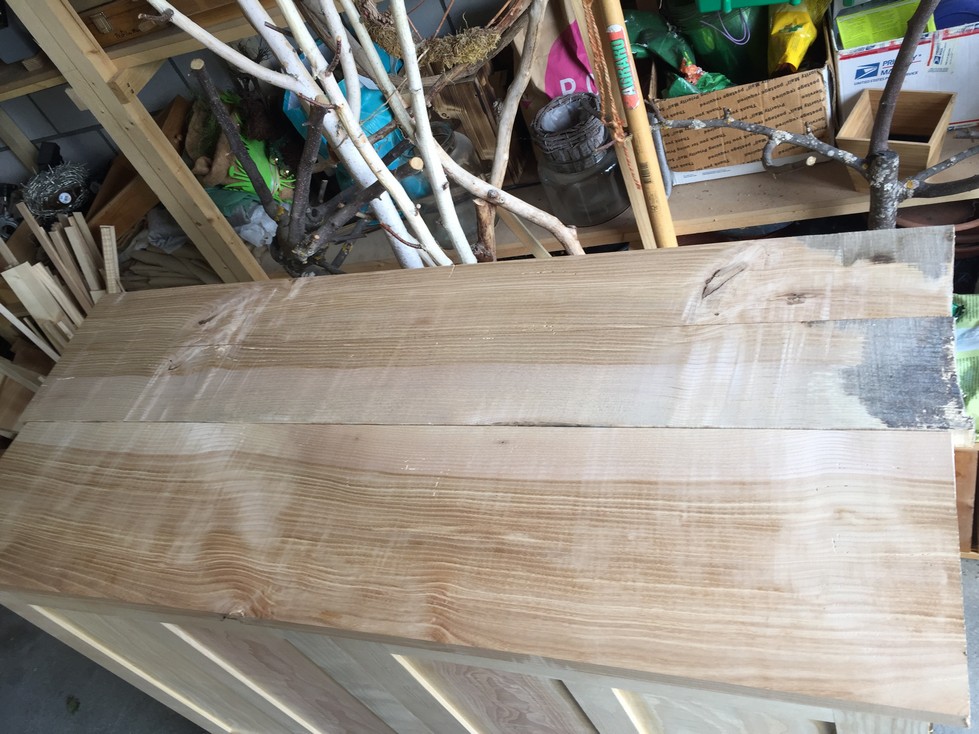
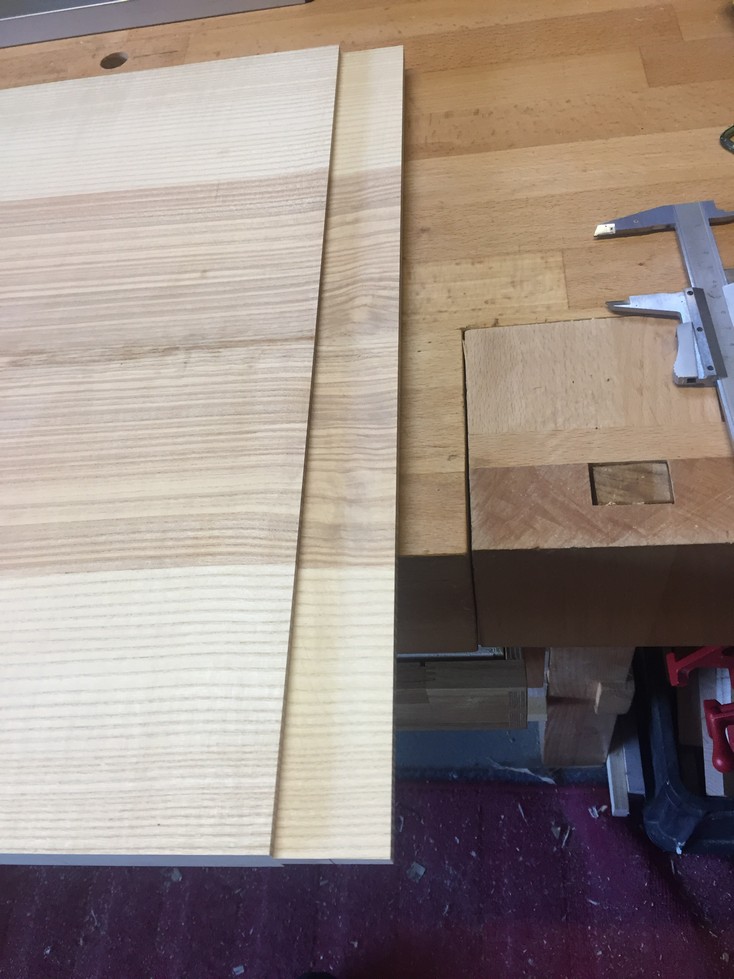
Previously, I had selected the rough stock that looked suitable for use creating the upper and lower tops. While plain-sawn lumber produces the most interesting grain patterns, quarter-sawn lumber is more well behaved. This means that the tops will have less tendency to cup or twist and the seasonal movement (expansion and contraction) is reduced to about half that of plain-sawn. Both good characteristics for a table top.
I jointed the first face of each piece of stock flat and planed off enough of the weathered wood on the other face in order to get a good look at the grain and decide how the pieces will be oriented for glue-up. These pieces will be used to make the lower top, the one that is permanently fixed to the cabinet.
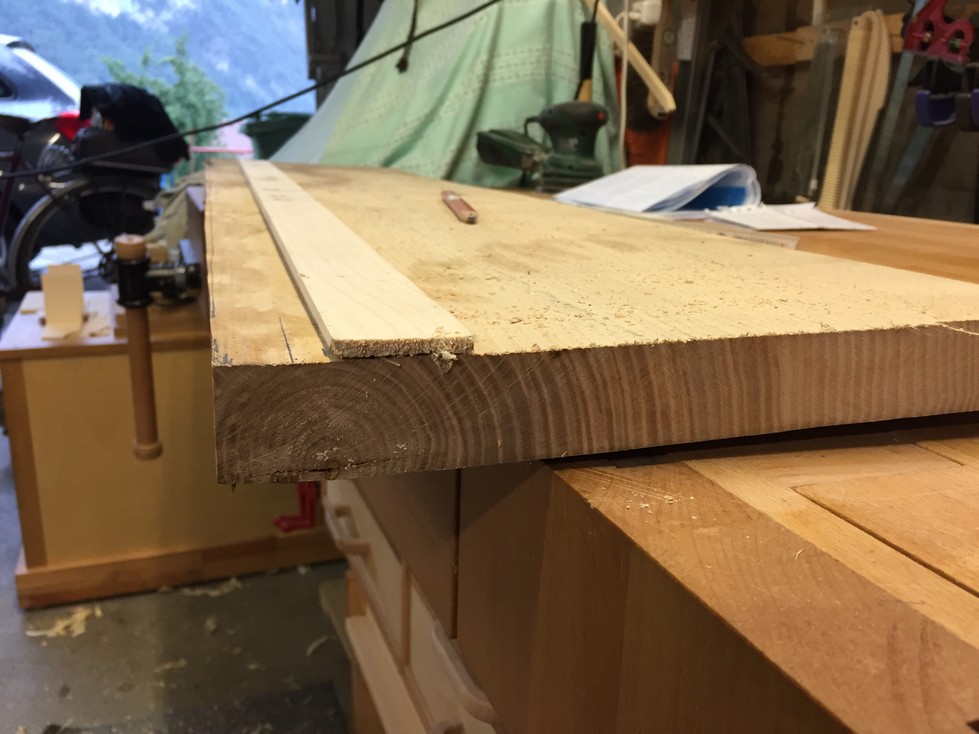
Below is an example of an almost perfect quarter-sawn piece as evidenced by the vertical growth rings (90 degrees to the face). On the left side, you’ll see what was the center of the tree. This is called the “pith” and is always a very weak portion of the wood so I will cut it away before going further. I make a mark on the right side of the wooden straightedge (not the mark you see on the left) and rip that section off with the bandsaw.
The other pieces I’ve selected are similar to this. Any that have growth rings 45 degrees or more to the face are suitable. I chose the best looking pieces for the upper top (that will be hinged leaves when open) and specifically, for the nicest looking grain when the cabinet is closed:

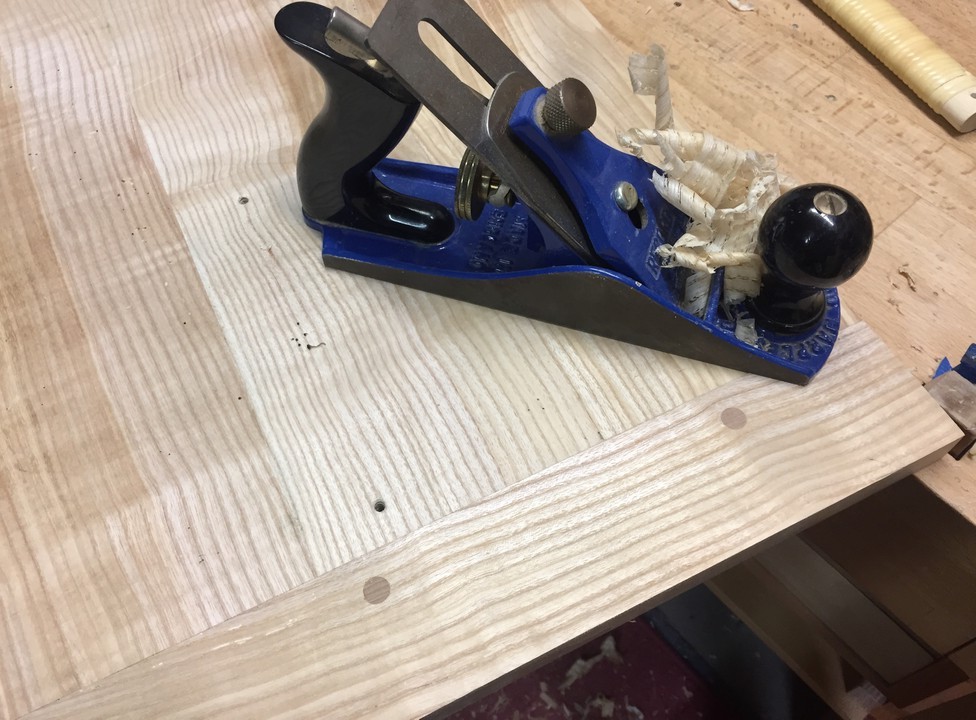
I have rough jointed an edge of each piece and then ripped the other edge on the tablesaw. If you have a good ATB blade (alternate top bevel) with sufficient number of teeth, you can get very close to a good edge for glue-up. Some woodworkers, even some of the old masters, say that depending on the blade, this can be good enough. For pieces shorter than about 75cm (30 inches), the jointer does a great job for me (as long as the knives are sharp) but for longer pieces, I still like to go over the edges to be glued with my jointer plane.
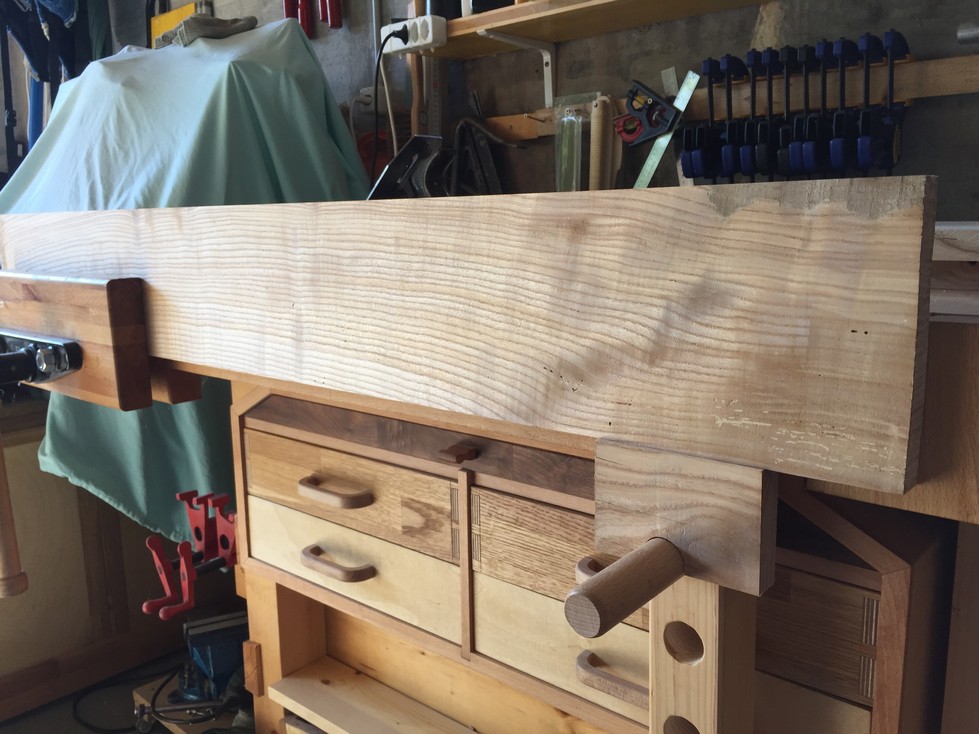
It’s important to be able to secure the piece appropriately to my bench so for long pieces, I built a board jack (sometimes known as a bench slave). This is a bench fixture that can be used to support one end of a long board. It fits between the floor and the bottom edge of my bench and is secured by a square peg through one of the dog-holes. The round peg can be fixed at different heights depending on the width of the board. In the below picture, I’ve clamped one end of the board in my shoulder vise. The end of the board is up against the vise screw so that when I plane right to left, the board won’t creep.


Before I make a pass with the hand plane, I scribble along the edge with a pencil. I can use the pencil marks to gauge my progress.


Once I’ve made a few passes and removed the pencil marks, I check the edge against my long fence. I also check for square.


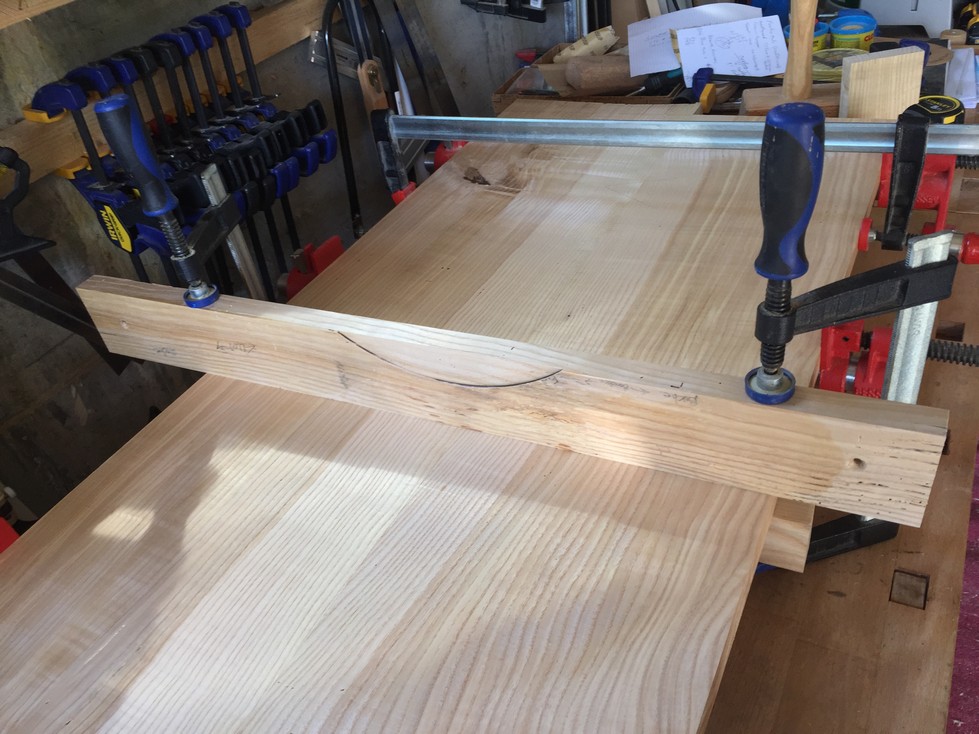
Here is another way to clamp a long board. This one is resting on top of the vise screws and since it is higher than the bottom of the bench, I made a little support block for the board jack.
I recycle bags of sawdust but when I use handplanes, I like to save the shavings to start fires in the wood stove (winter is coming….).

Before the actual glue-up, I do a dry run with all the clamps that I will need and ensure everything will go together nicely. I like to use pipe clamps as the basis for panel glue-ups as they are relatively inexpensive and you can have different lengths of pipe on hand for different jobs, another cost saver. You can get clamp ends for both 1/2 inch and 3/4 inch pipe but I’ve found that 1/2 inch is too flexible. 3/4 inch pipe is very straight from the factory and when I position the boards for clamping, I can tap them down onto the pipe for a flat reference. Also, pipe clamps that have integral feet that hold the assembly high enough to turn the handle (without bumping into the top of your workbench) are pretty much essential, personal experience talking. One final word on pipe clamps: like almost everything, you get what you pay for. Bessey is my go to brand for most clamps and while Jorgensen is very nice, it’s expensive and I’m not convinced it’s worth the extra cost. Woodstock and Rockler are also good alternatives. Beware the cheap-o brands, you’ll be cursing them during glue-up (again, personal experience).

When gluing large panels, it’s helpful to use cauls somewhere near the middle of the panel. Cauls are long pieces that have a straight edge and are clamped to one another sandwiching the panel in-between. This helps keep the panel flat. I put blue painter’s tape along the straight edge of each caul so the glue doesn’t bond to them. Some use many sets of cauls for a large panel however, based on Tage Frid’s advice in his books, if you alternate clamps below and above the panel, you shouldn’t need them. I use one set in this case just for a bit of insurance.

And now the glue-up. Caul in the center, three alternating clamps from above, the boards tapped down flush with the pipes, and two clamps at each end hold the joints even with each other.

After the glue sets up, I remove the excess and ensure the panel is at least smooth. Final scraping and sanding will only happen when the panels are ready for the oil finish. By the way, I’ve learned the hard way that glue can be tenacious when fully dry, that’s why I usually plan glue-ups so that a couple hours later I can be around to scrape off the excess while it is still pliable. Many times if the glue is completely dry, scraping will result in some wood getting torn out.
I then mount the panel on the sliding table of my saw and take a few light passes, adjusting after each one, until I’m happy that I’ll get a nice square crosscut.

Once both panels are square, and dimensioned equally length and width, I can think about how I want to attach them. Since I’ve used good quartersawn stock, the theory is that the wood will “behave” if properly dry (it is) and will not have a tendency to warp. However, I’ve read numerous stories about how even quartersawn panels can warp over time and I want this piece of furniture to last a long time. The bottom panel will get attached to the carcase with elongated screw holes to allow for wood movement due to humidity changes. At the same time, these attachment points will prevent warping. Okay, so much for the bottom panel.
The top panel, on the other hand, will be attached to the bottom panel only by hinges. This presents a problem because the top panel will then be free to warp or cup. Enter one of the most elegant solutions for keeping panels flat (IMHO), the breadboard end. A breadboard end is a piece of stock that is attached to the end of a panel with mortise and tenon joints (or picture a large tongue and groove) such that its long grain is 90 degrees to the long grain of the panel. As you can see in this drawing below, the mortises and groove cut into the “rail” allows the panel to expand and contract while at the same time, keeping it flat.

So, the plan is agreed and everything will work right? Wrong! Picture the bottom panel attached to the carcase; it can move with the humidity and is kept flat by the attachment points, which is fine. However, the top panel is attached to the bottom panel with hinges similar to this:
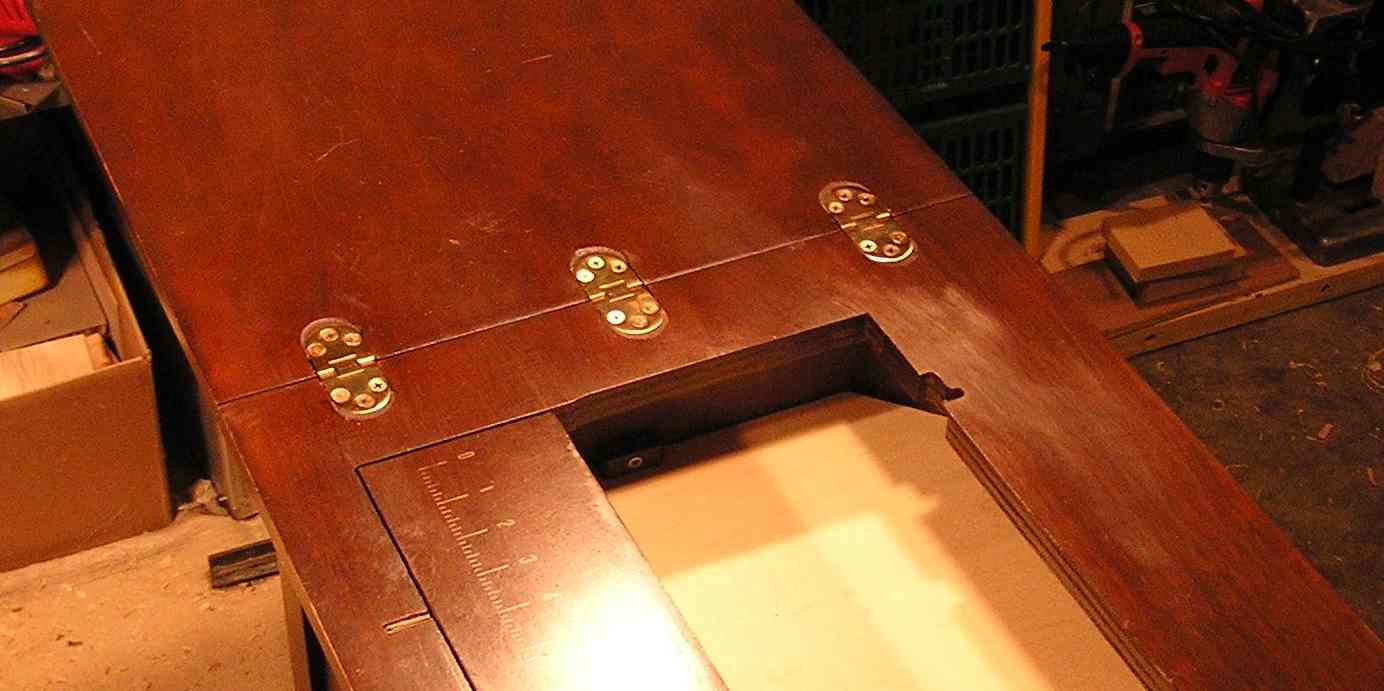
If I blithely attached the hinges to the edge of the bottom panel, and then to the breadboard end of the top panel, the bottom will move and the breadboard end will not. This equals buckling hinges and splintered wood. The best fix for this (and the best looking) is to breadboard both the top and bottom panels. Then the hinges will mount only to breadboards and the panel movement won’t affect them. That only took me two beers to figure out.
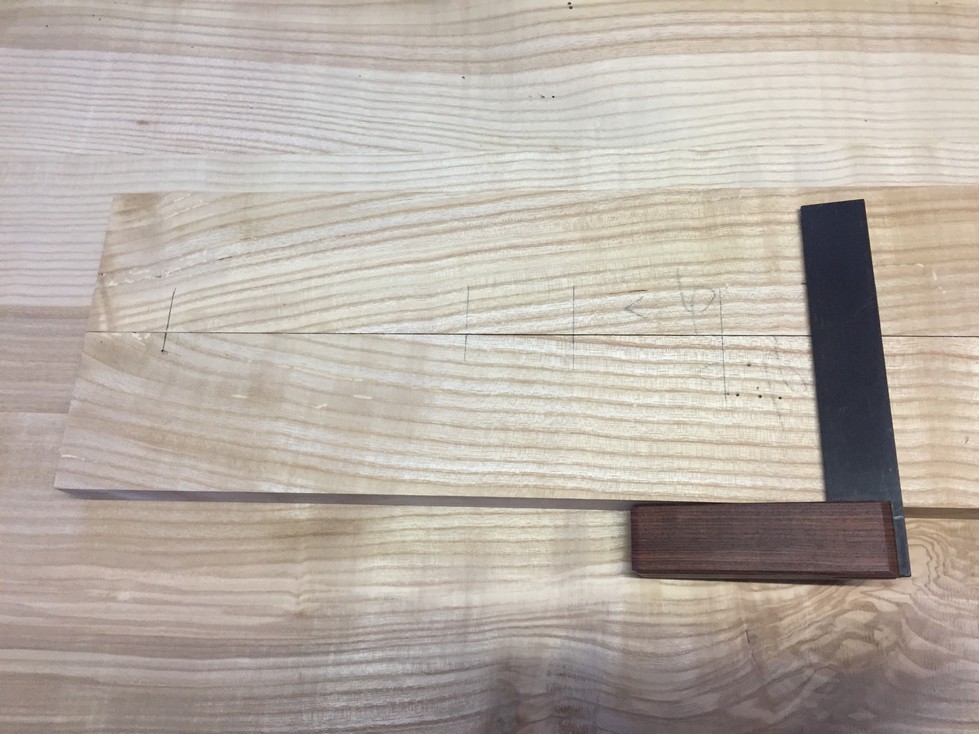
So the width of the breadboard end will be 60mm and the total length of the tenons will be 75% of that, so 45mm is the depth of the mortises cut into the BB end. The width of the tenons will also be about 60mm and the haunch will be 10mm. The only difference between my plan and the drawing above is that the haunch will run the full length of the BB end and will be visible from the front and back of the panel. Monika thinks it will look cool and I just want to see how much the panel grows and shrinks over the next year.
One thought I had worth mentioning: since in the end, I will be cutting the top panel into 2 pieces (remember, the right side leaf folds forward and the left side leaf folds outward) and the finished total width needs to be exactly the same as the bottom panel, I cut the BB ends 65mm wide so I have extra to spare when I make those last cuts.
First, I need to cut the haunch/tenons on the panel. For a normal sized rail or for a panel smaller than these, defining the shoulders on the tablesaw would be the easiest however, the panel needs to be perfectly square all the way around. I set the crosscut fence as close as I can and do a test cut about 10mm from the end and the below is the result:

You see how the bottom groove is slightly over the line? I could clamp a stop at the left end of the fence so that I could flip the panel over and still cut to the line but it would still be slightly off. If I only had one end to do I could finagle it by clamping a fence to the top for a router however, I have four ends to do and still would have to use the router to remove all the waste. I have a spindle moulder and should use it when feasible so I get a set of tenon cutters off the shelf. These are an amazing, professional set of cutters with a locking threaded center that came with the machine. I’ll be in debt to the donor’s family till I’ve made a few more pieces for them! (they are like family so I would do this anyway) This allows me to fine-adjust the space between the cutters (what will be the tenon thickness). I use a scrap piece to adjust the spacing and height of the cutters such that a 10mm tenon is cut exactly in the center of the scrap.


When I have the spacing and height set, I use my long level to ensure the infeed and outfeed fences are in line with each other. Then I use a dial calliper to set the depth of cut, in this case 25mm because I want to take two passes to get to the full depth of 45mm.


Finally, I use a square to ensure the crosscut fence and the moulder fence are square to each other. On the right below is a large heavy contraption that is 30 years old but still manages to keep wood flush to the table and fence in addition to leaving me with 10 fingers instead of 9….. 🙂


I mount another piece of scrap (I’ve mentioned before how helpful it is to mill extra stock so there is scrap available for setups) for a final run before trusting this to the actual panels. I get a nice clean cut with a 10mm tenon that is centered and 25mm long.


And now to the real deal. I send one edge through the moulder and am very pleased with the result. I mill the other end and the second panel, set the depth for 45mm, and run the 4 ends through again to achieve the final depth.
The moulder setup took me about 15 minutes, about the same time than setting up to cut with the router. The actual time to cut the four ends is about 15 minutes (I move carefully) vs. probably about 20-25 with the router. In the end, the finished product is better than if I routed it and that’s what matters. Also, despite its bad reputation, I like using the moulder way more than the router.
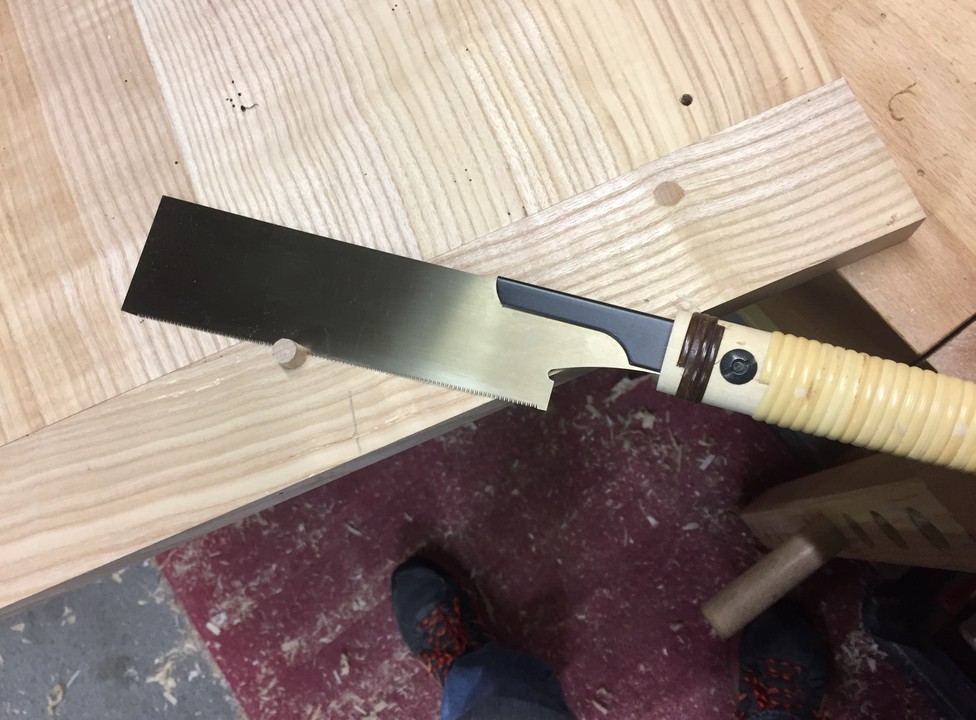
Now I can measure and mark where my three main tenons will be. I use a dovetail saw to cut the lines that define the tenons and then mount the panel to the front of my bench and use a deep coping saw to remove the waste.
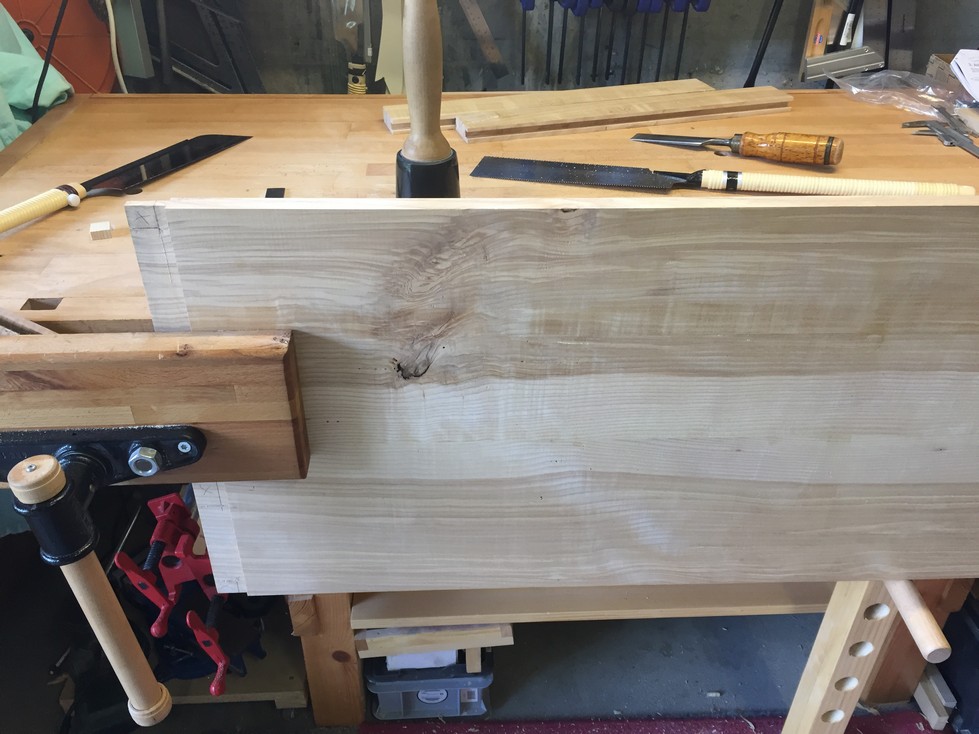

A little clean-up and the tenons are finished.

I’ve cut the BB ends oversize on purpose, this will give me some extra on each end to tap against when I’m installing and removing the ends during the final fitting. I mark the center of both the panel and the BB end, align them, and then mark where each tenon begins and ends. Since I’ve cut each set of tenons the same, I transfer the marks directly to the other 3 BB ends.

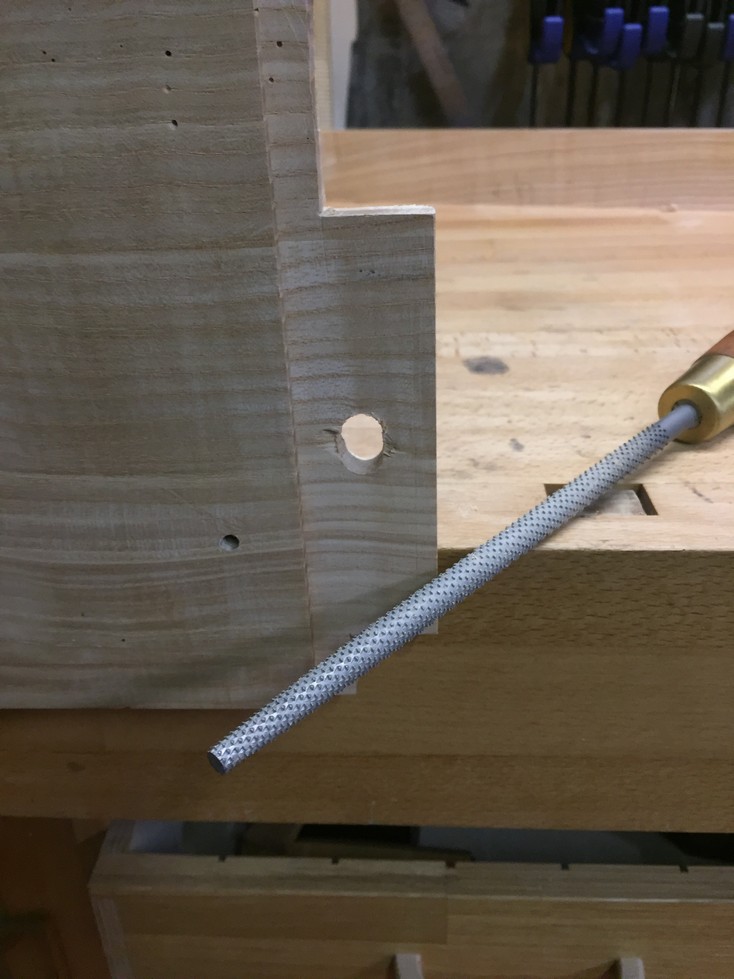
I cut a 10mm groove down the length of each BB end and then chuck a 10mm bit into the horizontal borer and use it to “route” out the deeper mortises. The center mortise will fit the center tenon snug however, the outside mortises are cut with an additional 8mm length (4mm on each side) to allow the panel to expand and contract on each side of the center tenon. For details on the setup and use of the horizontal borer, please see the chapter on frame joinery.
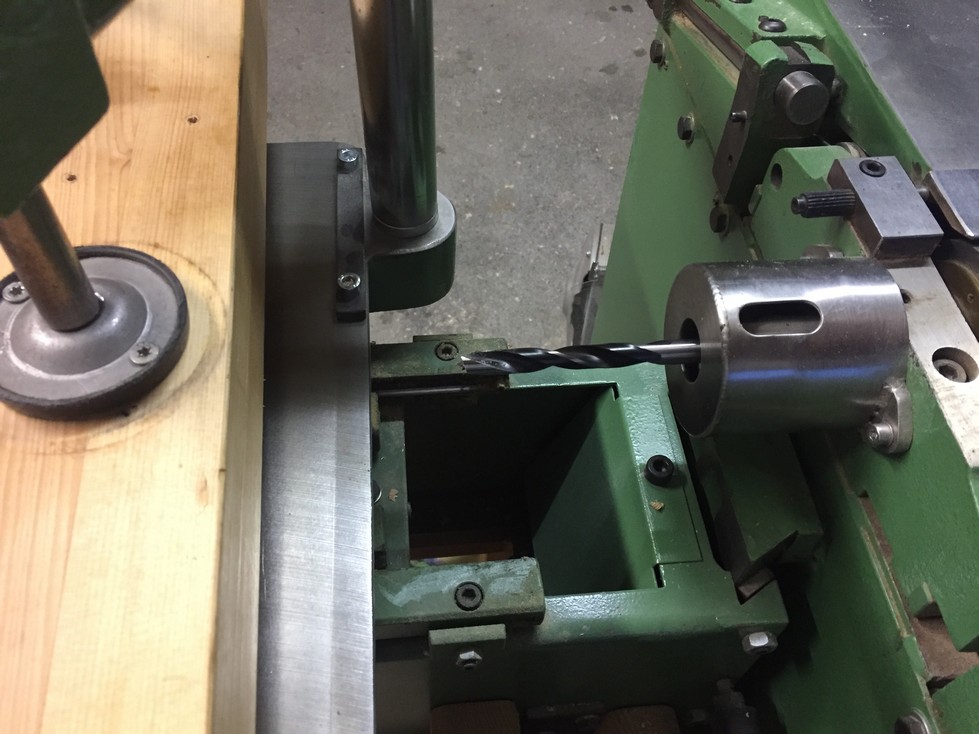
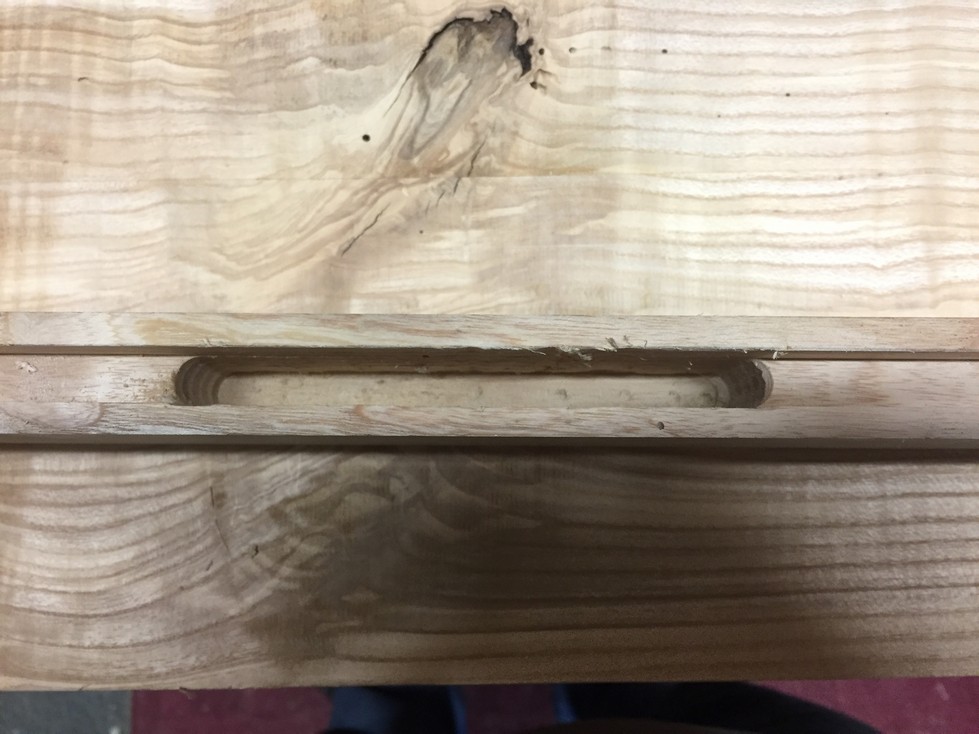
Using chisels (my mortising chisel was recently rescued from storage and needs some tuning up) I clean up the walls of the mortises. I’ll now need to custom fit each BB end individually to its mating tenons.
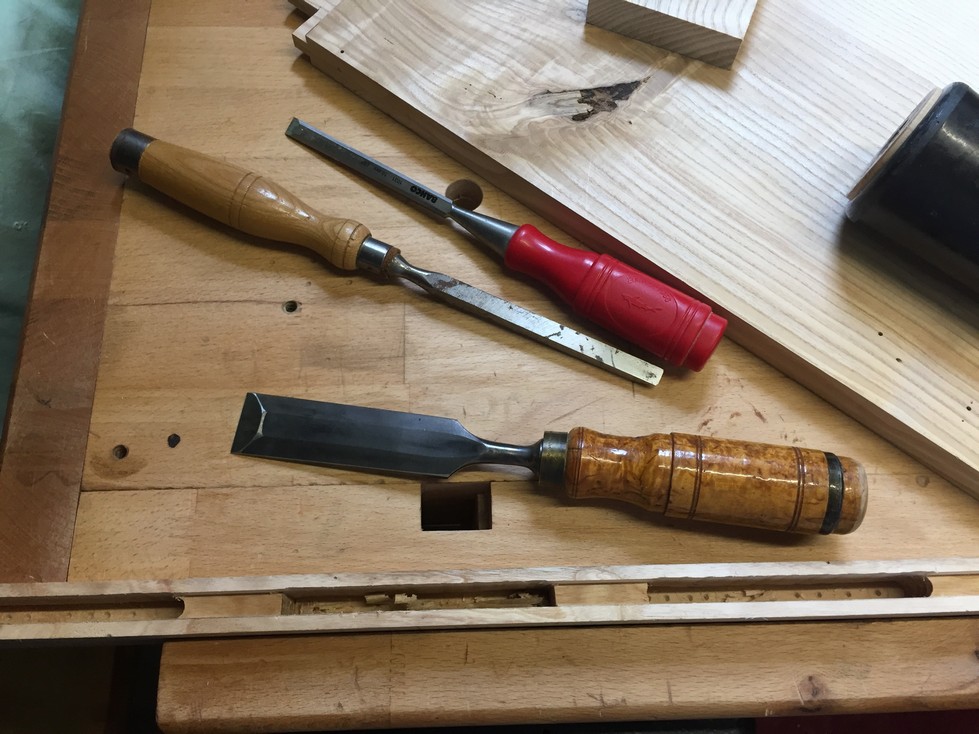
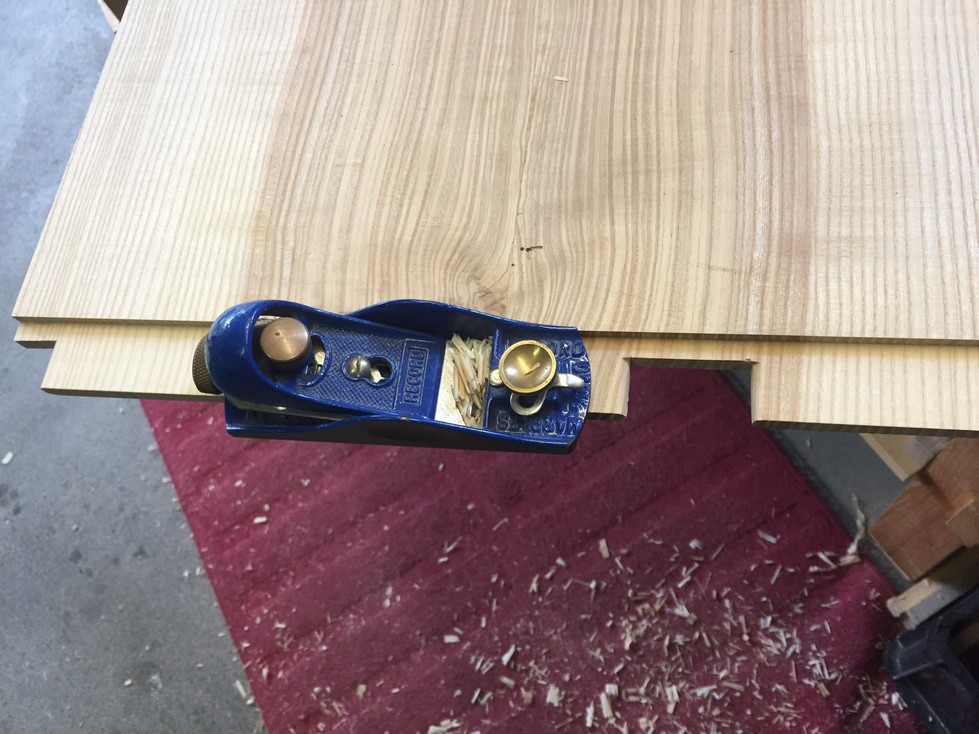
I find that it’s easier for me to adjust the fit by shaving the tenons lightly rather than try to shave the walls of the mortise. My bullnose shoulder plane has a skewed blade that cuts right up to the shoulder’s edge. I follow this with a few passes with my block plane to get the rest of the tenons. If I need to make more than a few passes, I’ll flip the panel over and take some shavings from the other side. This keeps the tenon centered.

Another simple and elegant technique the works for BB ends as well as other pinned joints is drawboring. I cut three holes for dowels in each of the BB ends positioned such that they are in the center of each tenon, then after installing the BB end, I use a brad point drill bit to make a mark on the tenon inside.
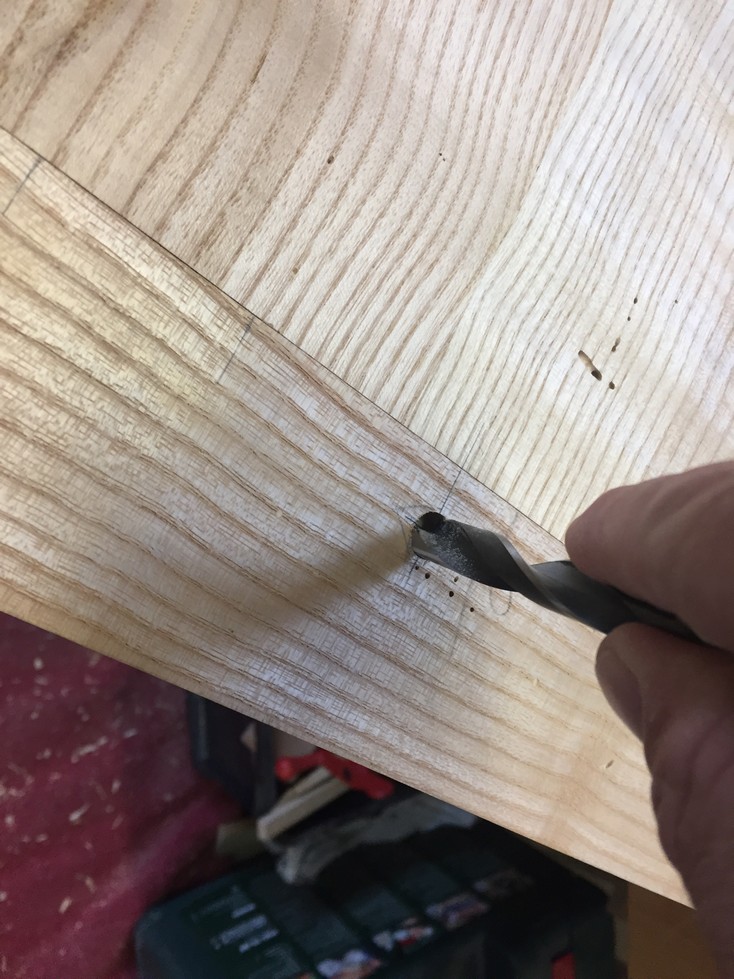
After removing the BB, I take my scribe and make another mark a little less than 1/2mm on the shoulder side of the original mark. Now when I drill the dowel hole in the tenon and install the BB end the holes will be a tiny bit off center so when the dowel is installed, it will pull the BB tight against the shoulder. Again, the center will be fixed but the holes on the outside tenons are elongated a few millimetres to each side with a round rasp to allow for panel expansion and contraction. Next, I glue the dowels in place but only the center one is glued all the way through. The outside dowels are driven in most of the way then, when I have about 10mm still to go, I wipe some glue around the dowel and tap it in another 5mm. This way the dowel is fixed, but the glue doesn’t interfere with the wood movement.
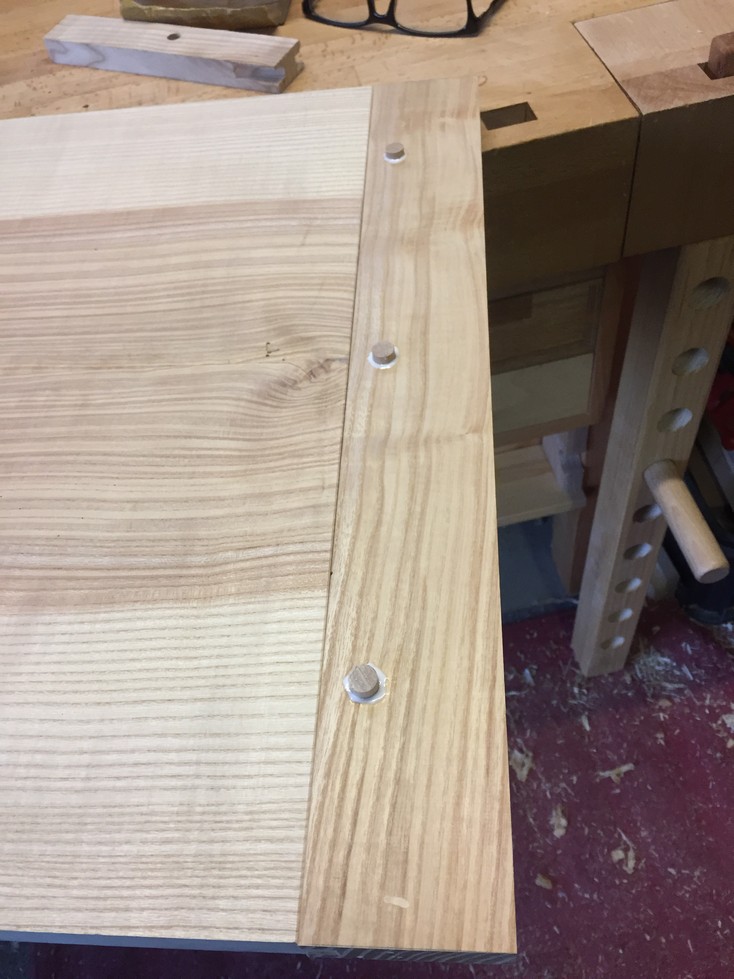
Finally, when the glue is dry, I trim off the protruding dowels with a flush cutting saw and smooth with my No. 4 plane. Phew! Both panels are now ready for hinges 🙂 .
Up Next: Mounting the Sewing Machine Lift
Leave a Reply