
It’s nice to have some extra help around the shop, but he’s so excited to start working that I’m glad that my floor is covered with sawdust and shavings 🙂 .
The doors are the last step before I start gluing things together. I haven’t glued up the carcass yet mainly because I’ll be using knife hinges and it is much easier (okay, less difficult) to cut the mortises for these while the frame parts are still able to be clamped to my workbench. These are offset knife hinges used when the door in question is inset into the frame and doesn’t overlap it: First, the doors. I’m paranoid when it comes to building doors because I had a door “twist” on me years ago. It didn’t help that I moved from New Mexico (38% average humidity) to Switzerland (77%). The first step to building doors without twist is to ensure the pieces are all 4-square. When preparing the stock for the door frames I took the pieces from rough to almost final dimension in three steps, allowing a couple weeks in between. I then brought them inside and kept them in my office for a week, then back down to the jointer for the final dimensioning. Even though these pieces are not quarter-sawn, after the first two jointing/planing operations I detected no movement.
A simple method for checking if twist exists is to use winding sticks such as my very crude ones below left. For short pieces, I just lay them on my jointer bed to check for twist. Also, if I clamp one end of them together the other end should have no gaps.
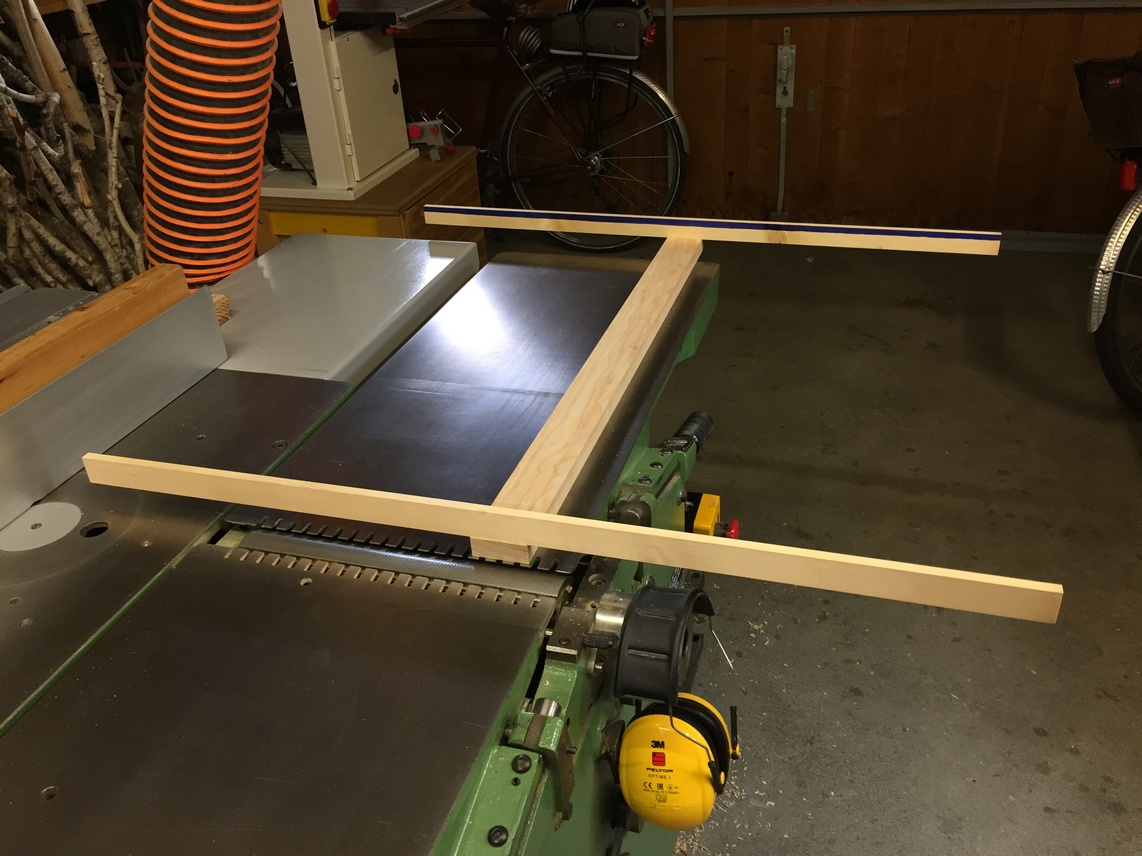
After determining the length of the tenons, I use a stop block on the tablesaw fence to define the shoulders of all 4 rails. A tenoning jig gets the cheeks cut close, but each one will need a custom fit to its mortise using the router plane.


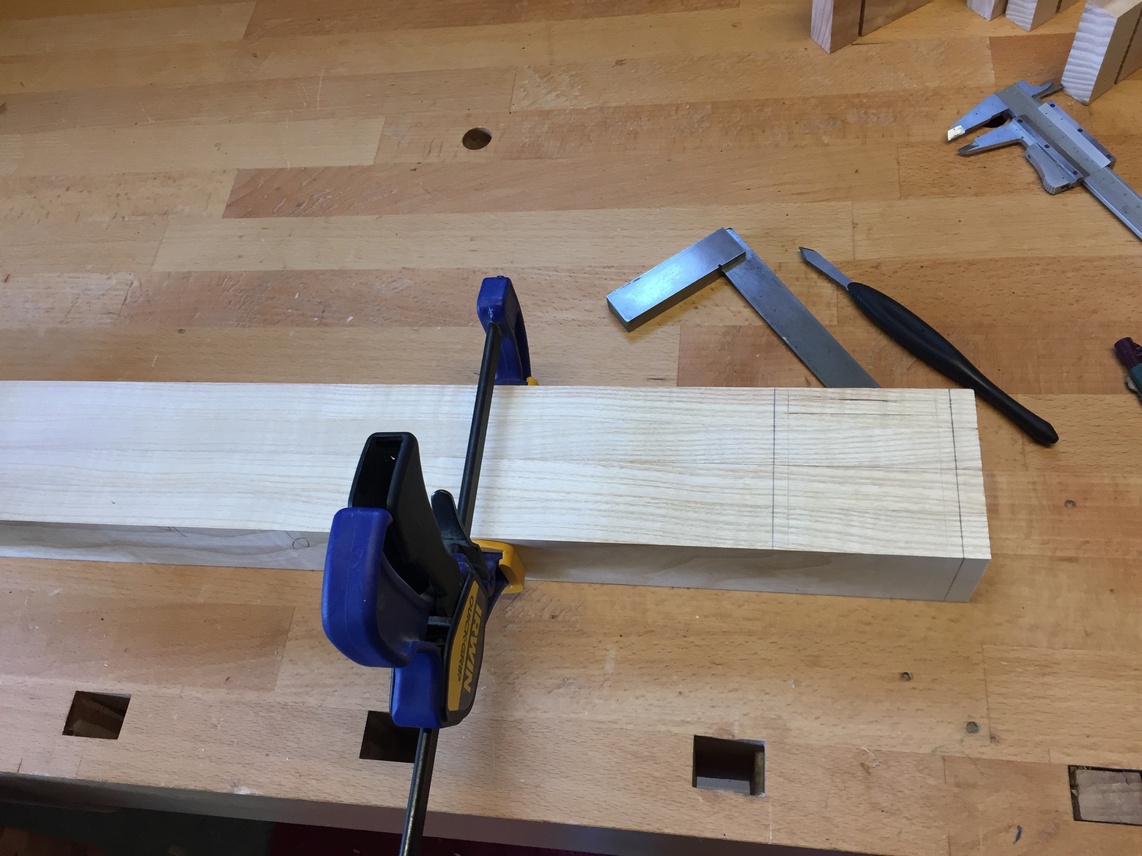
Speaking of mortises, just like I did for the big frame and panels I line up all four stiles and mark the locations of the mortises at the same time. I drill out the bulk of the waste before paring with the chisel.

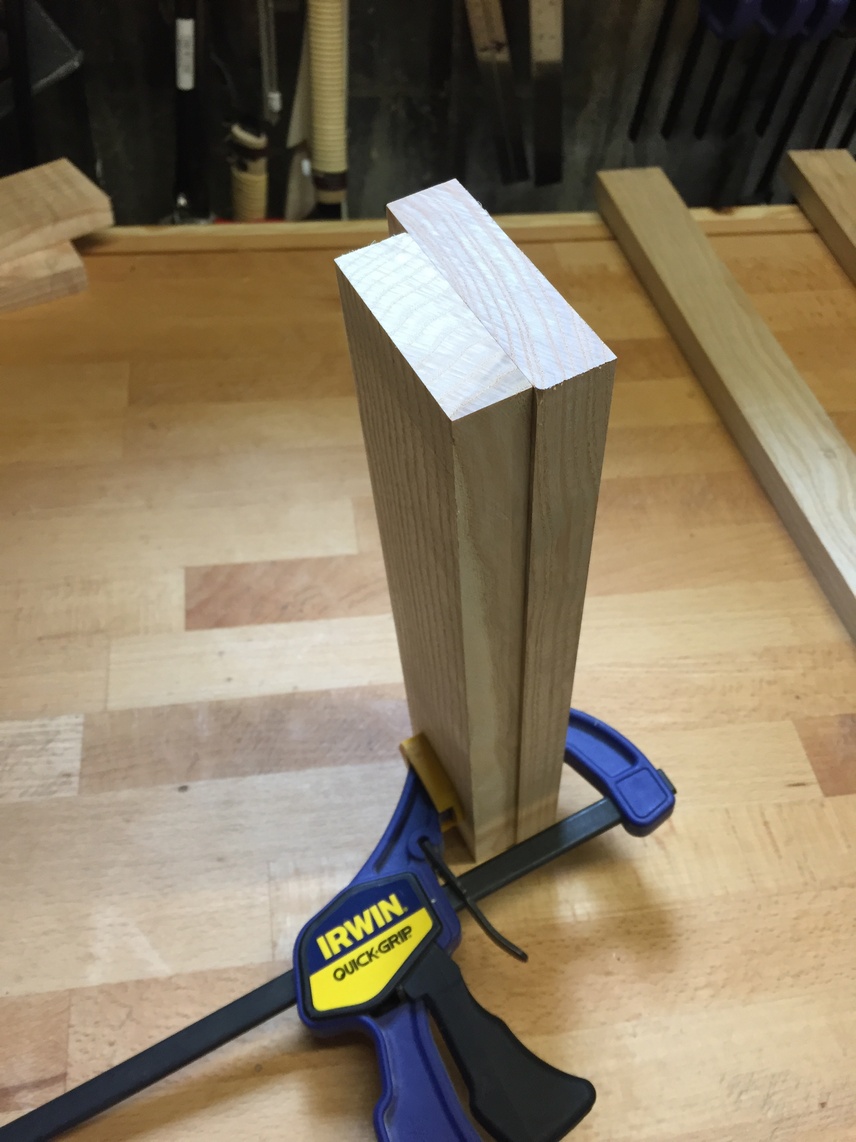
Again like before, I have made a scrap tenon piece to use as a guide for the chisel. The result is nice clean walls and a mortise that is perfectly centered. Once the mortises are cut, I make any necessary fitting adjustments on the tenon.

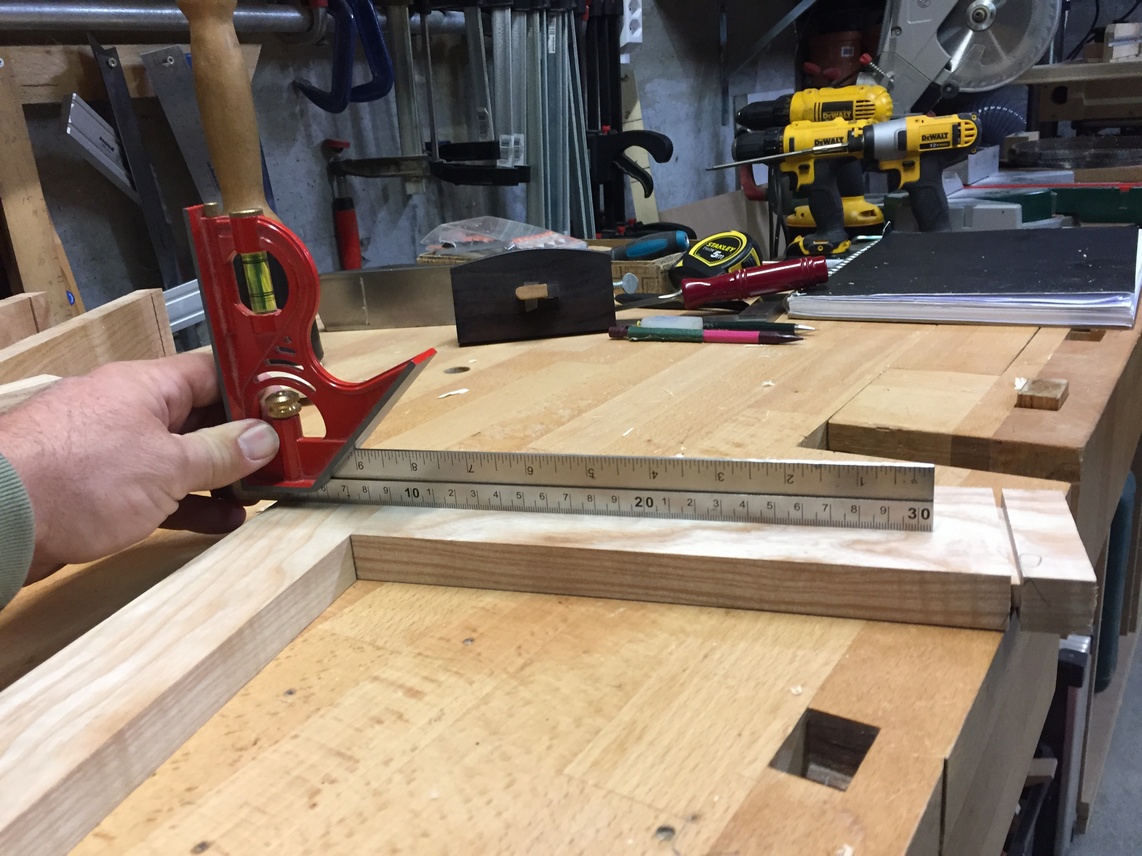
After final fitting of the tenon, I ensure that the shoulders show no gaps. Lastly, a straight edge lets me know if the rail is coplanar to the stile. Since I have recently flattened my bench, laying the pieces down and looking for wobble also works. All this to ensure that I’m not building any twist into the doors. Hopefully I can glue them up without inducing any errors with clamps!

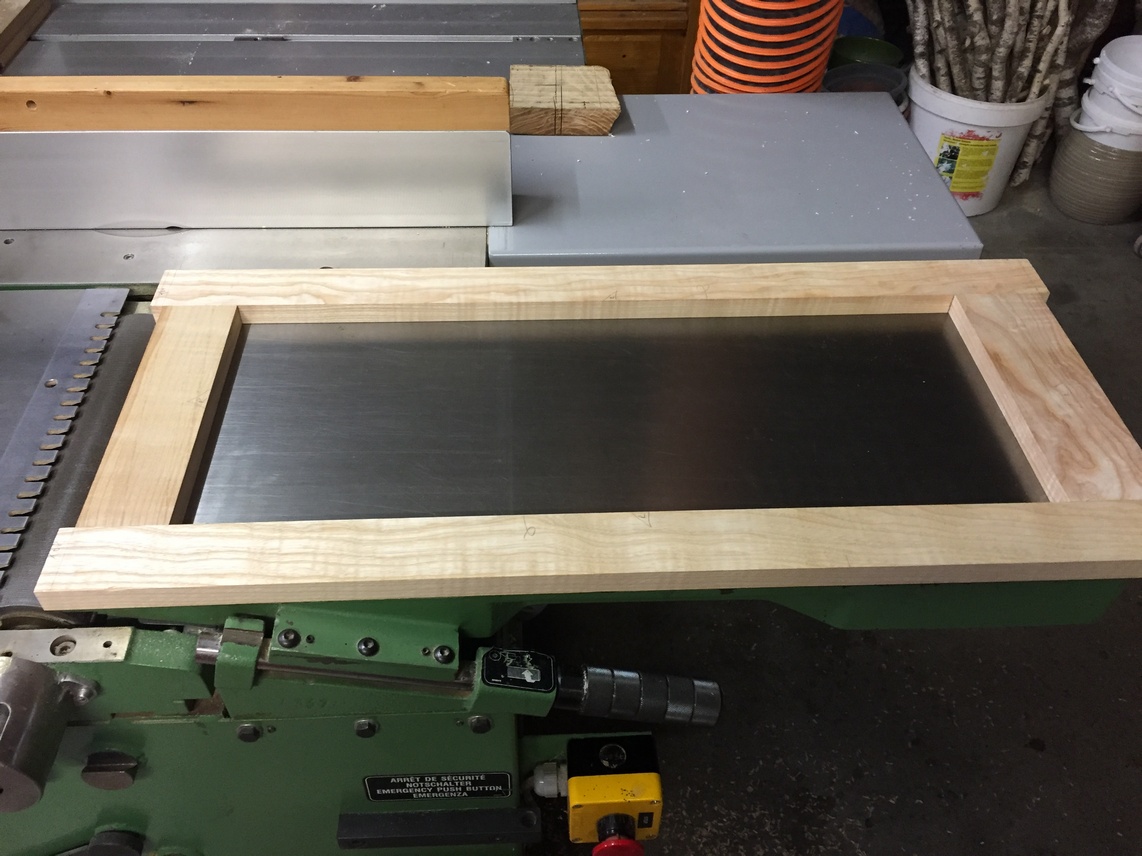
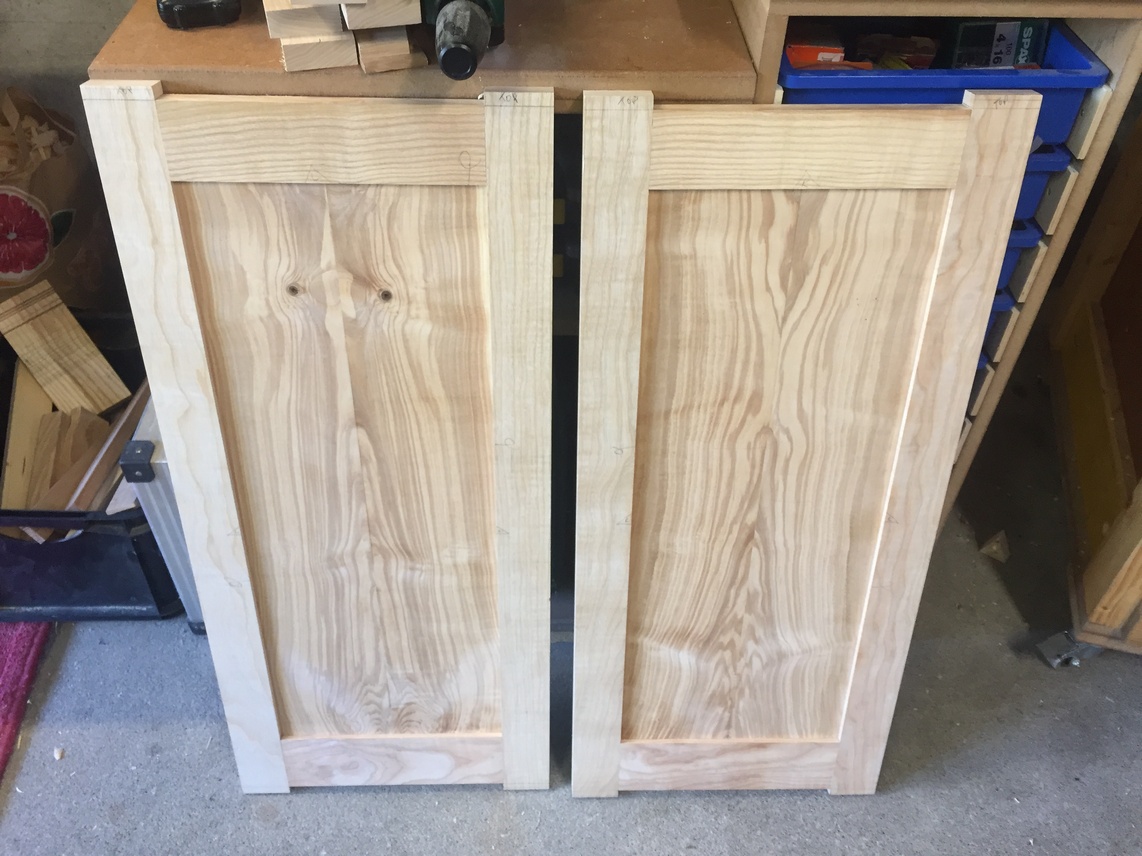
If I check and adjust each joint as I go, there is a better chance that when the door frame is completed, the whole thing will be twist free. This door frame just fits on my jointer table which is arbiter of flatness in my shop. The only thing that remains in the door construction process is to cut the panels to size and adjust them with a block plane till they fit just right. The top and bottom of the panels are flush with the inside of the rail groove but I leave 2mm on each side to allow for wood movement. The completed assemblies are now ready for stain and glue.
Detour into sharpening stone maintenance:
A while back I had purchased a Double-Time flattening stone which was inexpensive and worked very well to flatten the waterstones I use for sharpening. Every few sharpenings of a plane iron or chisel and I would use the DT to ensure the waterstone didn’t get dished out. It has a coarse side I use for my 800/1200 grit stones and a fine side that I use for my 4000/6000 grit stones. The problem was that I expected the DT to stay flat itself for longer than it did. About maybe 50 or 60 “flattenings” after buying it I started having trouble with my joiner plane digging in at each edge. After a fresh sharpening it continued so I put a straight edge to my sharpening stone and discovered a “hump” in the middle. This was caused by the DT becoming dished out.
I did some Googling and couldn’t find any preferred method for flattening of flattening stones, only lots of complaints about them not being flat. I did come across a forum post from a guy that just used the concrete floor of his garage to flatten the waterstones and didn’t even use a flattening stone. Wow, great idea. So I went to work (pic below left) until the DT was reasonably flat on both sides and then drew some pencil marks across it.
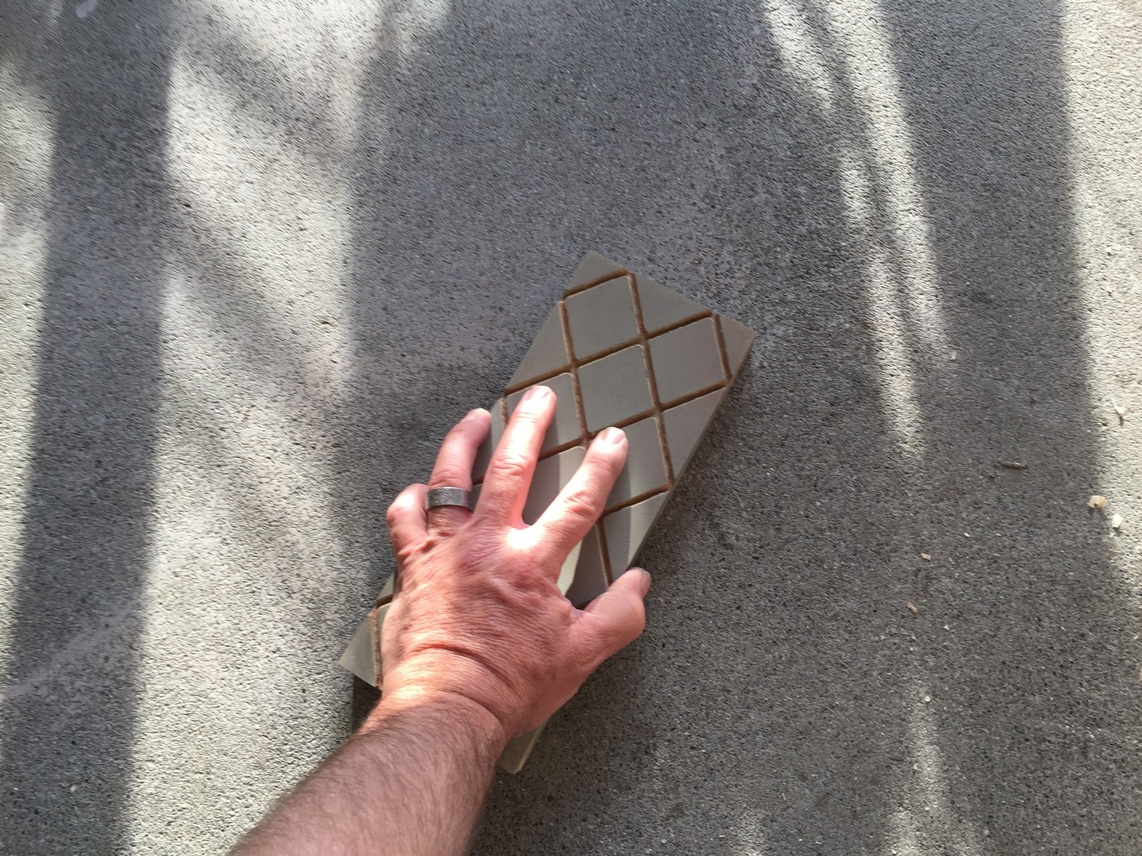

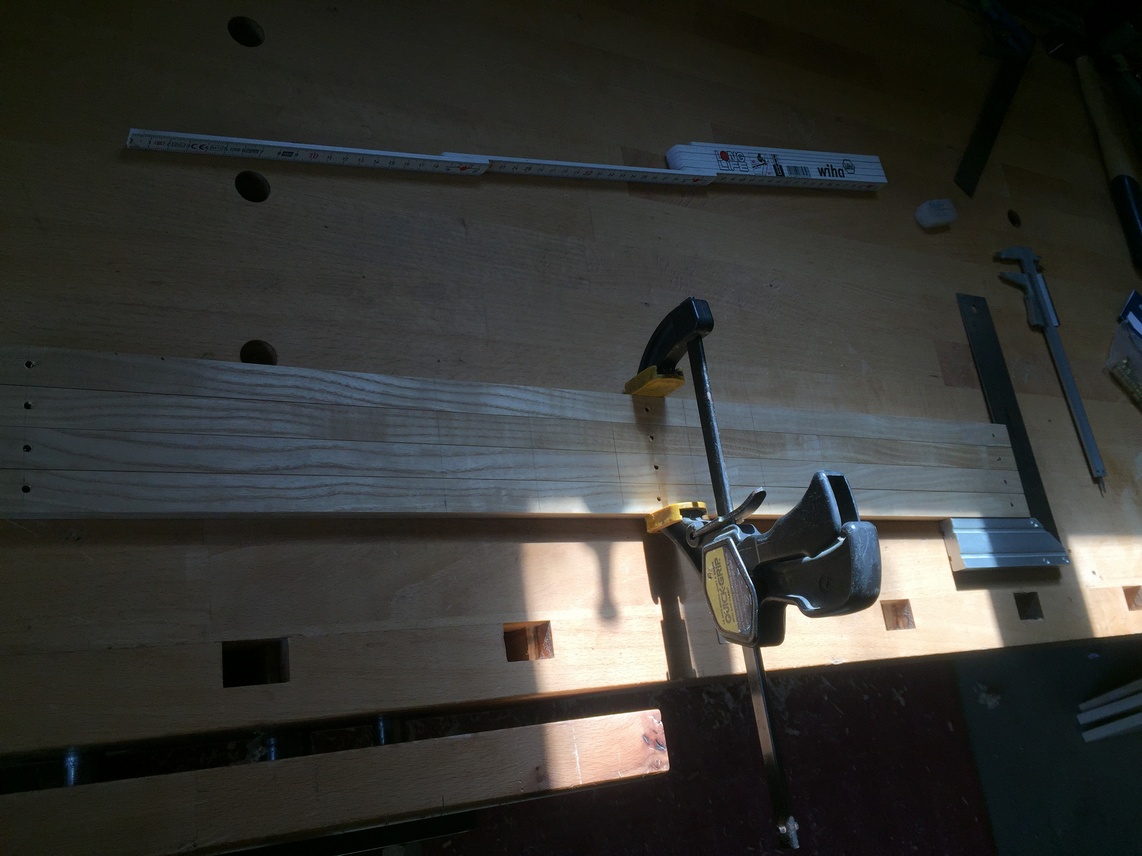
With a sheet of 100 grit sandpaper on the jointer table, I fine-tuned the DT until I was satisfied. The pic below right is fairly dark, but you can tell that I’m seeing no gaps due to out of flatness. I check the width and diagonals the same way.


A little water and a quick scrub and I’ve removed evidence of the process from the garage floor.

Verdict: This seems to be a more than acceptable way to keep the DT flat for someone that can’t spend $180 at a shot on a nice diamond plate such as the Dia-Flat. Chris Schwarz reviews it here. Yes, it’s quite a bit of scratch but frankly, the older I get the more precious my time becomes and as soon as I get tired of this garage floor procedure (or the DT wears out, which I’m expecting in the next year or so), I’m going to invest in the Dia-Flat. I messaged Chris recently and he responded that the Dia-Flat is still going strong 8 years after he first got one and I imagine he sharpens a couple of magnitudes more often than I do, not to mention the use it gets by students. That means my kids (or whichever one eventually takes up woodworking. I insist on at least one.) will still be using it decades from now.
Phew, now I can give my planes a quick hone and condition my scrapers for fresh burrs (I quit using a file on my scrapers and only use waterstones now).
Just a few more little things need doing before I start prepping the pieces for dye/stain. This is the time to think about anything that still remains to be done while I can still disassemble the carcass. The first of these are the pieces I will make for the shelf supports. I bought some very nice brass sleeves and supports from Brusso:


My original plan was to drill holes for the sleeves on the inside faces of the side assembly stiles but after thinking a bit, I decided it would be better if these were separate pieces that could be removed if necessary in the future. Since this is the new plan, I could do these later after the carcass is glued together but I would like to mark and drill for the attaching screws while it is still easy to do. At a minimum, I need the four pieces cut and the attaching points marked and drilled but I figure that while I’m at the drill press, I might as well drill for the sleeves while I’m at it.
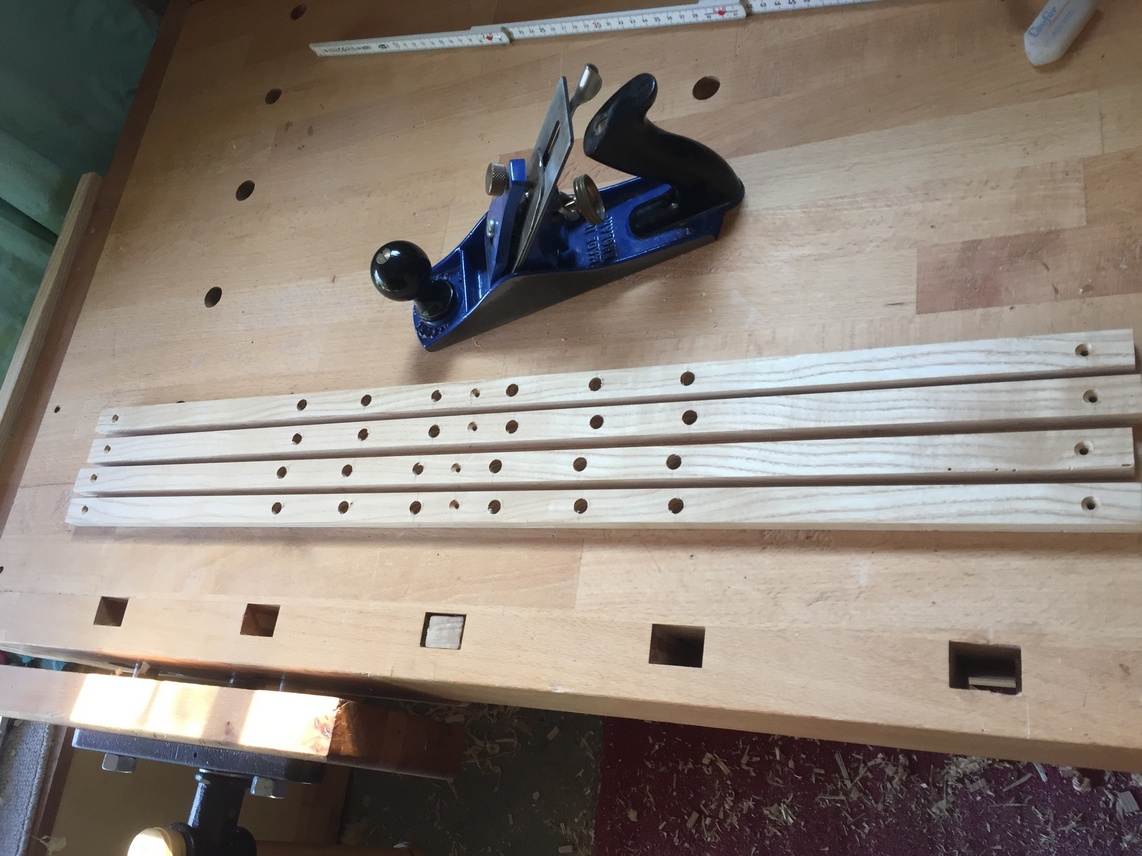
I cut four brackets approximately 75cm (the height of the inside cabinet) long and 2cm wide. The sleeves are 11mm so I plane the brackets to 13mm thickness. Accuracy is important for these brackets so clamping the pieces together ensures the marks are all the same. In addition, I use stop blocks on the drill press table and drill each position in all four brackets before moving to the next. Lastly, a couple of swipes with the smoothing plane removes the pencil marks and any ragged edges.
Next up is something that really does need to happen now and that is cutting the mortises for the door hinges on the corresponding rails. This would be extremely difficult to do (well) after glue-up. Knife hinges are not as easy as butt-hinges (or the cheap looking 34 mm standard cabinet hinges) but do lend themselves to a straightforward process. The most important part is to accurately position them. While I haven’t come across a definitive treatise on knife hinges, and I don’t plan on doing it in this post, the article here does a pretty good job of making it clear. The only difference is that I don’t use a router. James Krenov also gives some good hinge tips in his book The Fine Art of Cabinetmaking.
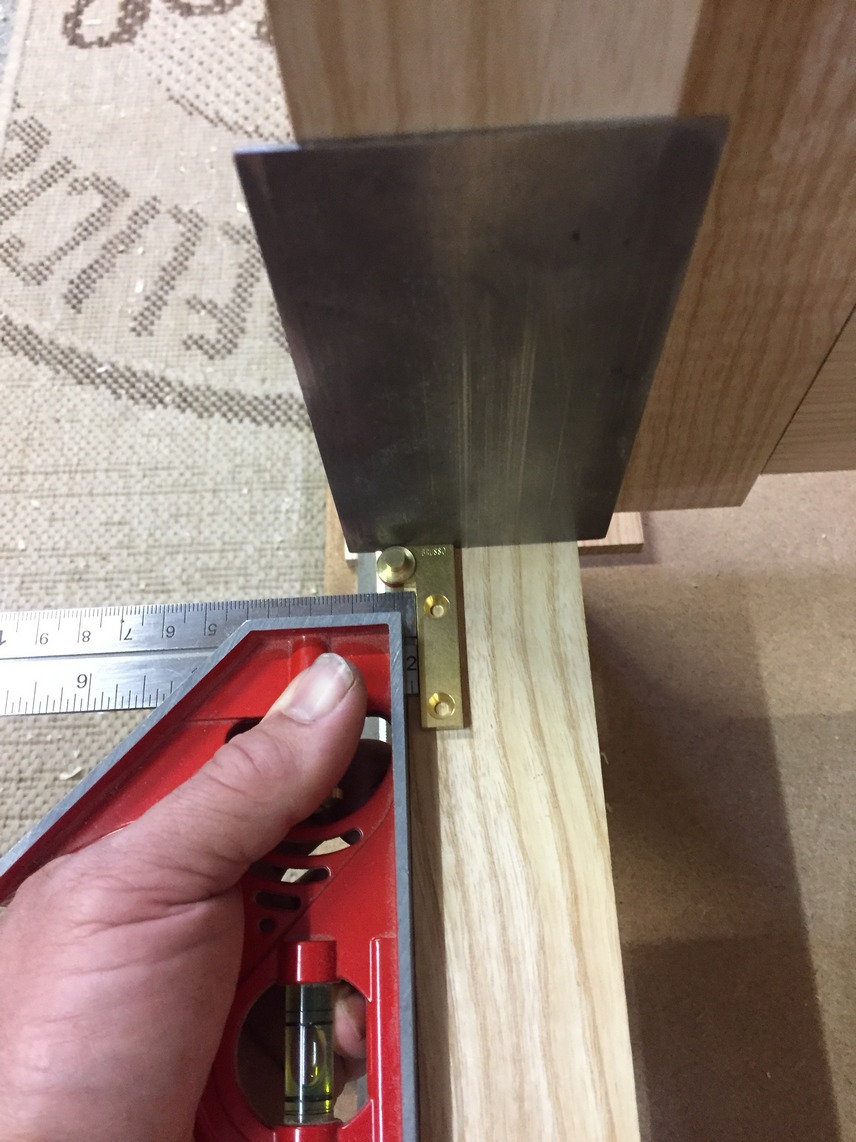
By measuring the integral pin spacer on the bottom leaf of the hinge, I can determine what my gap should be between the door and the carcass. In this case, about 2mm. One of my scrapers is 2mm thick so I use it as a spacer to position the end of the hinge leaf next to the inside face of the leg. At the same time, I want 3mm of inset on the rail so I use a combination square to set this. An important consideration is I want exactly the same 3mm inset when I cut the hinge mortises on the doors so I will leave the combi square set until I mark those out. I have a second one if needed for something else in the meantime.
Two small drops of super glue hold the leaf in place while I mark the rail, and then afterwards the leaf is easily popped off. I decide to do a practice mortise on a piece of scrap the same thickness as the door frame and clamp it in my vise flush with the top of the bench. This will help keep the wood from splitting as I chisel on the 3mm side.

I work slowly, alternating between defining the walls and paring out the waste until the hinge leaf fits flush with the edge of the scrap. By “choking up” on the chisel, my fingers provide a stop so that I can keep control of the cut.

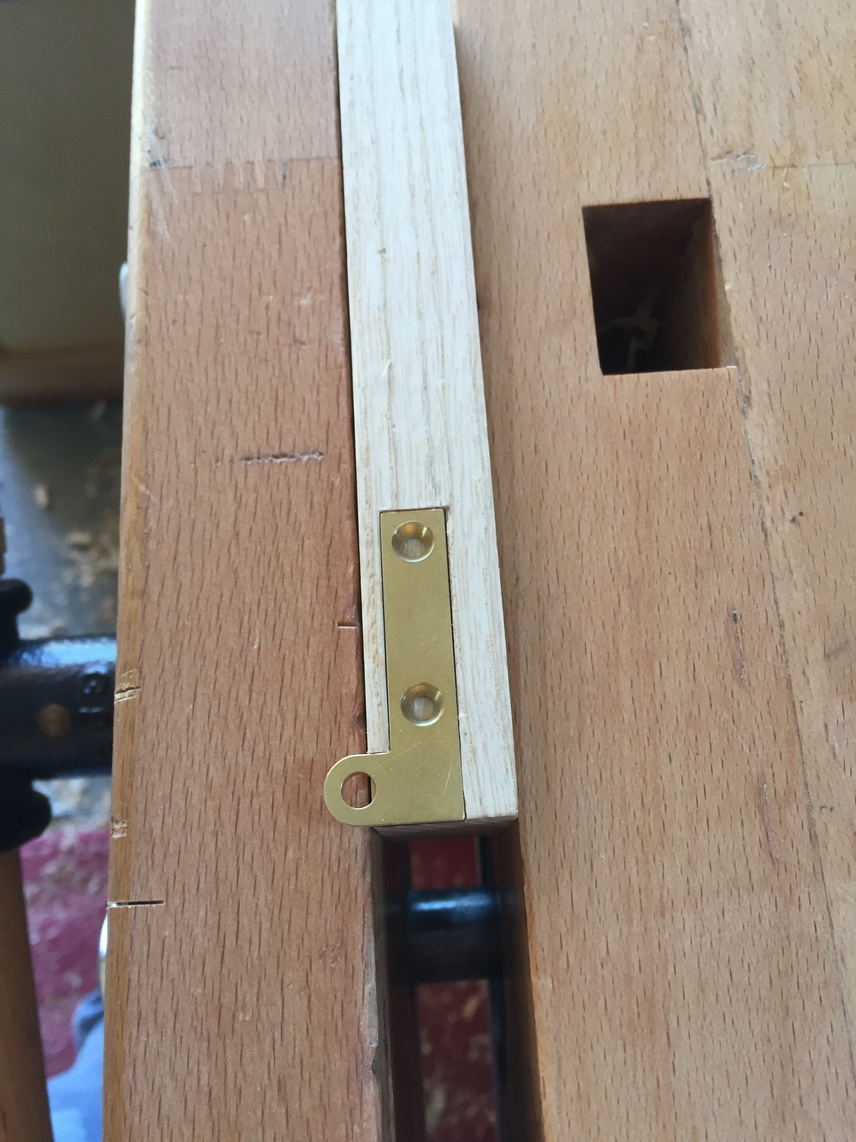
The other half leaf is still super-glued to the bottom rail so now I can 1) check that the front of my scrap is flush with the front of the rail and 2) check the gap between the leg and the end of the scrap.


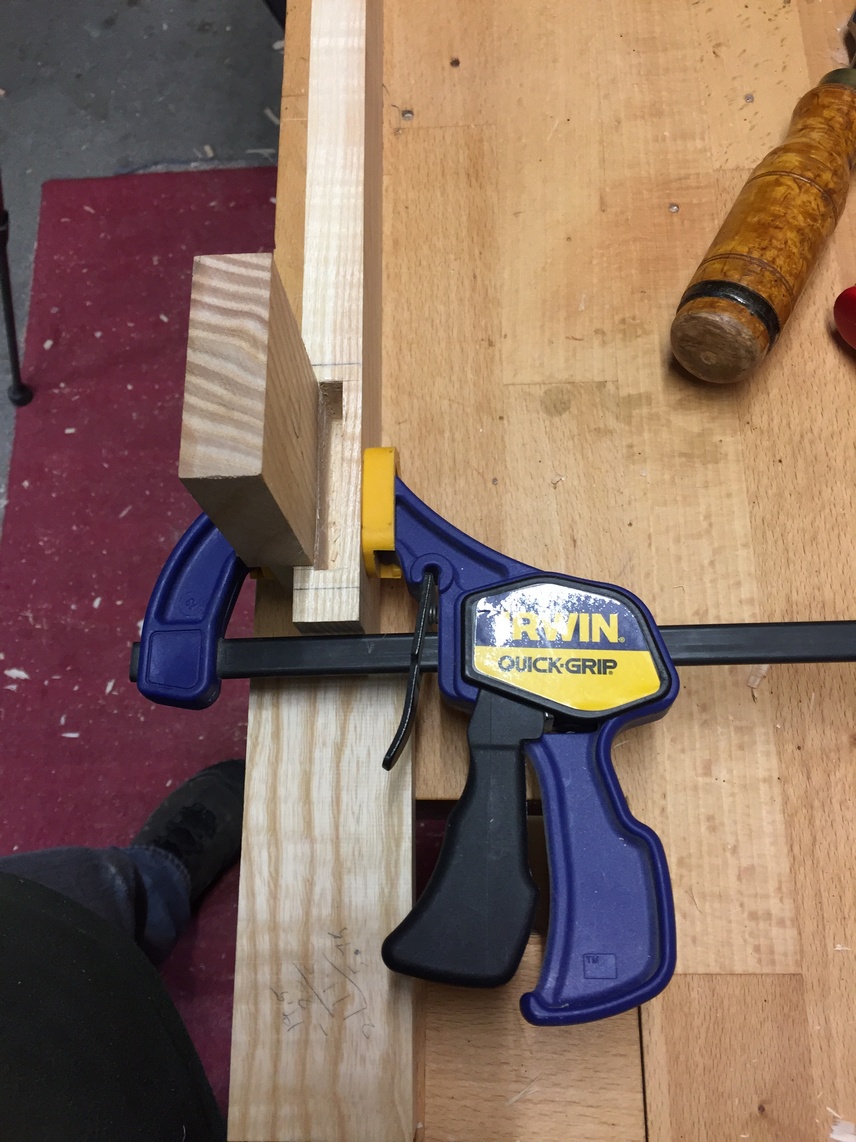
I’m satisfied with the test fit and now disassemble the rails so I can chisel out the actual mortises on the workbench. It looks like an elaborate set up but the clamped scrap on the side of the rail prevents me from blowing out the 3mm shoulder. Also, it might be difficult to make out, but there is a thin scrap piece positioned above the tenon so I don’t ruin the 2mm shoulder. It is well worth the extra trouble to avoid having to repair something if my hand slips! The pic below right is the other end of the rail. I’ve left a 1mm gap (on purpose) to allow for a small adjustment if necessary and this is also why I won’t drill the pilot holes for the screws until the door is actually fitted.


Knife hinge verdict at this point: in the future, try to design in a larger shoulder than 2mm 🙂 . Oh, and the Brusso hinges are leaps and bounds better than the cheaper alternatives. For an operation that is as critical as installing knife hinges, you’ll do yourself a favor by getting quality hardware!
Next Chapter: Prep the parts and apply the dye/stain.
Leave a Reply