
The actual construction phase is nearly done but so far, none of the major parts have had glue applied. This was a good decision as it was necessary for me to insert and remove web-frame parts a number of times to get the fits just right, especially for the dividers, which I had some slight difficulty with. For any professional woodworkers reading this post (why would you be? 🙂 ), I’m sure you’ll have a chuckle, but at the time it sure seemed like a straightforward process…..

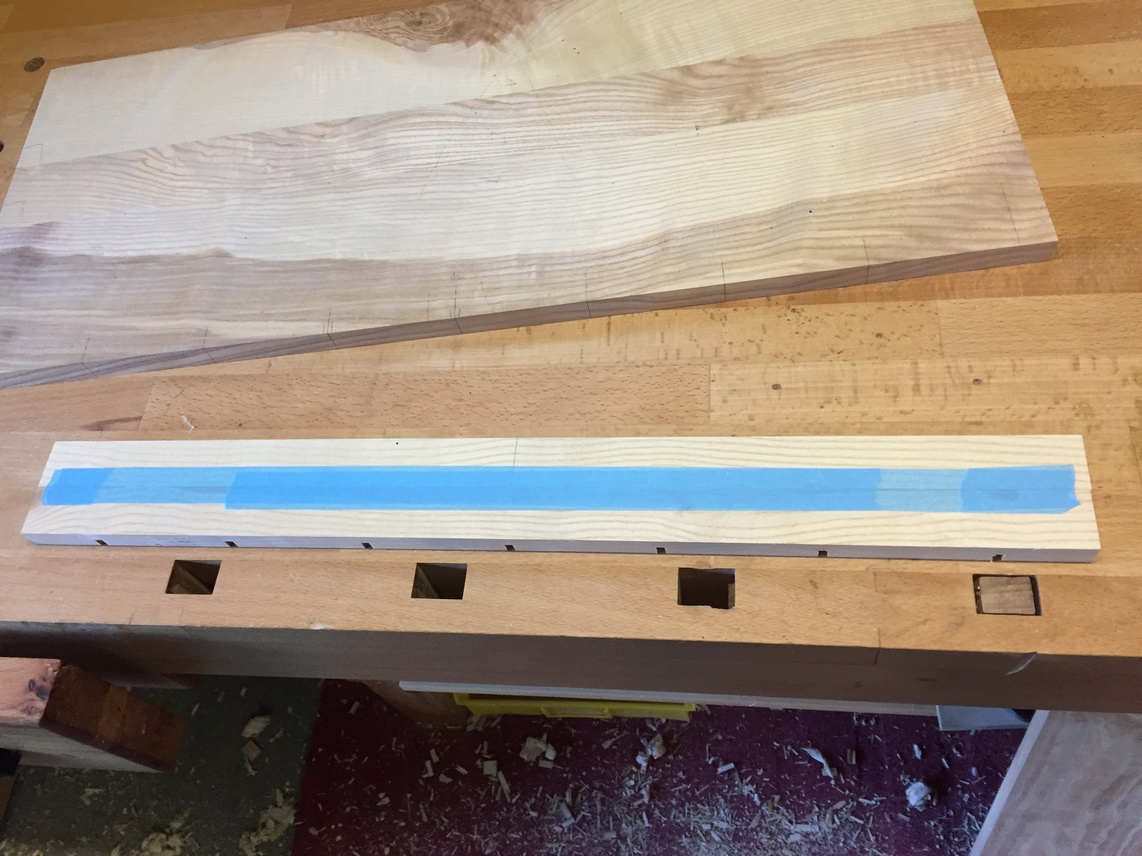
So here was the general challenge: to cut 7 evenly spaced grooves in three pieces of wood, none of which are the same length, and without a dado blade (from my reading, they’re not actually forbidden in Europe but their use is discouraged due to safety issues; to the point that you can’t buy a tablesaw with an arbor long enough to mount a dado stack). The grooves are 5mm wide and my tablesaw blade is 3mm thick. The shelf that holds the bottom of the dividers is the full width of the inside carcass. Two auxiliary pieces, one front and one rear, will be mounted to the top web-frame and have grooves to hold the top of the dividers. These two pieces, while theoretically should be the same length, are about 3mm different (don’t ask why). So after thinking about this for a while I was resigned to resetting the tablesaw fence 7 times and aligning with the blade by eye.
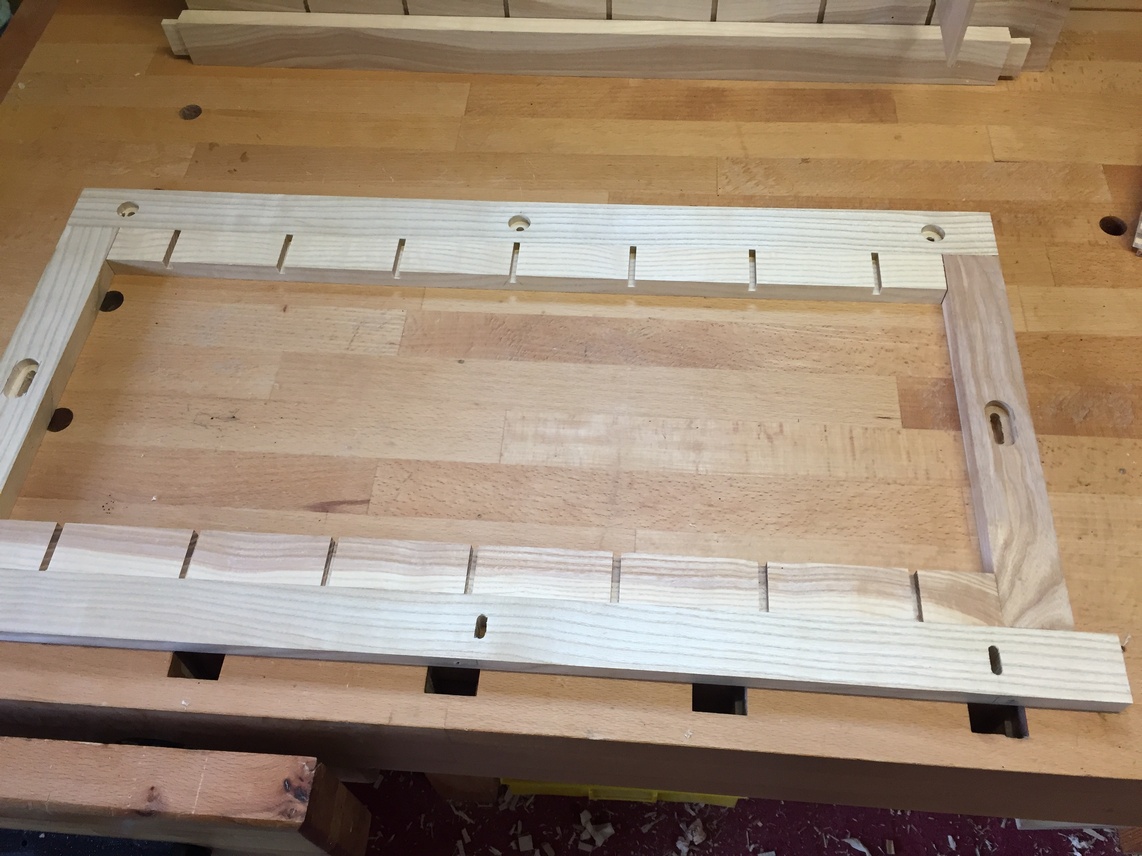
To help matters a bit, I measured the center-to-center dimension of the grooves (86mm) and cut myself a piece of scrap that same width to use as a spacer. After setting the fence for the first cut, I could use this spacer to set up the second cut. I then decided that the way forward would be to find the exact center of the bottle shelf and use that as my reference for the grooves on either side. Then, I marked the center point of the two top pieces and taped them together. Measuring from the center, I marked for 3 grooves on either side and then marked the 5mm width of the groove.
The idea was to set the fence in order to align the left side of the blade with the left side of the groove, slide the piece 2mm to the left and align the right side of the groove with the right side of the blade (bye hand and eye). I hold that in place, turn on the saw, cut the right half of the groove, slide the piece up to the fence, and cut the left side of the groove. Now to do this 6 more times. By putting the spacer against the fence, it sets up the right side of the next groove. This way I only have to reset the fence 4 times instead of 7. The result is two pieces, centered on each other, with the 7 grooves cut.
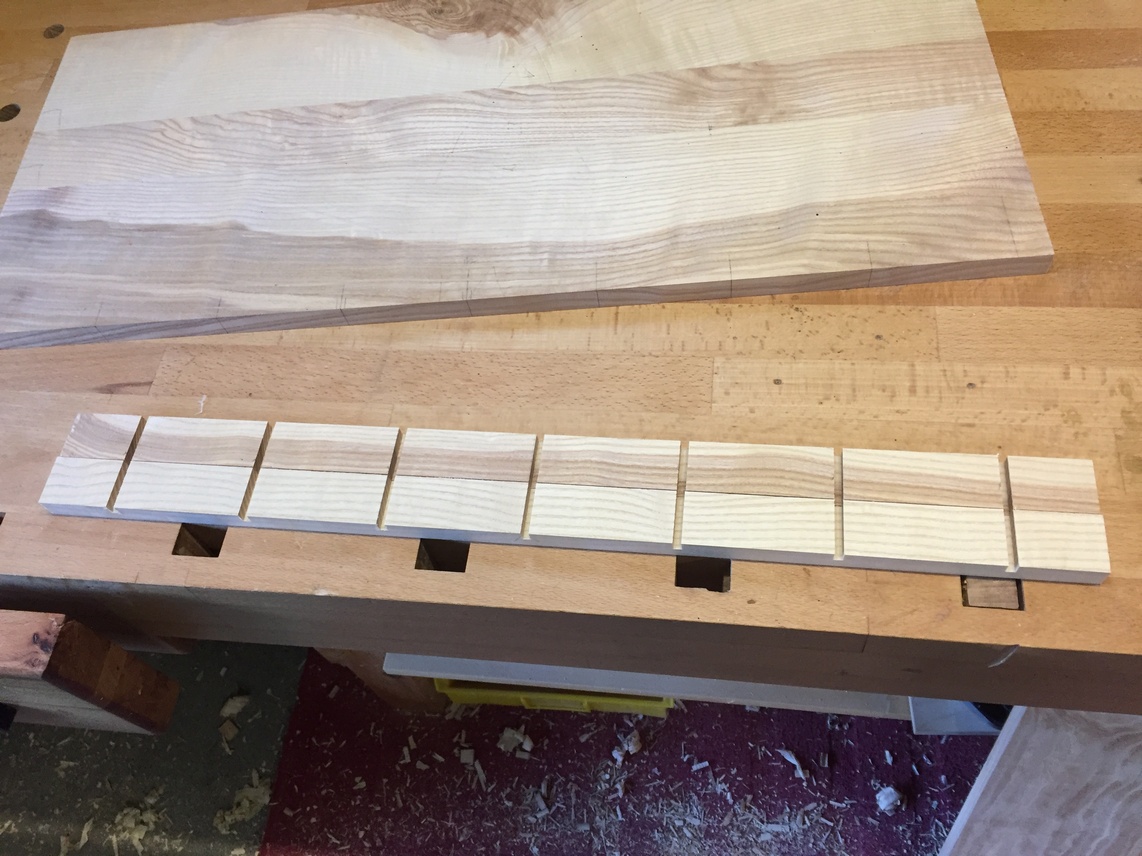
As you may have guessed, I could only cut the center and 3 other grooves with enough of the wood registered against the crosscut guide. After that, I flipped the taped pieces around 180 degrees to cut the remaining 3 grooves.
I pulled the tape off and used the front piece as a guide to line up the blade to cut the grooves on the shelf piece. Aligning the two center marks, I taped that to one edge of the shelf. Now I can use the existing grooves to align, then, flip the guide piece out of the way while I groove the shelf in the same manner as previous.

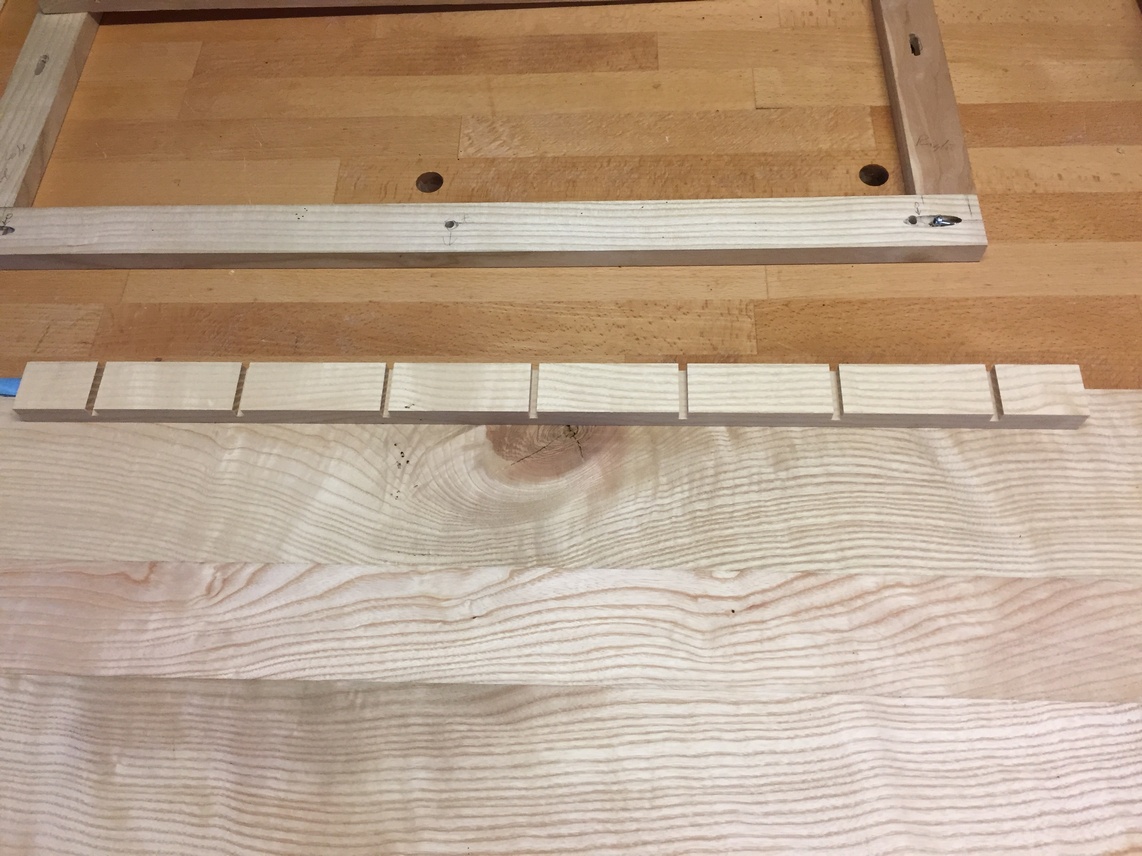
Obviously (or maybe not), the front and rear edges of the shelf have to be exactly parallel so that when I flip it around 180, the last 3 grooves will be spaced exactly the same as the first 4. If I had registered my markings from the end instead of the center, the shelf would have to be perfectly square.
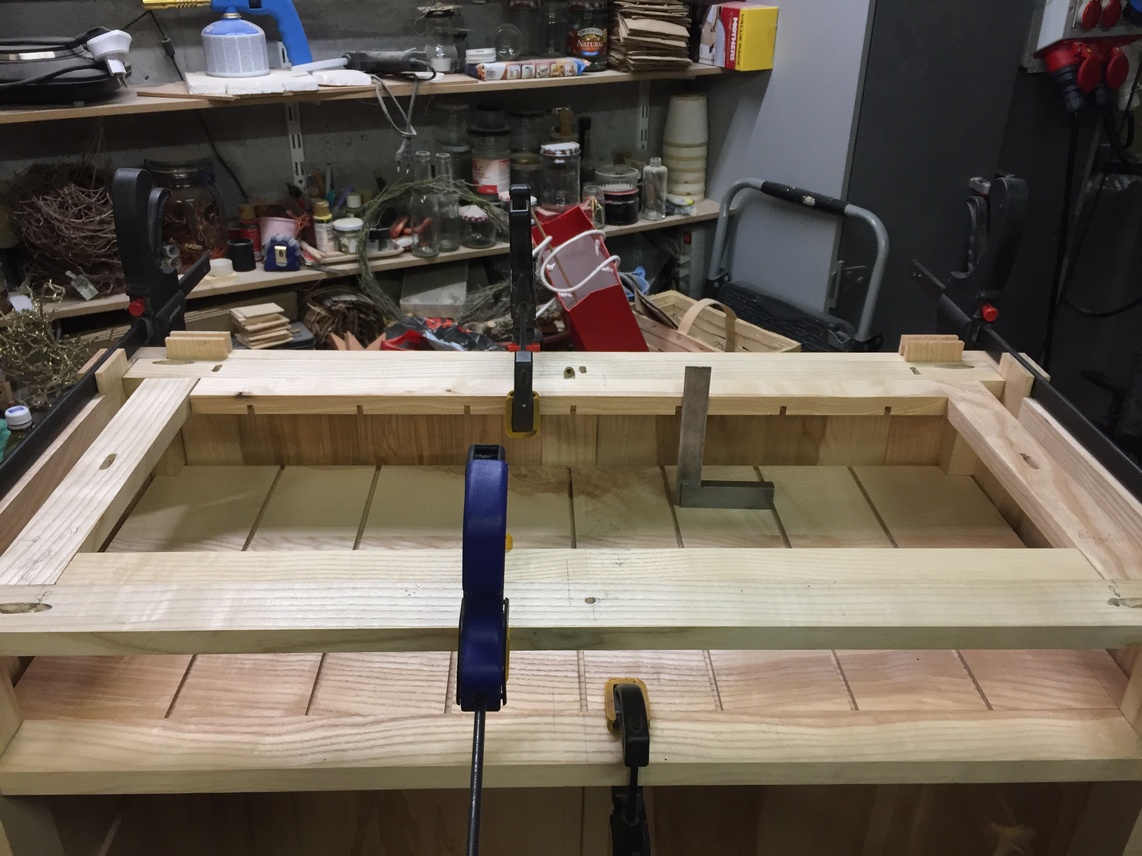
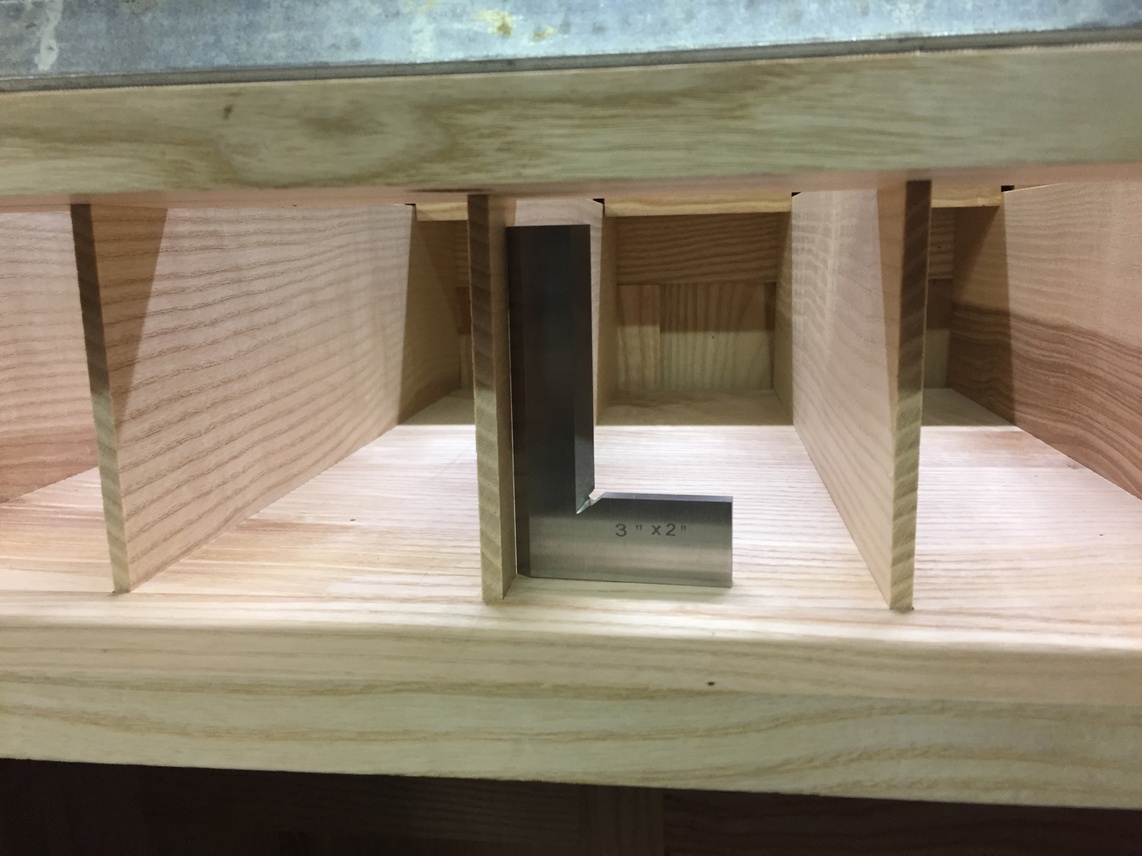
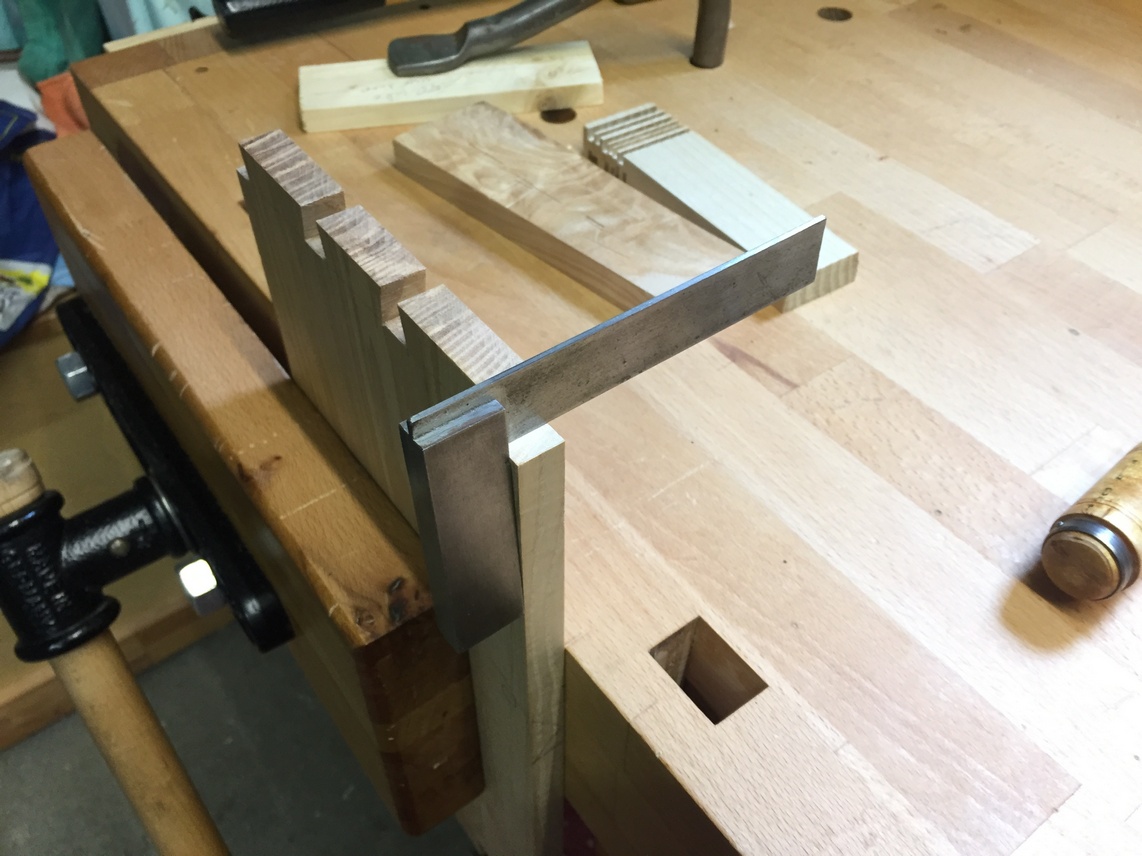
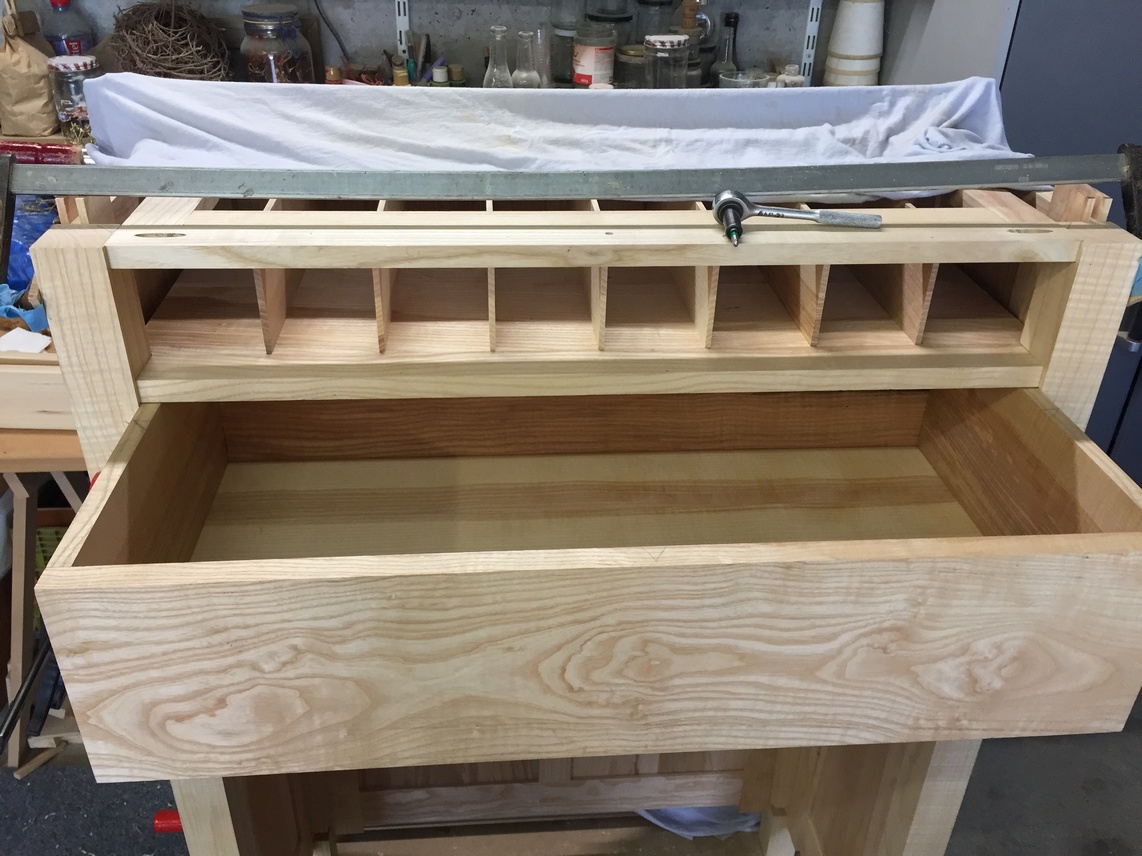
And now I can clamp the shelf in place as well as the top frame and see the result of my efforts. You’ll notice the square in the picture below right that shows the alignment of bottom groove to top groove is spot on. I’m sure there is a better way to have done this, probably with a router, but I only use that when I absolutely have to.

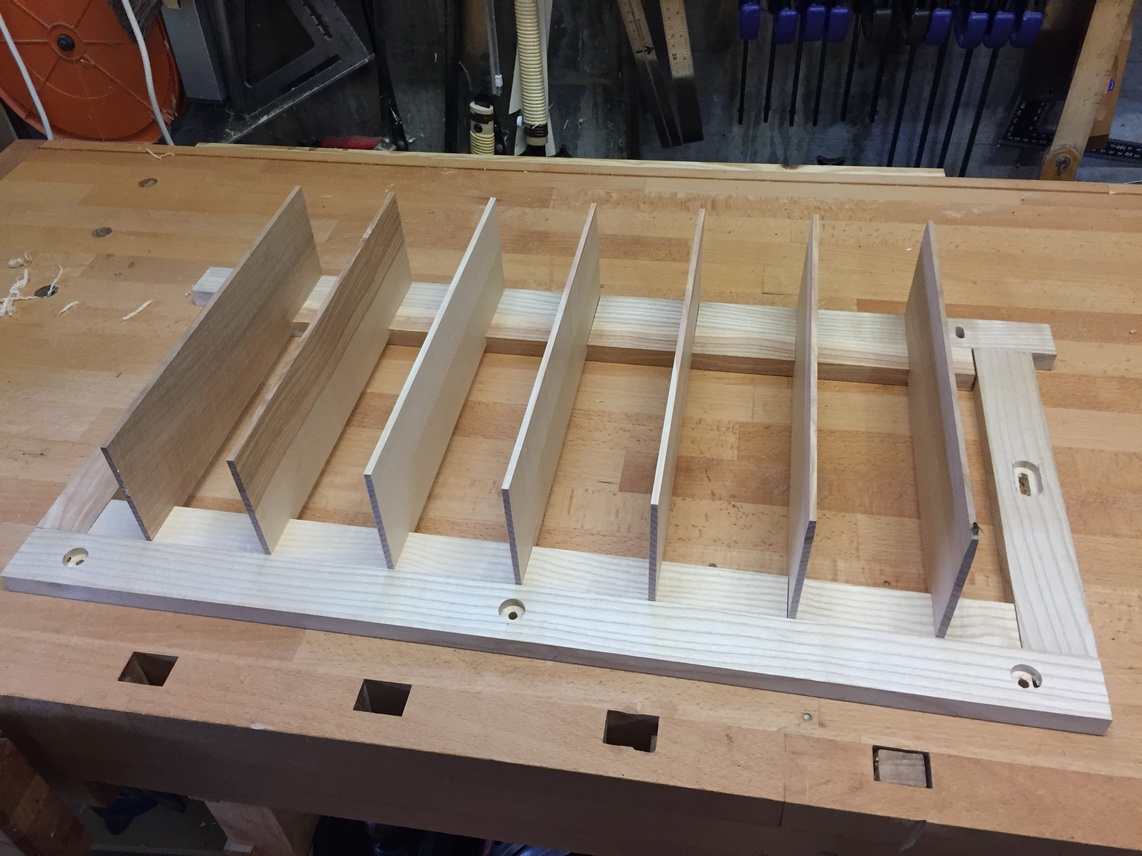
The rest is pretty direct. I’ve planed the dividers on the machine down to just over 5mm thick. I can fit each one specifically to its’ groove by using the block plane to take off a few shavings until it just fits. Of course I label each divider so I don’t get them mixed up!


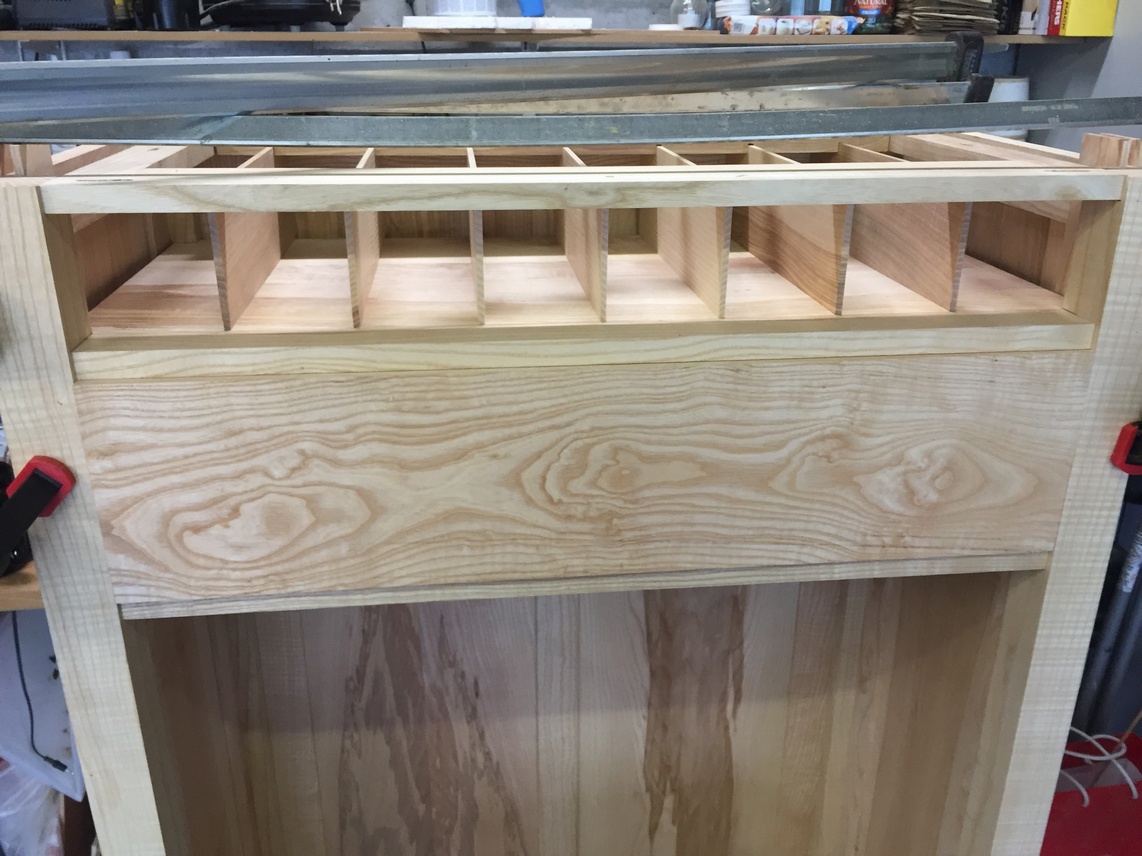
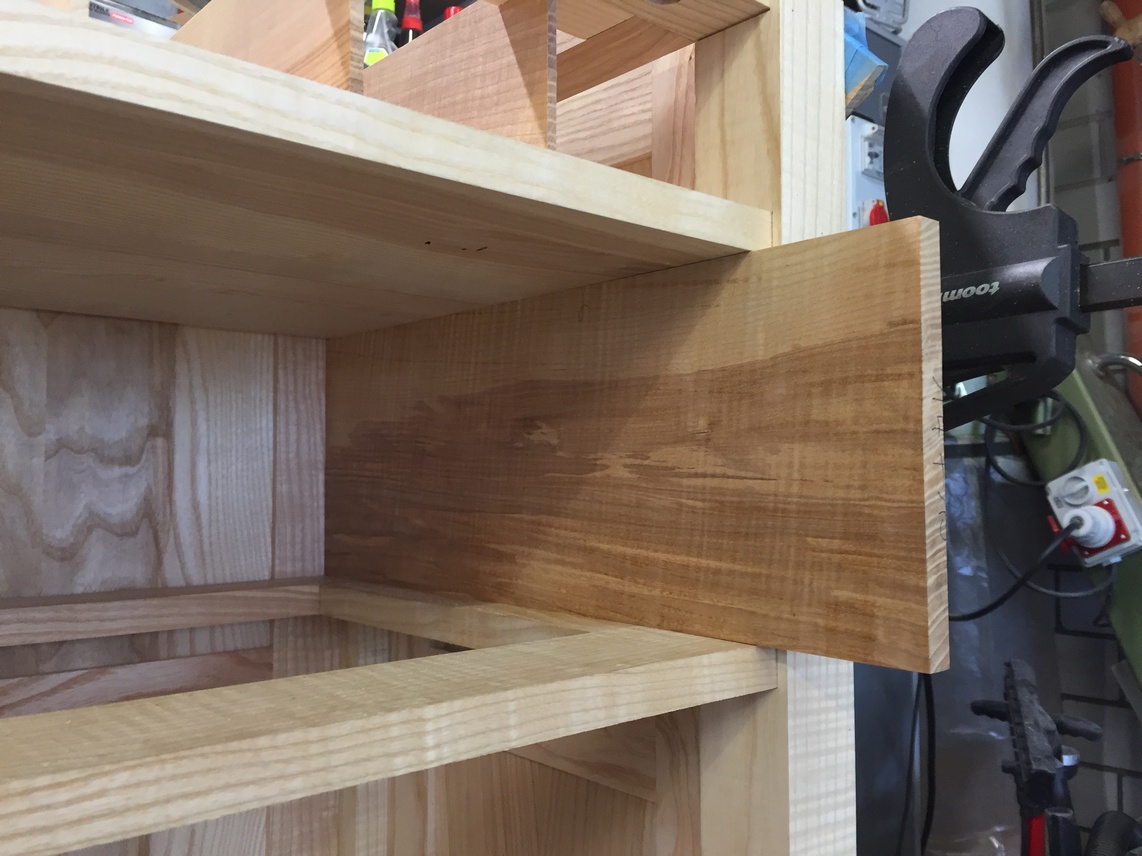
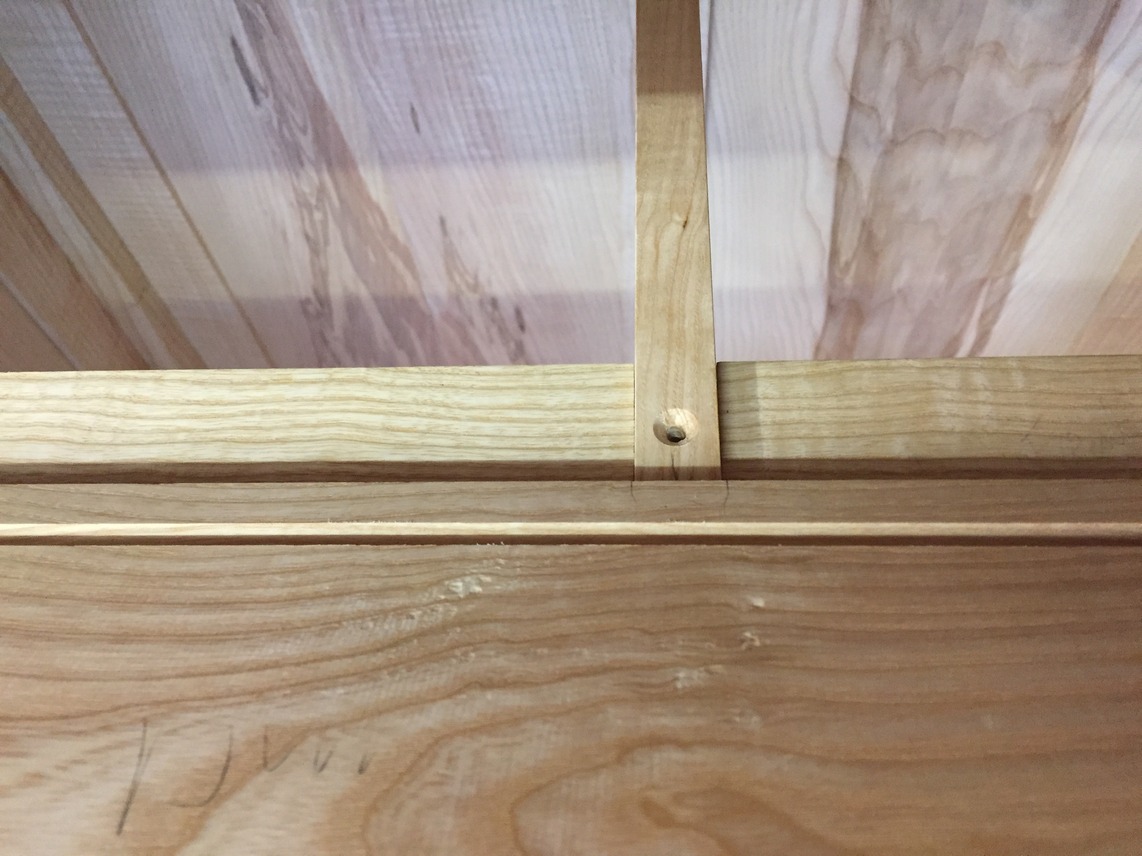
When they all fit into the bottom grooves, I do the same so that they fit into the top grooves as well. If you study the two photos below carefully, you’ll see where I made a goof. On the left is the glued up top frame, but I wanted the dividers to reach all the way to the back (notice that there are no grooves in the rear frame member, the one with the elongated holes). So I needed to extend the grooves through that piece. Set up, align, cut, repeat 6 times. Sigh. The photo on the right shows the finished assembly with all the dividers fitted.
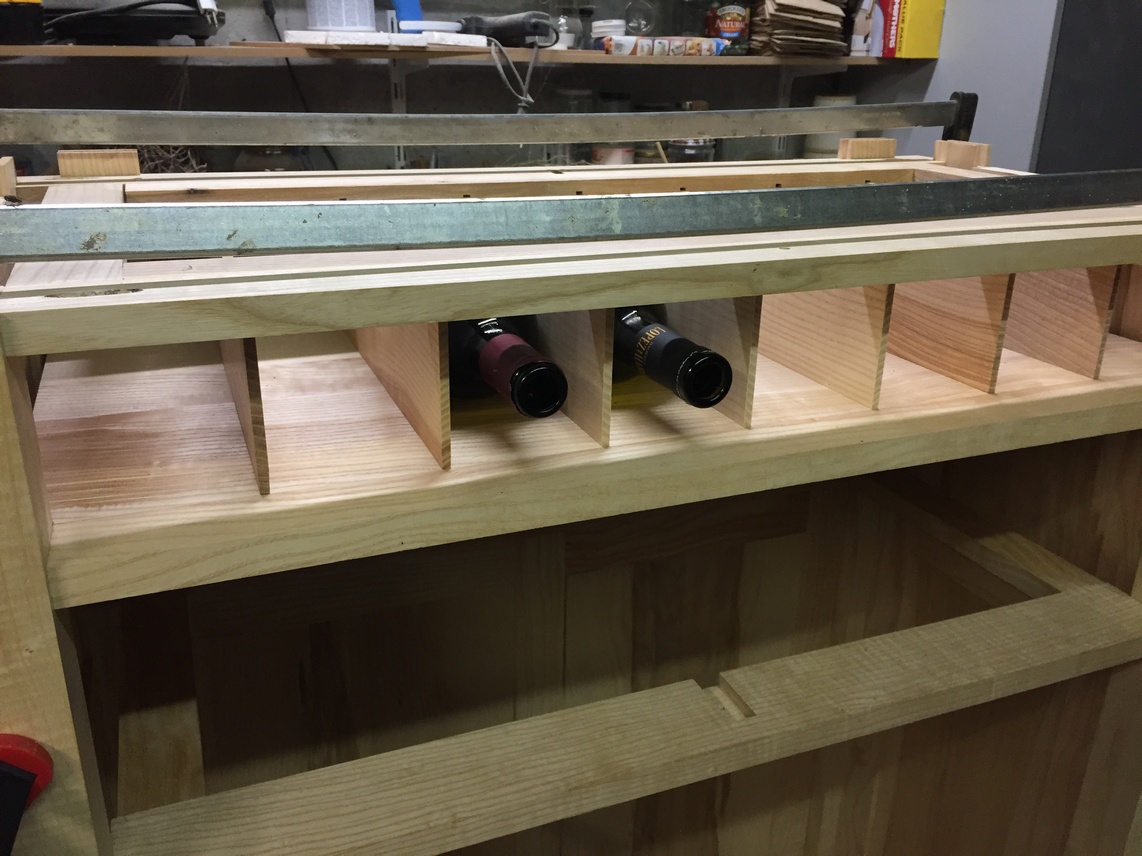
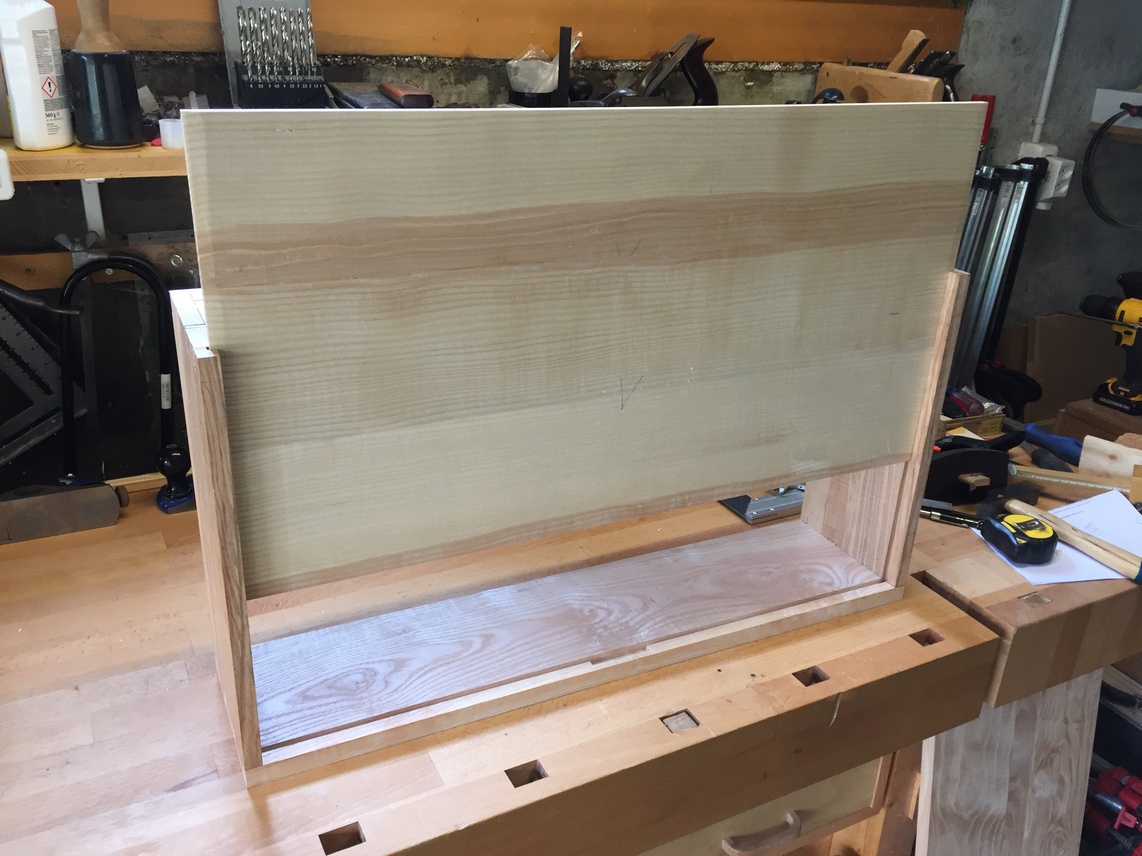
With everything clamped in place I’m pleased with the outcome.
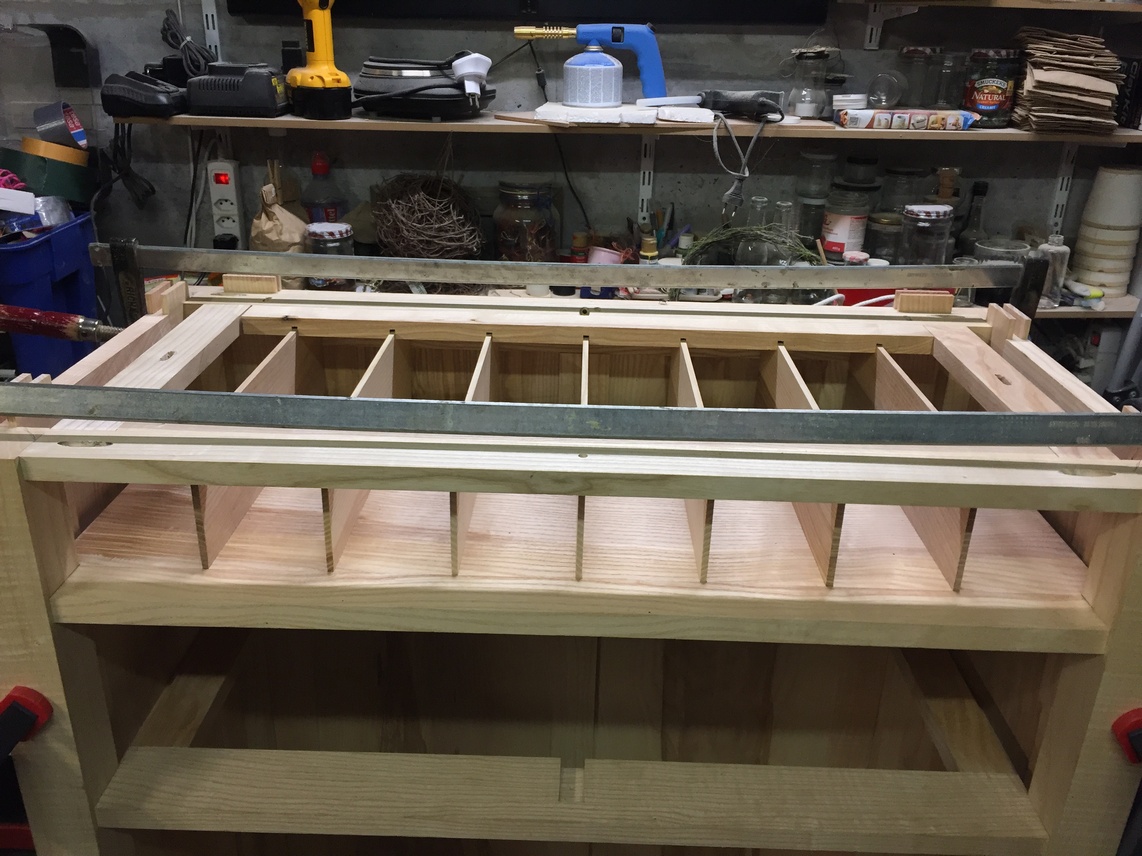
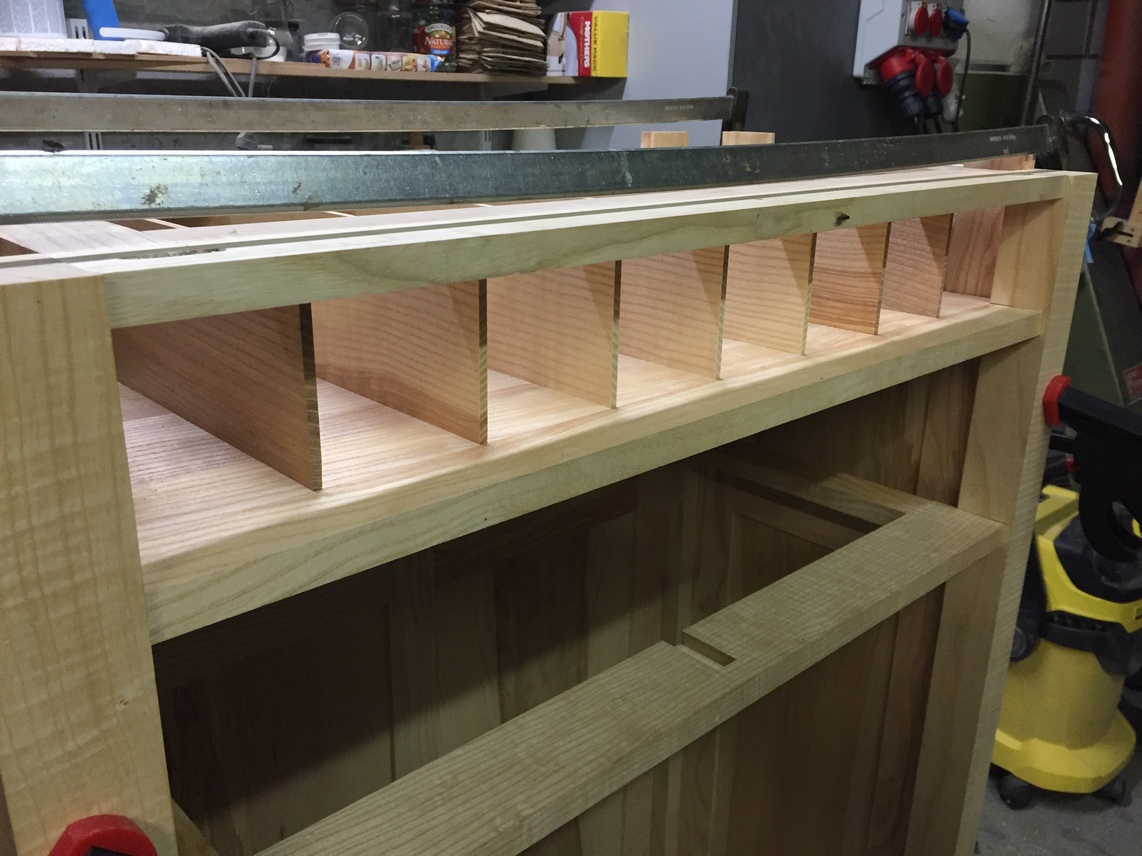
Of course, the real test is to insert a couple wine bottles! A Pinot Noir bottle fits fine and I’ve satisfied my OCD by checking that the dividers are square to the shelf. Only two were perfect but all were acceptable 🙂 .
Now we come to the drawer. I follow a process that I’ve read about in a few different sources but two good ones that come to mind are articles by Philip Lowe in Fine Woodworking here and Robert Lang at Popular Woodworking here.
**Begin Rant: in case any are curious, I’ve only ever subscribed to 3 woodworking magazines. Fine Woodworking for most of the late 90’s and 2000’s but I stopped when each issue seemed to be repeating previous ones and the emphasis was put on tool reviews that read like long infomercials to get you to buy some new gadget. After that, I would just thumb through the current issue in Barnes and Noble and buy the ones that had some project I was interested in. Ditto Popular Woodworking although I hung on longer because I enjoyed some of the articles from guys like Bob Lang and Glenn Huey (and really enjoyed the ones from Chris Schwarz). Lastly, in terms of valuable content and amazing builds, Woodwork magazine was my favorite until they closed up shop in the late 2000’s. Sad times when the big corporations buy up magazines to squeeze every dime out of them and don’t care about producing quality content anymore. /**End Rant.
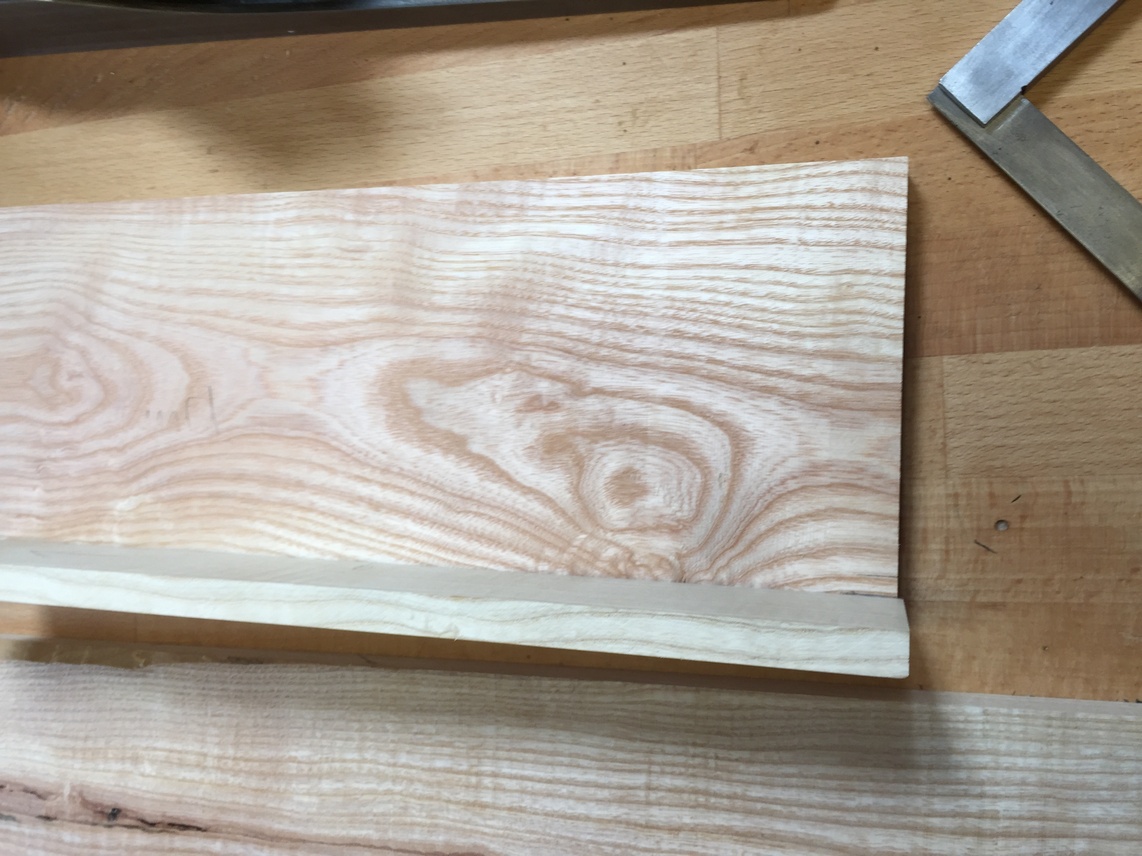
I start with the drawer front and cut it to just slightly oversize on the tablesaw and then creep up on a snug fit with handplanes. The basic theory here is that you’ll be planing to perfect fit after the drawer is glued up so it’s better to start with a “no gaps” approach. I make the back of the drawer the same as the front. Some people suggest to make the back about 1-2mm narrower than the front to ensure a smooth fit. This is fine, but I prefer to plane the sides if necessary. If it’s not necessary, and I deliberately made a “trapezoidal” shaped drawer, then it may end up too loose.

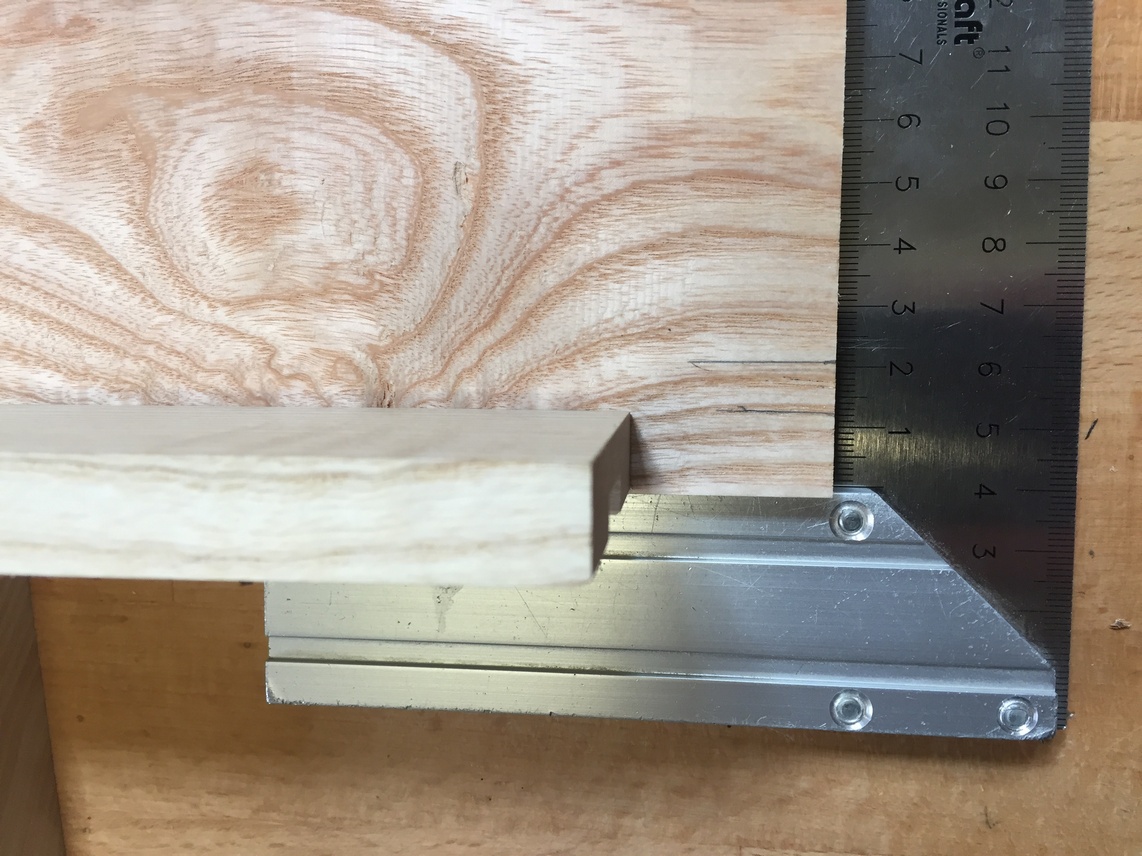
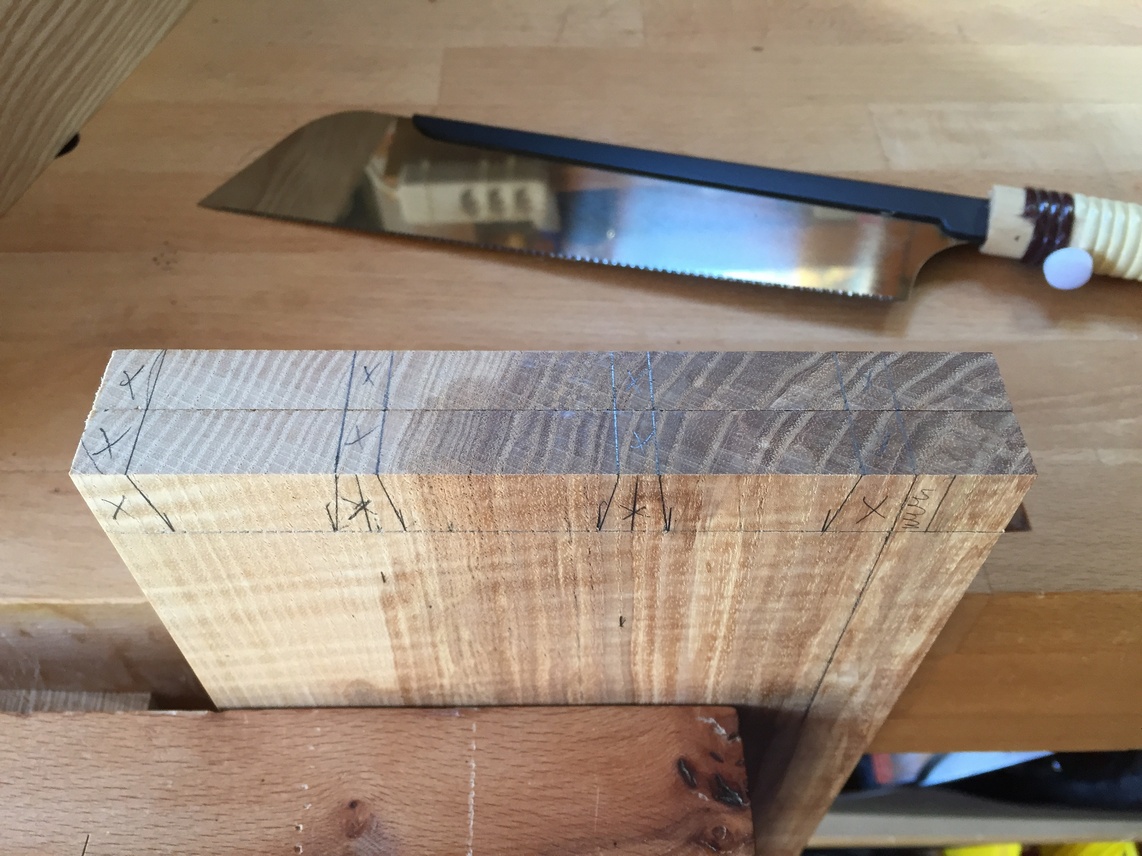
I do the same for each side piece and when they fit nice, I mark where the front piece will be flush with the rail. Then, since the side/front joint will be a half-blind dovetail, I measure from that mark back another 6mm (the drawer front is 19mm thick and I use about 2/3 of that thickness for the dovetail). Previously, I studied the drawer parts and decided which was left/right and which face was inside/outside and marked them with a triangle so as not to get confused during the build.
With regard to dovetails, I won’t attempt to describe a process that has been covered so Ad-nauseam in books, magazines, blogs, videos you name it. Instead, I’ll just give you an overview of what I did.
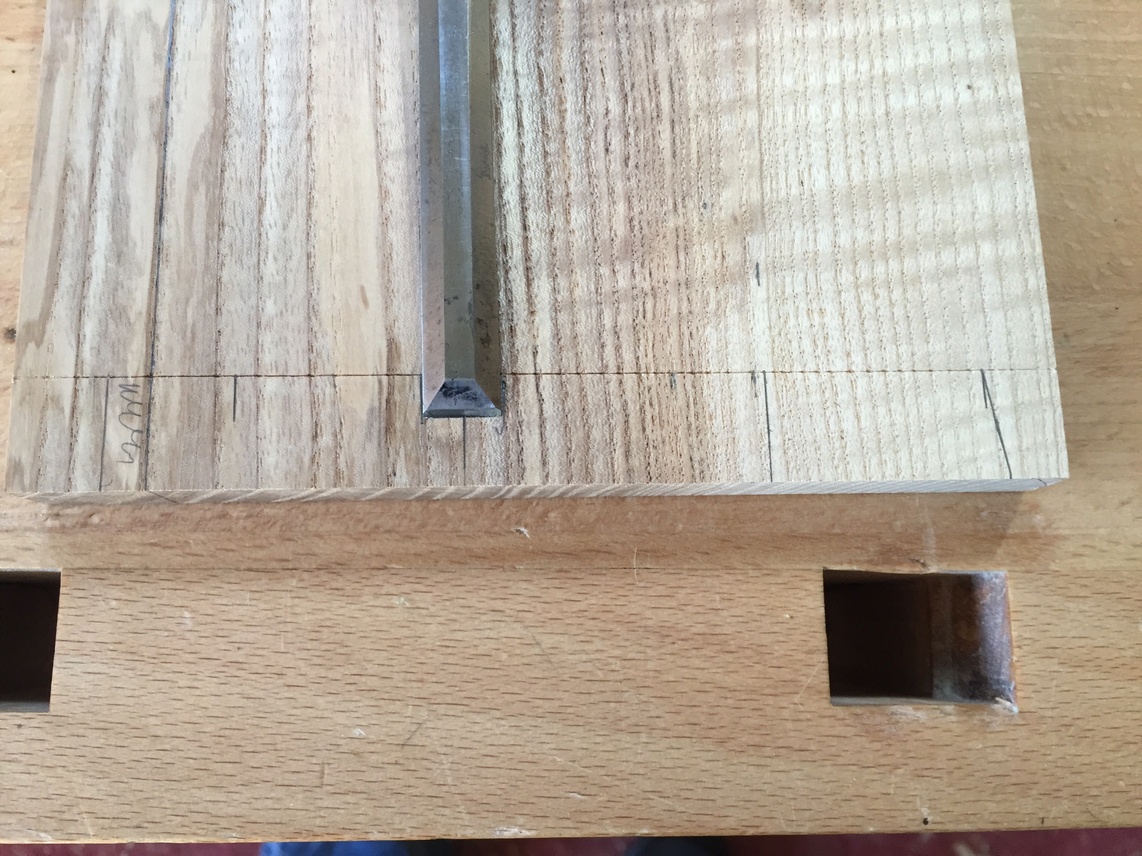
To prepare for dovetail layout, I want to know where the drawer bottom’s groove will be located. I lay the front piece on the bench and position the drawer slide (about 12mm thick) flush with the bottom edge and mark it. Then, having already glued up the drawer’s bottom, I take a scrap from it (about 7.5mm thick) and position it next to the slide and mark. I transfer these marks to the ends of the side pieces so I can layout a dovetail to bury the groove in.
This done, I start at the back. Unless I use a dado to contain the back piece, I start here so that I can warm up on the dovetailing before doing the front. The back is easier since instead of the half-blind, it’s a through dovetail.
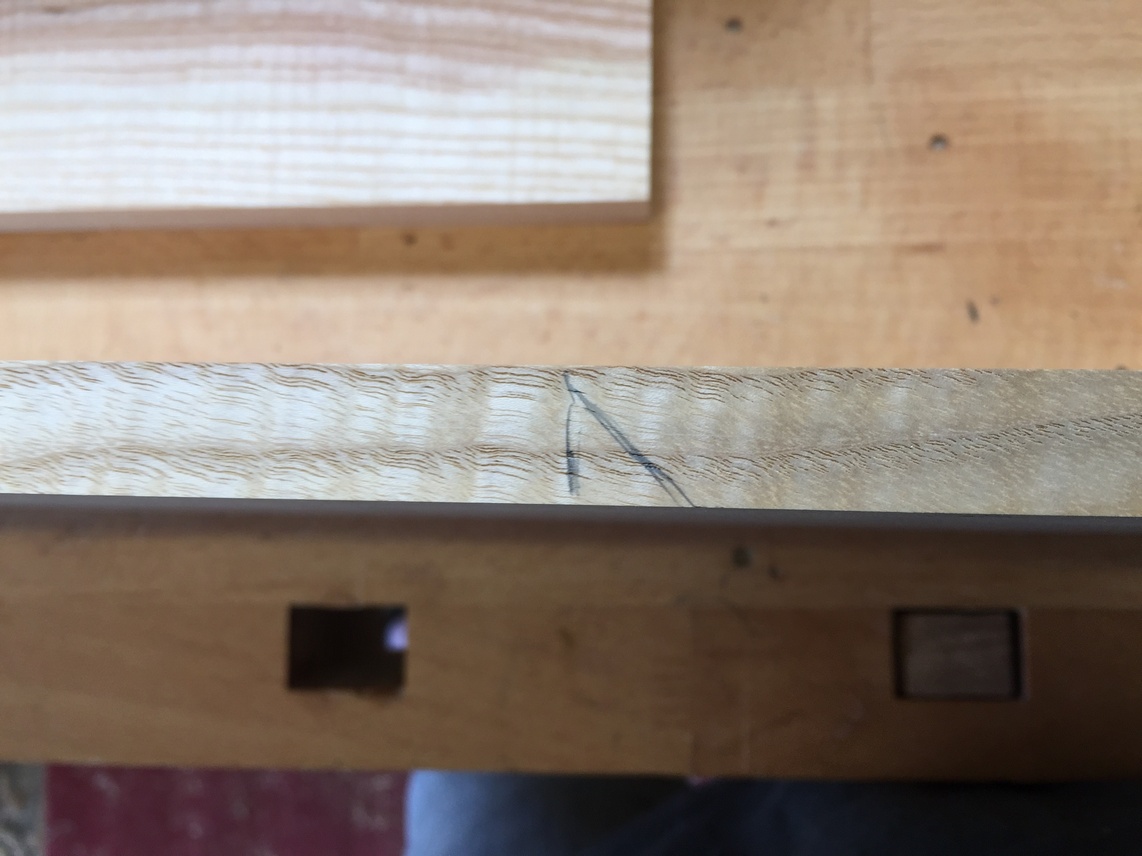
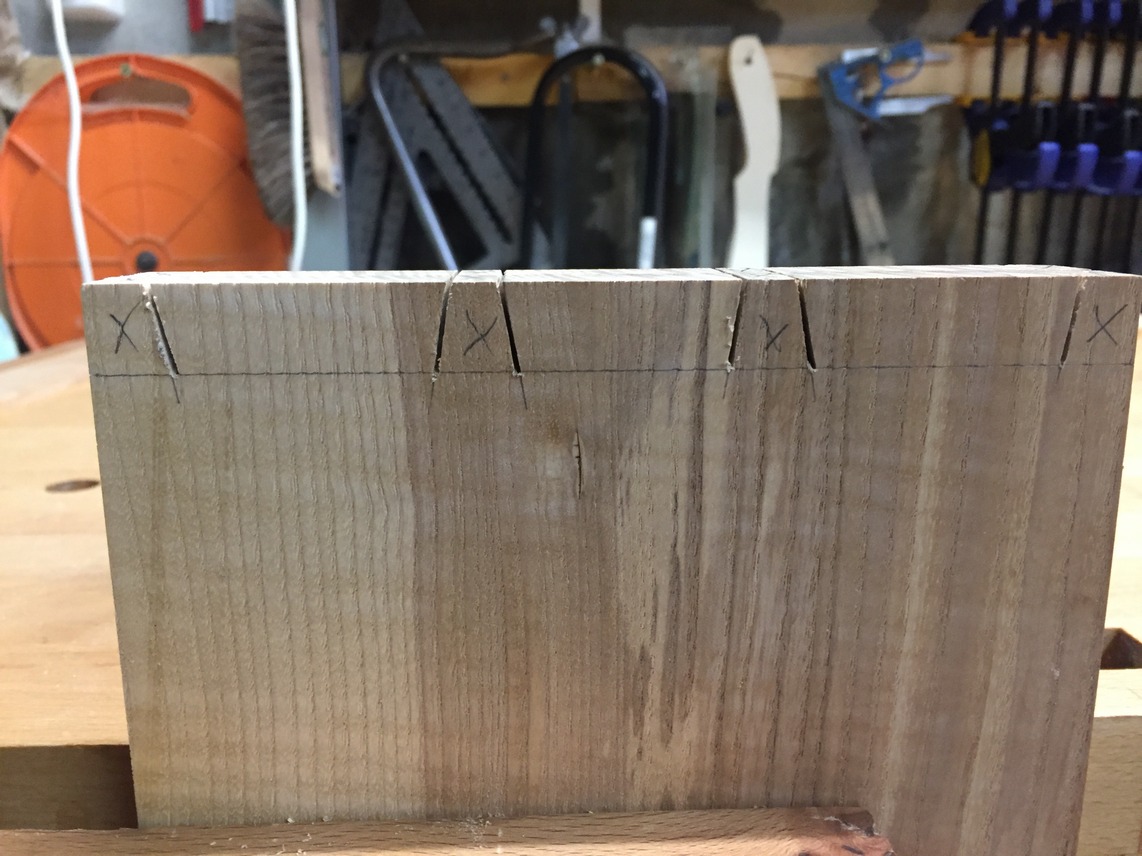
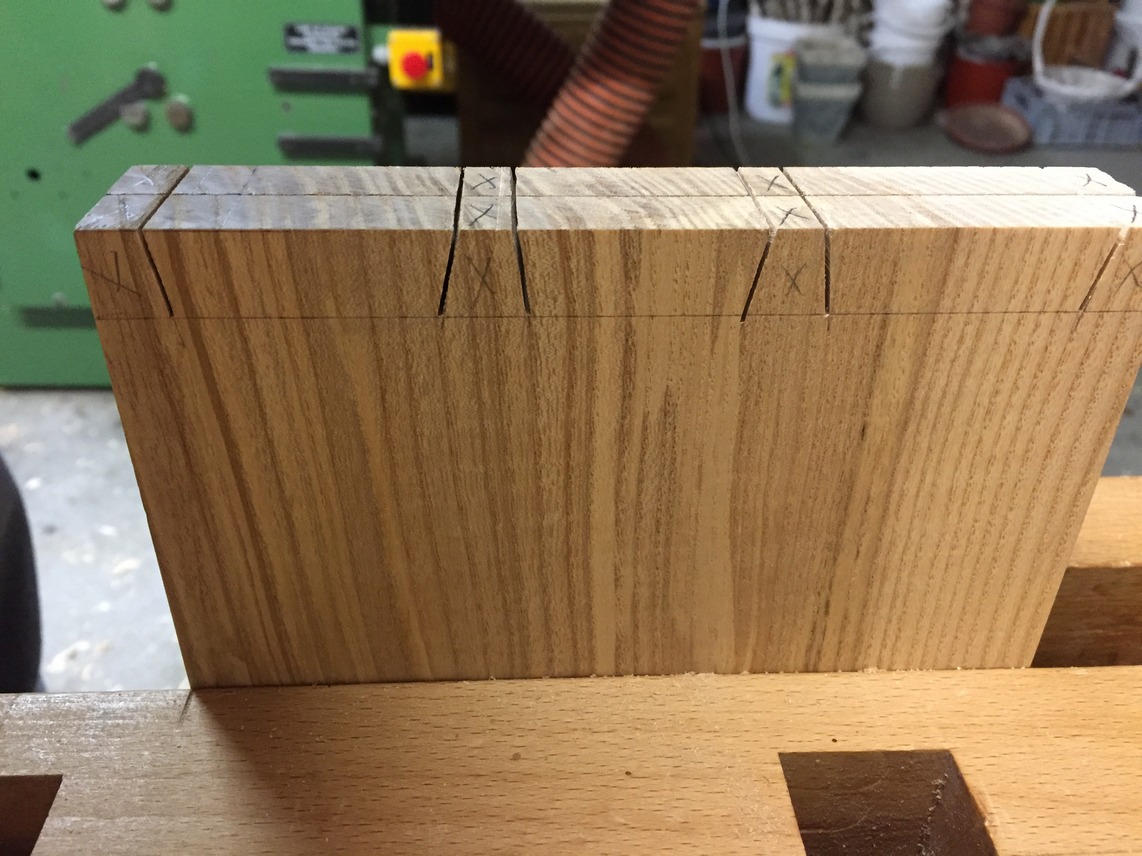
Since the back will eventually get cut narrower in order to accommodate the slide and bottom piece, I use the marks I transferred from the front to reference my layout. First, I extend the mark that represents the top of the groove (by the way, the layout is done on the outside face of the side piece). I want 3 tails at the back so I set my ruler on the edge at a number divisible by 3 (in this case, 15) and rotate it till the 0 mark aligns with my extended groove line. I make marks at 10 and 5 cm on the rule. These marks will represent the centerlines of the pin spaces. Then, I take a 12mm chisel (this will be the width of the pins at the baseline) and use it to mark for a half-pin by the groove and by the top edge.


Then I center the chisel on the two pin marks and draw a short line on either side of it. These marks will tell me where to place my dovetail marker in order to draw the angled lines.

Now the 3 tails are marked, as well as the locations of the half-pins. I sandwich the two together in my face vise and transfer the marks straight across the end grain. This not only saves time by allowing me to cut the tails for both sides at the once but the longer end grain mark helps me to cut a straighter line. Incidentally, these tail marks are all in pencil since the tails don’t need to be super accurate, only straight and square. Once the tails are cut and I transfer the marks to the back (the “pin-board”), I’ll use a knife as the pins will need to be cut very accurately.

After the initial saw cuts are done, I use a fret saw to clear out the waste prior to chiseling up to the baseline. I really need to find a better quality fret or coping saw somewhere because this one keeps letting the blades pop out, although the “Pegas” blades I’m using are really great.


After cleaning up the dovetails and getting all the cuts square, I prepare to transfer the marks to the back piece. I ensure the back is oriented correctly and clamp it in the vise at the same height as my smoothing plane. Then I take a scrap piece with a straight edge and pin it to the side piece right on the baseline with a couple of small brads.


Now I can flip it over on top of the plane and use the scrap as a fence to locate the side precisely up against the back. Now a marking knife is used instead of the pencil although I need a thin 0.3mm pencil to darken the knife lines so I can see them. The pin cuts are straight down and so are a little easier to cut, this time just inside the line so I can pare a little bit for fitting. As before, I saw out the waste and ensure the joints are square.


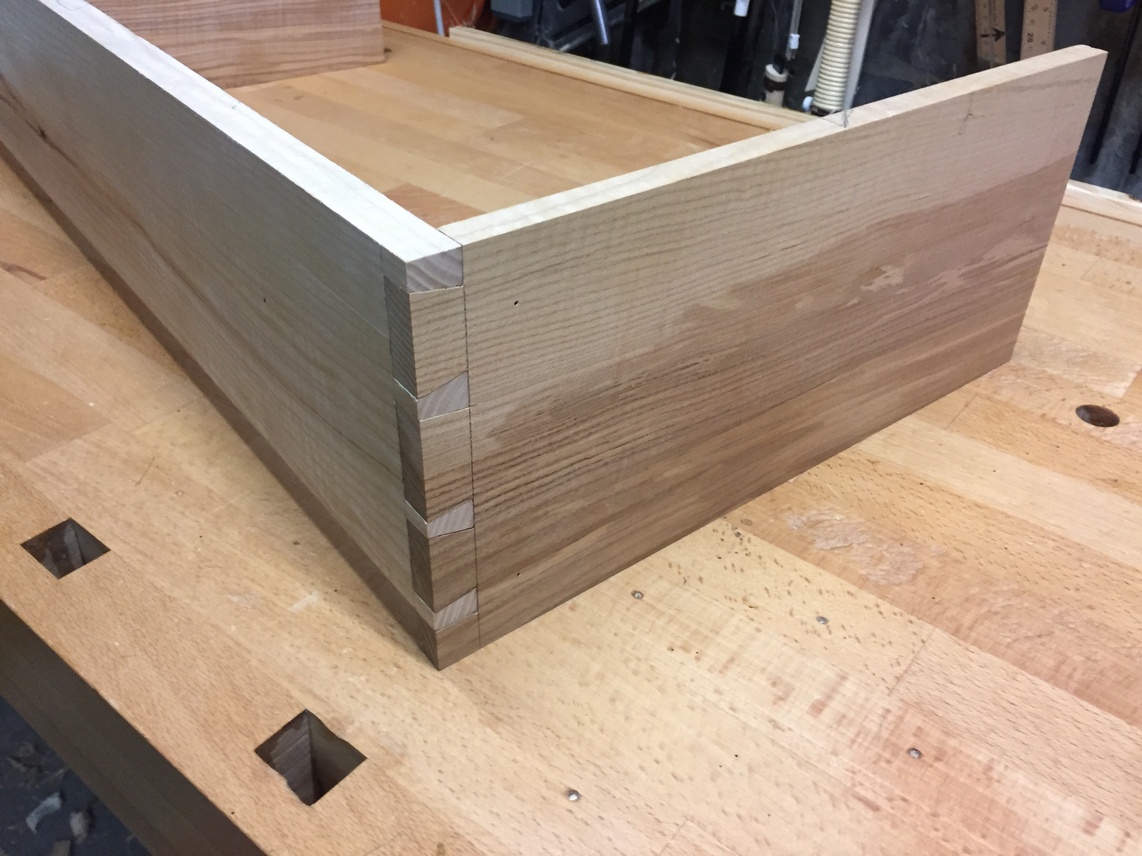
Once I learned the process, it just takes practice and patience to get a decent dovetail joint. If I go at it slow and steady I usually do okay. After a couple of tries, and a little bit of fine-tuning, I get a pretty decent fit 🙂 .

For the half-blind dovetails at the front, it starts basically the same. I layout and cut the tails first, taking care to saw as straight as possible. I’ve gotten fairly good at using the Japanese saws but after this project, I’m going to restore a couple of English backsaws I got on a certain auction web-site and try my hand at the “traditional” push-saw. I’ll be giving them a couple years at minimum and even if it turns out well, which I expect, I’ll likely always reach for the pull-saw on occasion. Below left is the one side and below right is the other side. My cuts follow the lines on both and once again, I’m happy that I took my time and not rushed. It’s time to call it a day though because when I try to do precise joints when tired, something always seems to go wrong.
The next evening after work, I get back to the half-blinds. These are dovetails that don’t show from the front, only the side, and are the traditional joint for drawer fronts. After cleaning out the waste and chiseling carefully up to baseline, I check for square, both on the tails and across the baseline.

I use the same trick with the scrap piece as before to make a temporary fence. Now I can accurately scribe the tails onto the endgrain of the drawer front with a marking knife. Again, I darken the lines with a pencil and commence to sawing these tricky cuts. After it fits right, I use the tablesaw to cut the grooves for the drawer bottom. These are cut in both side pieces and the front.


I assemble the drawer (without glue) and measure for the length and width of the drawer bottom. I cut the bottom ensuring that it is square and the width to just 1mm less than the distance from inside the left groove to inside the right groove. I don’t have to worry about wood movement along the grain (lengthwise), only across it. This means the bottom will expand and contract towards the back. I use a block plane to shave the left/right and front edges of the bottom so that they fit snug, but not tight, into the grooves. The bottom is about 7mm thick and the grooves are just over 5mm.

Once the bottom fits I check for square. It’s a little bit off but when I glue it up a small adjustment with the clamp will put it in order.

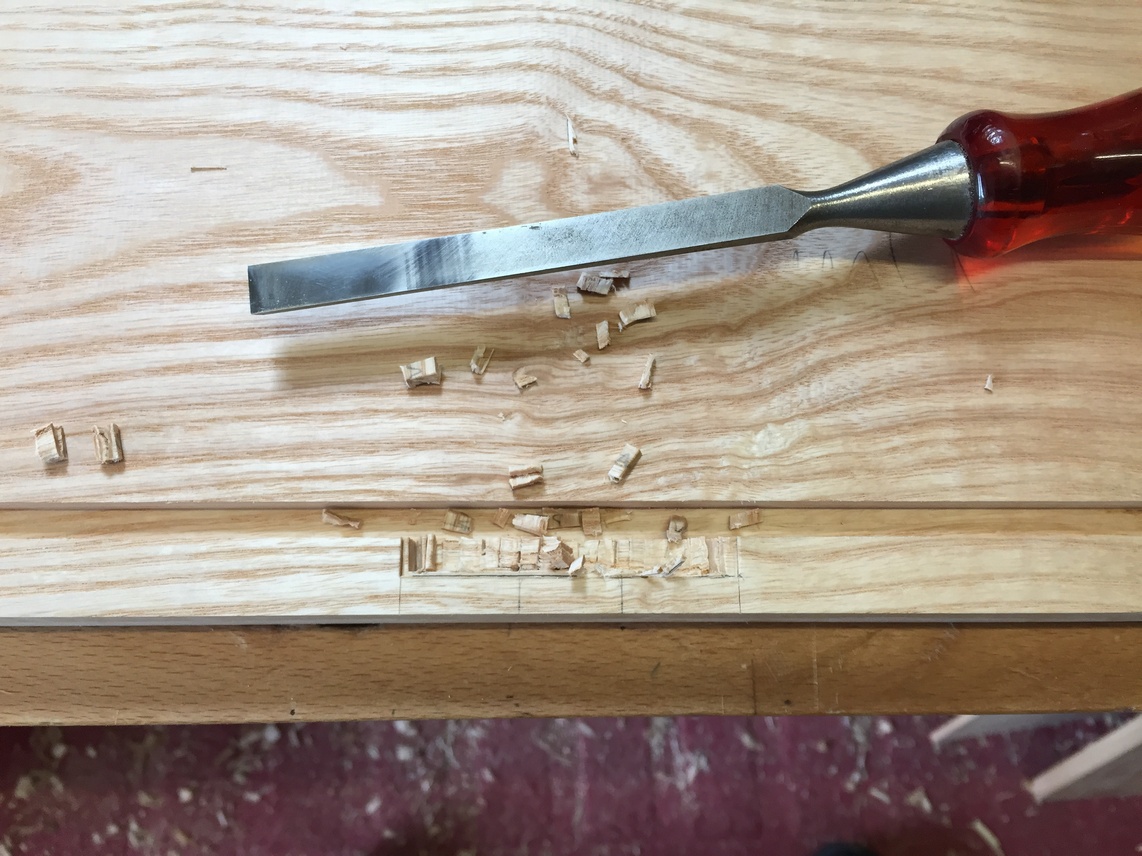
Last but not least, I need to chop a small mortise to insert the drawer slide. I insert the drawer front into the opening, angled back, and mark the location of the drawer guide. Then I can line up the slide’s groove with the guide marks and mark the outside width of the mortise.

This is only a 5mm wide by 30mm long mortise so I just use a chisel to cut it, without drilling out the waste. It fits nice and snug and flush with the bottom of the drawer front.

I do another dry fit, this time with the slide in place and insert the drawer into its opening. There’s a little bit of resistance pushing in the drawer but that is just what I want. After the drawer and carcass are glued up, I’ll mark the position of the back end of the drawer slide, fix it with two small screws, and then plane the drawer sides till the fit is just right.

The last step in construction are the doors but I’ll save that for the next post as this one has been quite long!
Next Chapter: Doors and Hinges
Leave a Reply