
Click on most pictures to see a larger view.
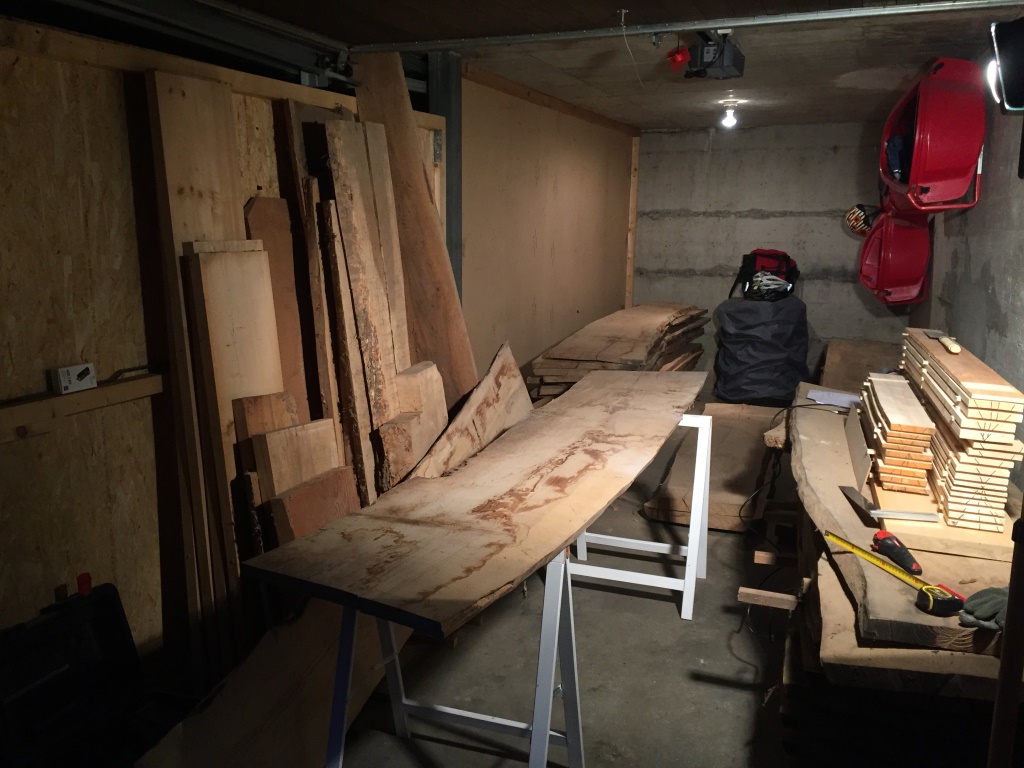
This project will begin with a visit to our secondary garage in Wolfensschiesen, just up the road from where we live in Dallenwil. Even though we have a double garage (Swiss standard, which is equivalent to a single garage in the U.S.), it made sense to rent another one due to the fact that I was given a lot of nice wood from a friend of the family, not to mention storing our tandem bicycle, tandem kayak, snow tires, etc. (who parks a car in a garage anyway?).
Since I don’t have my old beast here (a bashed up 1974 Ford F100 that would net me 10 years in prison if I was caught driving it in Switzerland), I have to pick out the slabs I want at the storage garage and then try to see the grain well enough to decide on how I want to use them.

I then cut the slabs with a circular saw into pieces small enough to fit into the car. A “slab” is typically a piece of rough cut lumber straight from the sawmill and still includes the bark. Most of the trees cut in a sawmill are “plainsawn” or sliced from top to bottom.
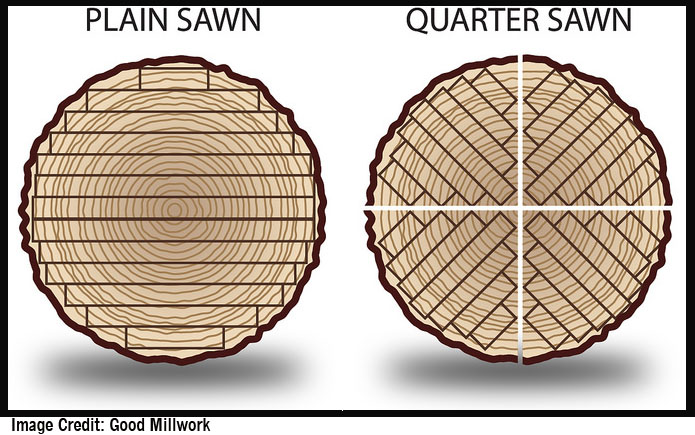
Plainsawn lumber will typically have nicer figure and grain patterns however, it has more of a tendency to move in ways that must be considered carefully before building. Quartersawn lumber will be more stable but in many species of wood, loses the nice grain pattern. One nice exception is quartersawn oak with its rays and flecks.
What I have is all plainsawn lumber, rough from the sawmill, that has been stored in a barn for many years and is all plenty dry enough to use. The lumber includes mostly Ash, some Walnut and a little bit of Cherry thrown in. I have yet to pick up the final log which is Beech. I like Ash. It works well with handtools and has a nice grain. I built a TV cabinet with it back in Albuquerque and used African Paduak for the top and feet. I used only a clear oil with no pigments and the grain stood out really nice.

Back to the home garage, I have a chance to further work out rough dimensions for the main parts.


I use a jigsaw to cut the parts down to a more manageable size and then the bandsaw to bring them to just oversize of the final dimensions. This is usually about 2.5cm wider and up to 10cm longer than final. This gives me some flexibility to make a mistake or two…

The main reason to cut oversize is to allow for wood movement. Even though the tree is not alive anymore it will always move with changes in humidity, even after it is “dry”. It is important to allow time for the wood to acclimate to the environment in my garage before starting to mill it to final dimensions. In this case, it has been in the garage in Wolfenschiessen for a few months which will be close enough in relative humidity to the shop (might as well stop calling it a garage 🙂 ). However, once you start cutting into rough lumber, it is almost certain to “move” again, especially after the first thickness planing.
I mill one face of each piece on the jointer to make it nice and flat. After that, it gets flipped over and sent through the thickness planer which not only flattens the other side, but makes it parallel to the first.

At this point, I only take off enough on each face to reveal fresh wood underneath the weathered, outer layer.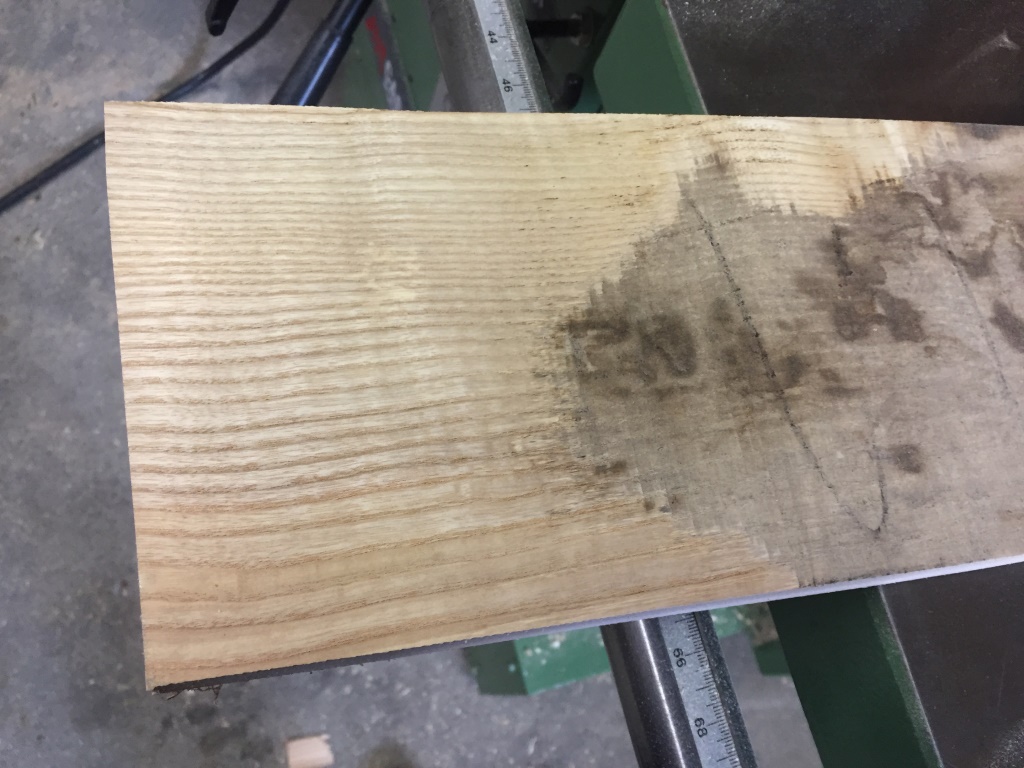
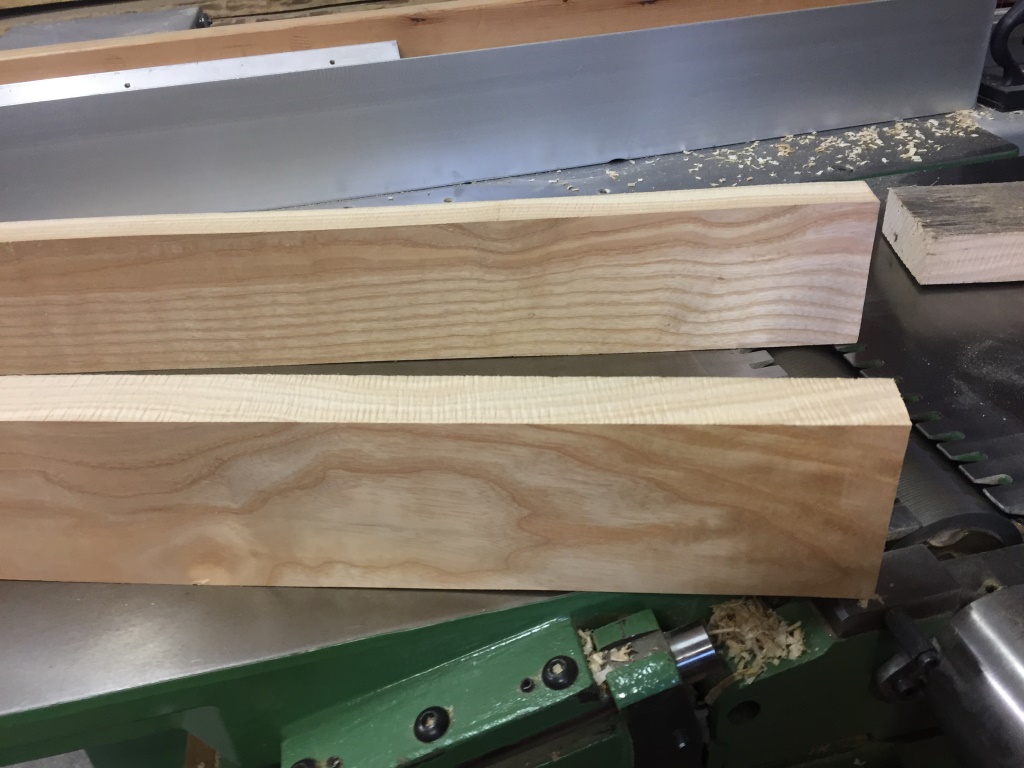
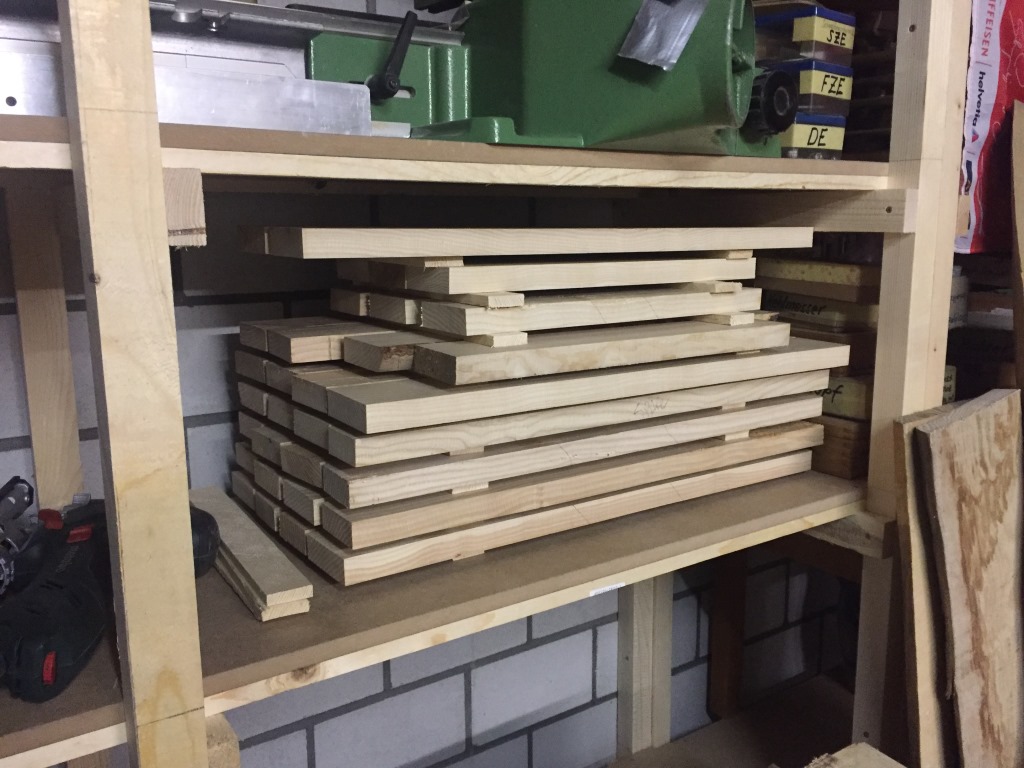
The oversized pieces get stacked with pieces of wood (“stickers”) in between to allow for even airflow.
The first set of pieces are for all the rails and stiles. If you look at a typical American cabinet door, the horizontal pieces are the rails and the vertical pieces are the stiles. In the middle will be a “floating” panel. It’s floating because it doesn’t get glued inside the frame. This is because as the panel expands and contracts with changes in relative humidity (low RH in winter, high in summer), it can move. If the entire panel were glued, it would probably crack during the first seasonal change. Engineered wood like plywood would solve this problem however, I don’t like using it unless it makes sense, like for some shop storage.

Unfortunately, as mentioned above, even though the pieces are all flat with parallel faces now, in a week or even a day or two, some (or most) of them can warp, bow, cup or twist. Ideally, they’ll have a few weeks to finish any movement before I joint/plane them again to final thickness and crosscut to final length and rip to final width.
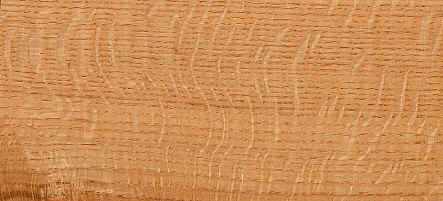
Below is a potential piece I’m considering for a door panel. Since the doors are the first things that catch the eye, it makes sense to try and select wood with a nice grain pattern. Luckily, I have pieces that are thick enough to resaw. Resawing means slicing a board through its thickness so that you end up with 2 pieces the same length and width as the original, but only half the thickness. The panels only need to be a third to half the thickness of the rails and stiles (the rails/stiles will be about 22mm or 7/8” thick and the panels around 10mm or about 3/8”). The aesthetic benefit of resawing is to achieve a “bookmatch”. When you resaw a piece of wood and open the halves like a book, the grain pattern is very similar and each half is a mirror image of the other.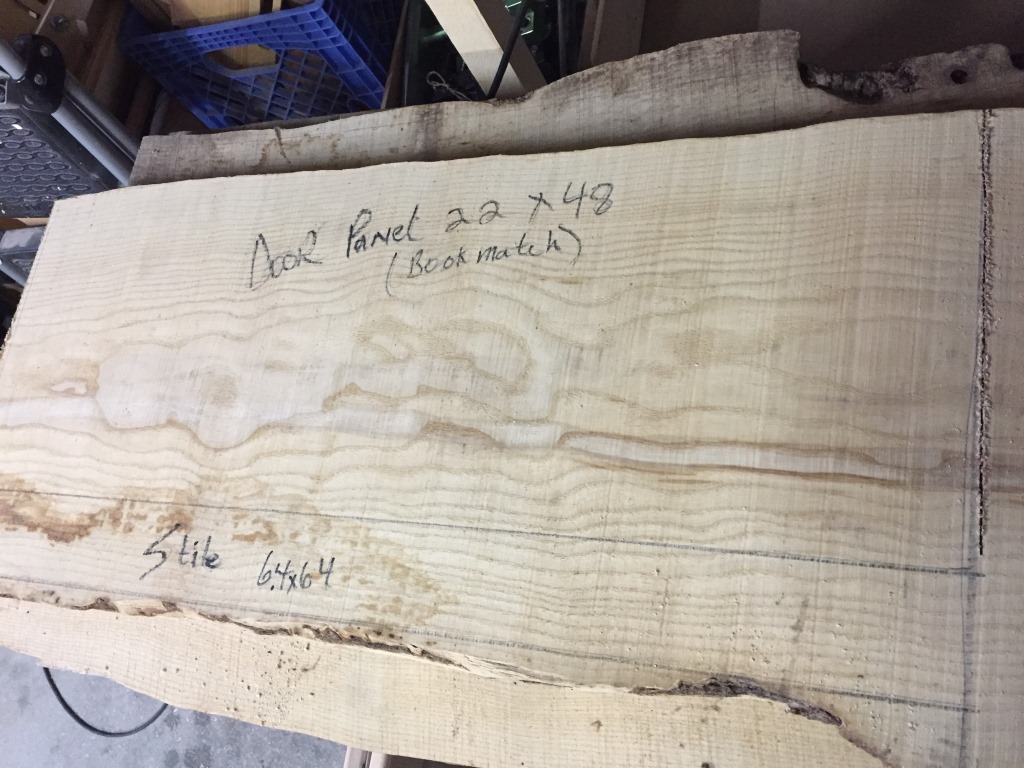
Here is a nice example of bookmatching. Not my wood, this is from the internet.

I’ll also joint the faces of these boards and let them acclimate before resawing. Once they are resawn, they’ll have to “rest” again. In the case of resawing, tensions inside the wood get released and the two resulting panels will almost always cup inward. After a week or so, they’ll get planed again and then rest a bit more before milling to final dimension.
So now that I have the “first” cutting done, all the pieces can sit for a few weeks. In the meantime, I’ll finish a couple of smaller projects on my list not to mention some much procrastinated work on the car.
Leave a Reply