

Who thought that the drawers would be the most complicated part of this cabinet? Complicated yes, but difficult, not so (except for the dovetails). Drawers go together with a straightforward, step by step process that is at times painstaking, but without the hair-pulling and teeth-gnashing that one might expect (except for the dovetails).
When last we met here in cyber-space, I had just finished cutting all the dovetails for the drawers. Maybe a few more furniture pieces with 5 or 6 drawers each will see my dovetailing skills start to reach a happy place but for now, I’ll sleep at night knowing that at least these drawers will be strong, if not so wonderful to look at from the side.
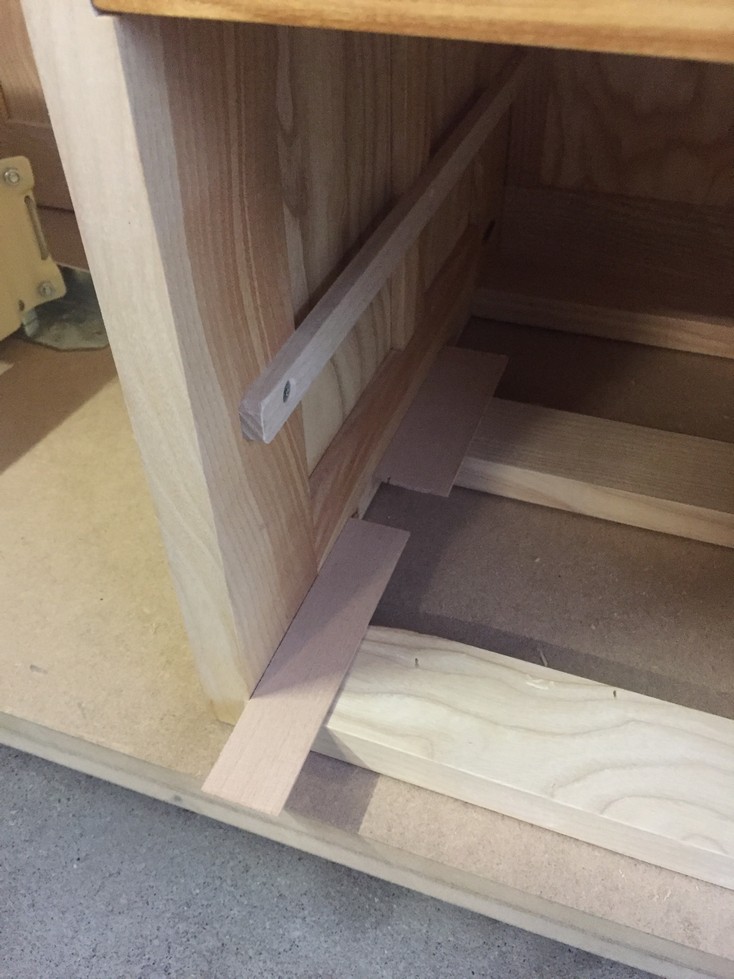
Now there are grooves and dados to cut into the drawer pieces. First, a dado along the outside of the side pieces will provide a space to house the runners that hold the drawer in place. I decide how deep I want the dado and use a scrap piece to set the tablesaw blade height to 8mm. I want to keep close tolerances when making the drawers so I cut the dado the same depth as the thickness of the drawer runners. I can always shave or sand off a bit later during final fitting. It’s better than trying to calculate extra space and ending up with a loose fitting drawer. A scrap piece helps set the blade height.

I want not more than a 3mm gap between the bottom edge of the drawer and the case so I place a couple of 2mm shims at the bottom and use another scrap piece to mark where the upper edge of the runner will be. The next time I build something like this I’ll probably use my router table however, a few passes on the tablesaw does the trick. I make a cut on both side pieces and then again the scrap after moving the fence about 3mm. I keep repeating this until the scrap piece fits perfectly and then I can make the final cut on the drawer sides. In a situation like this it is better to be able to creep up on the perfect size dado.
I then make the last pass on the side pieces and test their fit. Since the left and right drawers at the bottom are the same height and I positioned their runners exactly the same (not by chance either), I can cut the pieces for both drawers at the same time.
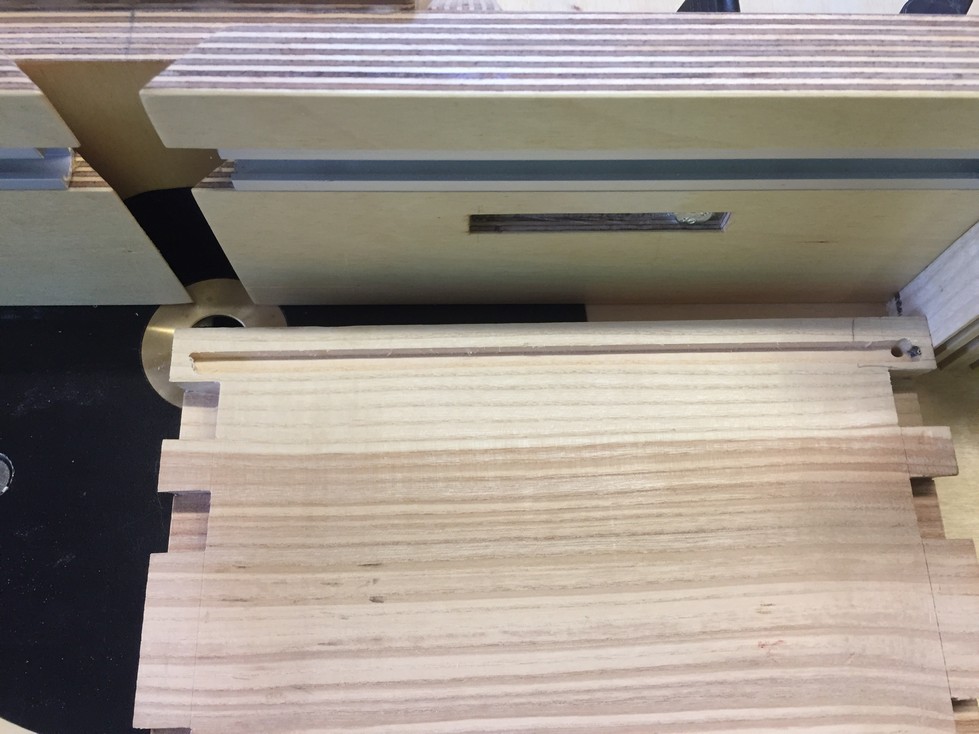
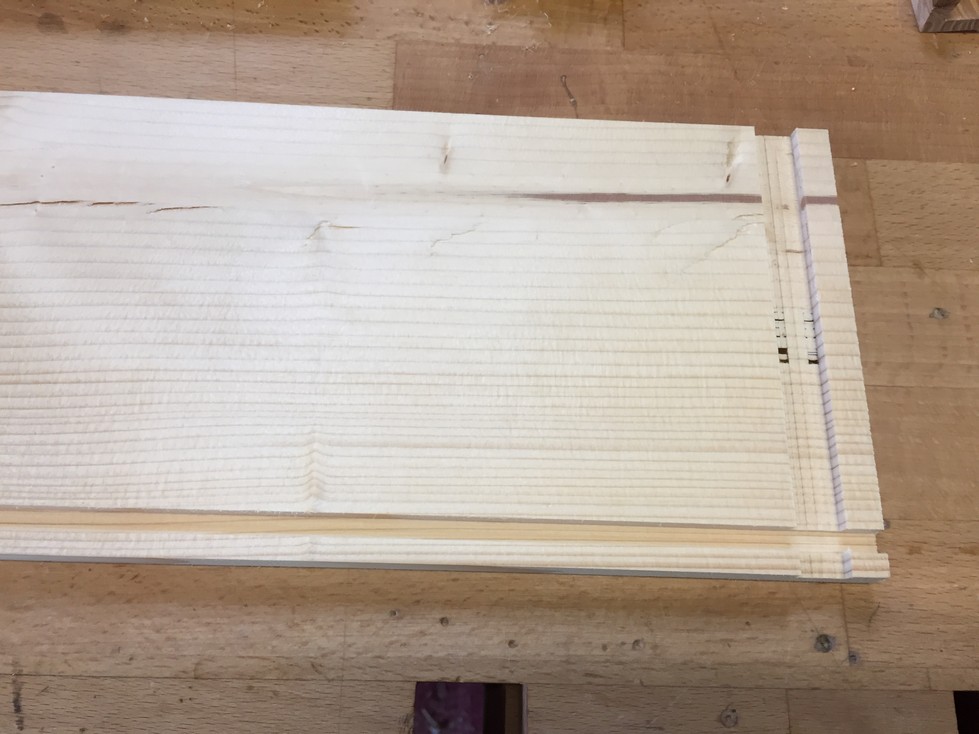
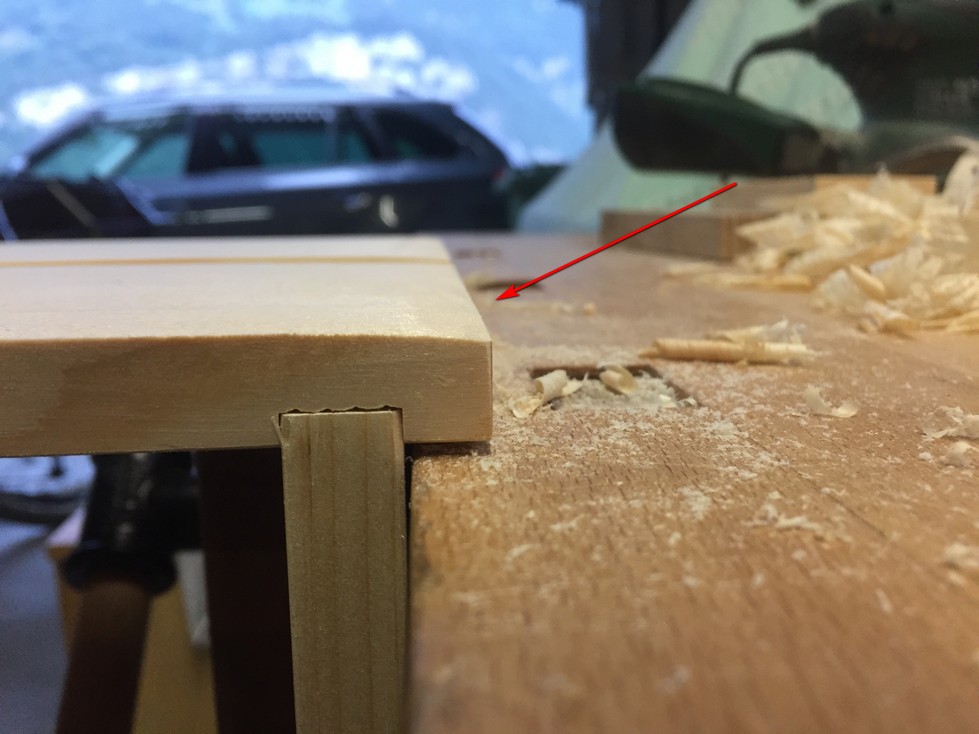
On the inside of the drawer, a groove near the bottom of all the pieces will house the drawer bottom. On one of the drawers, the slot happened to be in line with a dovetail (circled in red below) so I could use the tablesaw to cut that groove.


Unfortunately, and I’ll be careful in the future to plan better, on the rest of the drawers, I had to use the router to cut the groove because it wasn’t in line with a dovetail. If I just cut it with the tablesaw like before, you’d see the gap when the drawer was opened.
I set up my router table which mounts to the face vise of my workbench. The design (from Popular Woodworking Magazine) allows for convenient storage of the router table when not in use. I find that most of the work I do doesn’t require it, so it’s better to keep it up on a shelf and out of the way. I mount a 1/8th inch straight bit and adjust the fence. To help make a consistent cut, I clamp stop blocks on the right and left. I drill a hole to help the router bit get started and plunge the drawer front onto the bit while bracing one end against the stop. I can then rout from right stop to left stop and duplicate this for the other 4 drawers on the left side. The right side drawer is wider so I have to adjust the blocks for that particular drawer front.

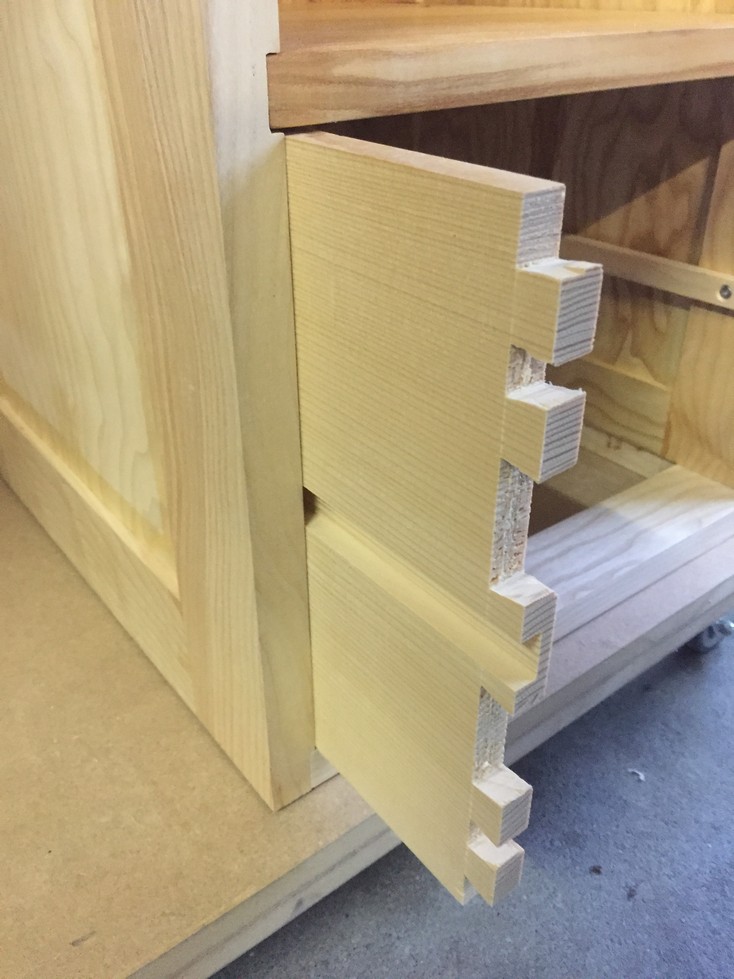
Back to the sides, I cut a vertical dado on the inside and near the rear. This will house the back of the drawer.
And on the 3 smaller drawers, I cut some grooves for dividers that run the length and width of the drawers. All the better to organize small items like spools of thread. Here are all the pieces for drawer #2.

The bottom right drawer gets dry-fitted and it goes together square and level so I move on to the other drawers.
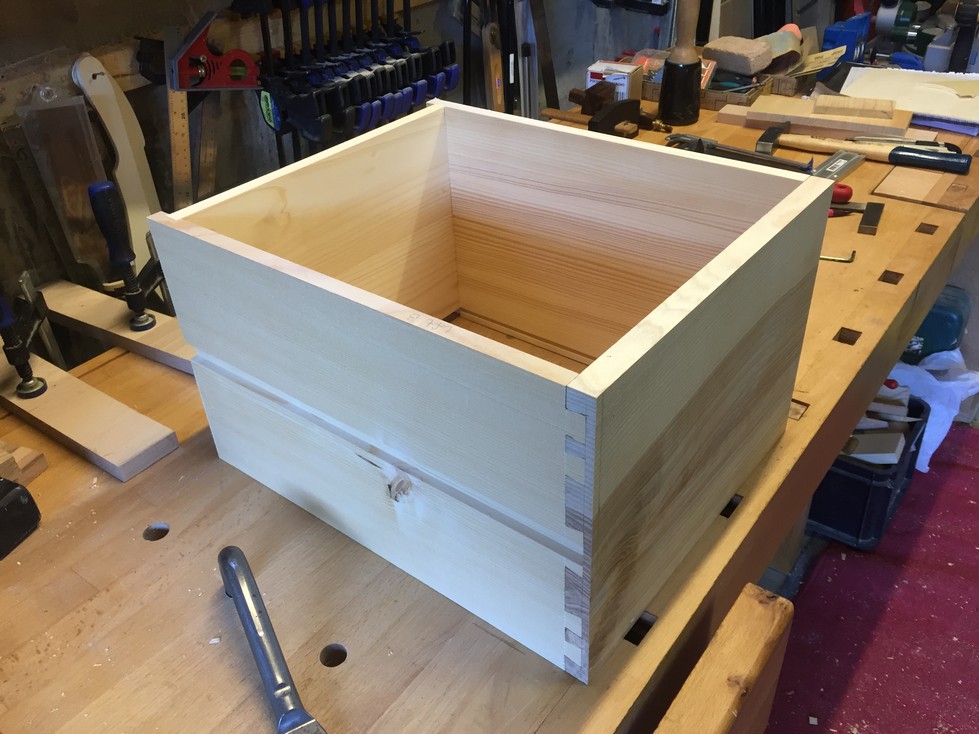
As I cut and fit the sides of each drawer, I leave them in place so I can measure and fit the next one. I’m shooting for only a 1mm gap between these drawers in anticipation of adjustments after glue-up. When glue up and fitting is finished, my goal is not more than a final 2mm gap between the drawers.

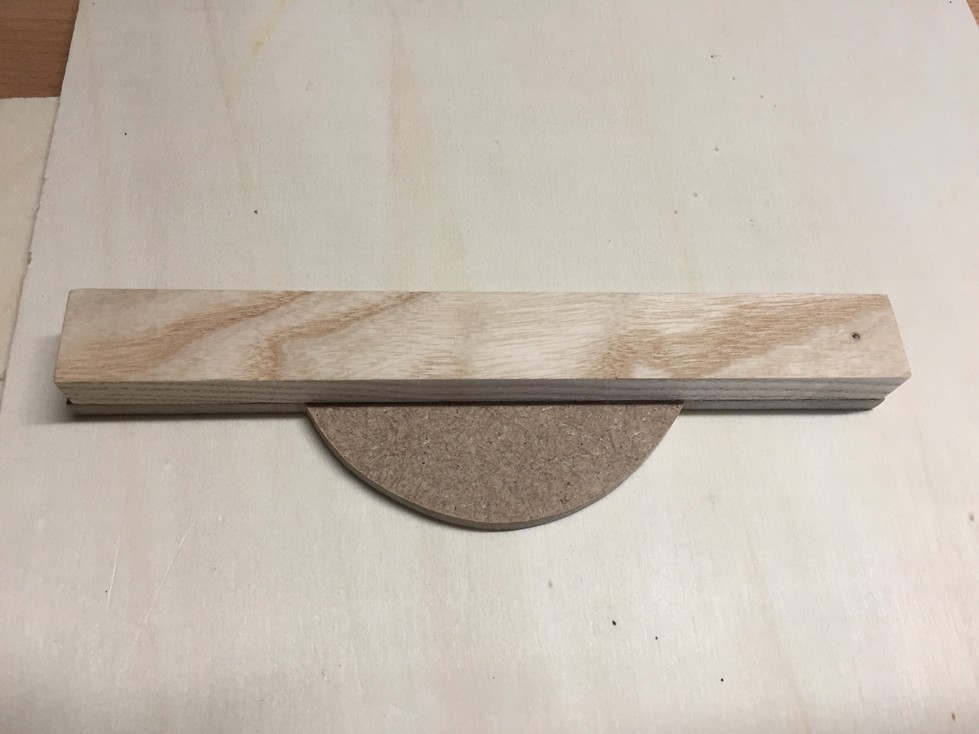
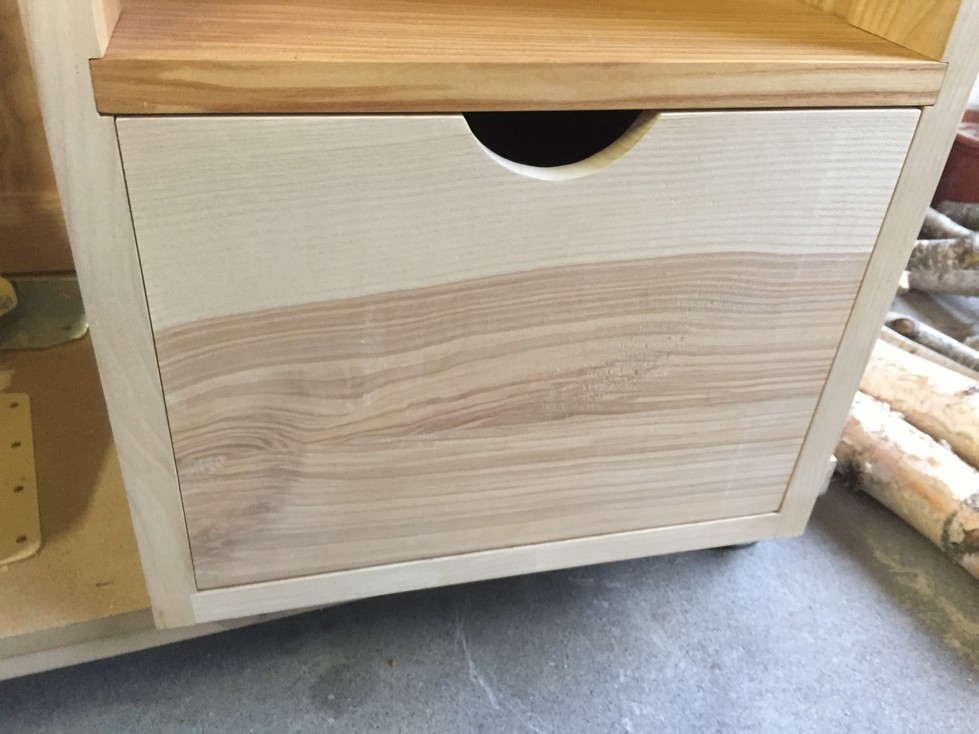
Once all the drawers have been dry-fitted and checked in their runners (final fitting will be done after glue-up), I plan for the drawer pull openings. Since the doors will close flush with the front of the drawers, I can’t use a standard pull or knob so I draw a radius on a piece of hardboard to make a little jig. This will let me easily draw the same radius on each drawer front for a cutout.

I mark the radius and then use the bandsaw to rough cut just inside of the line on each of the 6 drawer fronts.

If I were only building one drawer, I’d cut carefully to the line with the bandsaw and then use a round bottom spokeshave to smooth the radius. Since I still have the router table clamped to the workbench, I mount a straight, pattern cutting bit. Pattern bits have a bearing on either the top or bottom of the cutter flutes and make it easy to rout to a pattern.

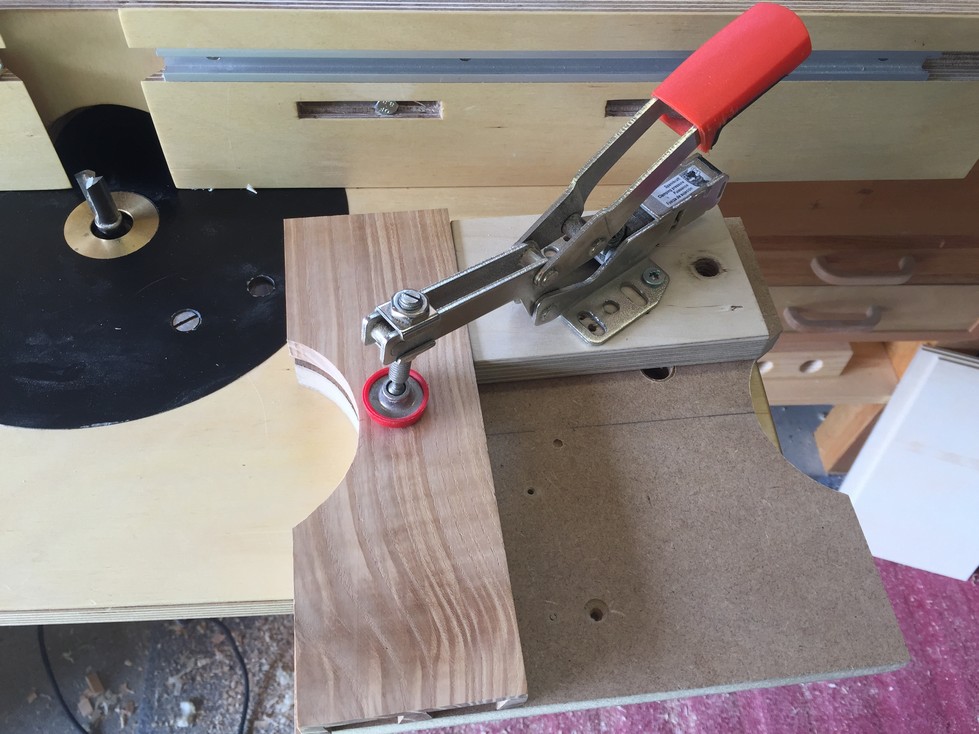
It was quick work to make a pattern jig for this cutout and mount a toggle clamp to hold the drawer front. With the piece clamped to the jig the bearing will follow the pattern and I end up with a nice smooth radius.

Wanting to maximize the use of the router table while I have it out, I then mount a round-over bit. This also has a bearing and will follow the radius while cutting a round-over on the inside of the drawer front. This will make for a pleasant pullout when a drawer is opened.


Once again I pause and consider before pulling out the bottle of glue. I think I’ve done everything that makes sense prior to glue-up, so I take the plunge and, armed with as many clamps as I can fit on one drawer, I move past that point of no return.
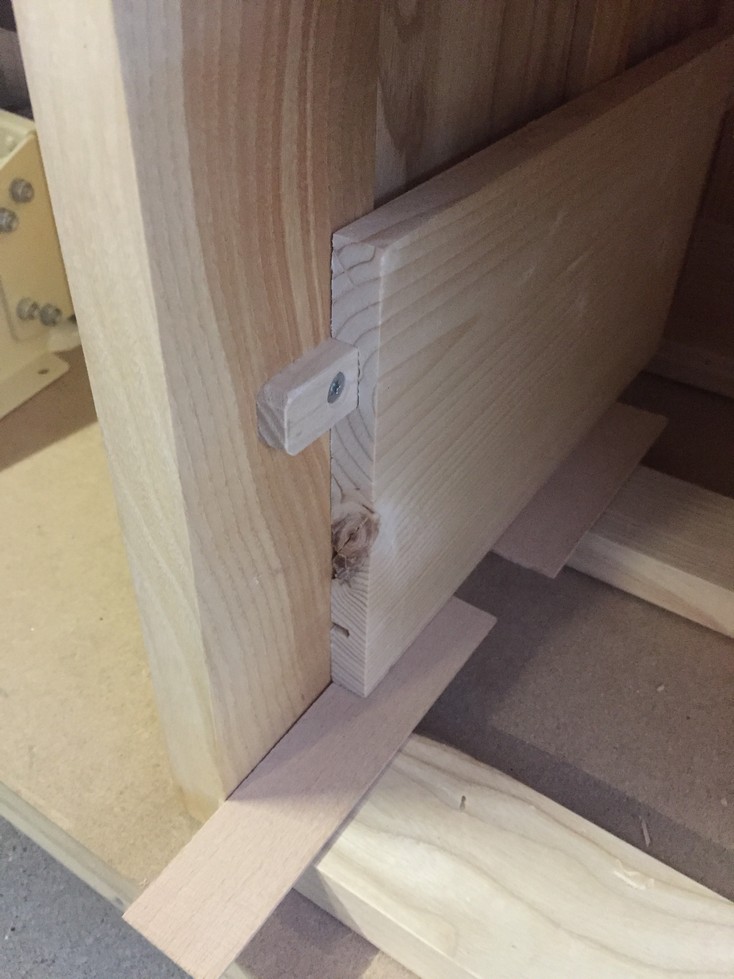
After the glue has set, I can now do the final fitting. I have already determined that the dados fit the runners snugly, but now I want to make sure that opening and closing the drawer happens smoothly. This is the best time of year to do this because it’s hot and humid in August and if I fit with very close tolerances now, there is room for shrinkage in winter without the drawers’ fit becoming sloppy. I ensure the dados are sanded smooth to 150 grit and then waxed. Now when I insert the drawer to check the action, it runs nice with one exception. You’ll remember that on the inside of each pedestal I installed a muntin in order to have something for the center screw of each runner to grab; when the drawer is pushed in, sometimes the side would bump against the muntin. I don’t like that.
So with the plane, I made a slight bevel on the outside of the side pieces and now it works very smooth and doesn’t catch on the muntin.
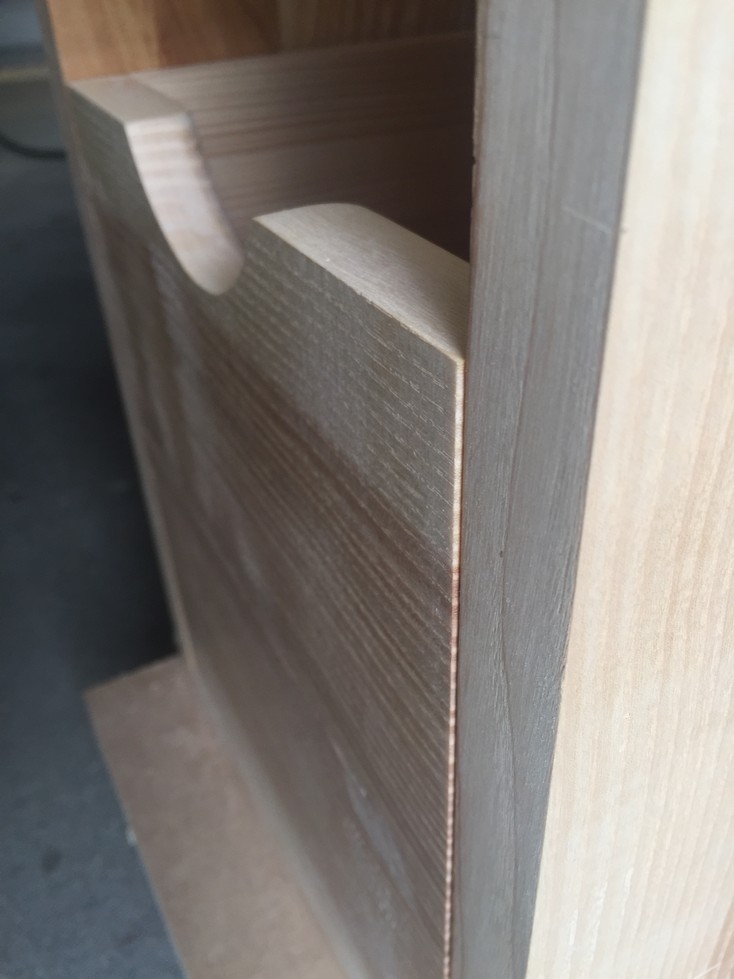
After ensuring proper action, I ensure that the drawer front is exactly flush with the front frame of the carcass when fully closed. You can see here that it protrudes a little more than 1mm. I purposely cut the side pieces slightly long so that I could creep up on the perfect length at this step.
After a few minimal cuts at the back, the right side of the drawer is nice and flush however, the left side near the top still sticks out a tiny bit. Less than 1/2mm, but I want it to be just right. Back to the vise and I plane off the a little bit until it’s flush. A few seconds with the scraper and any plane marks are removed.

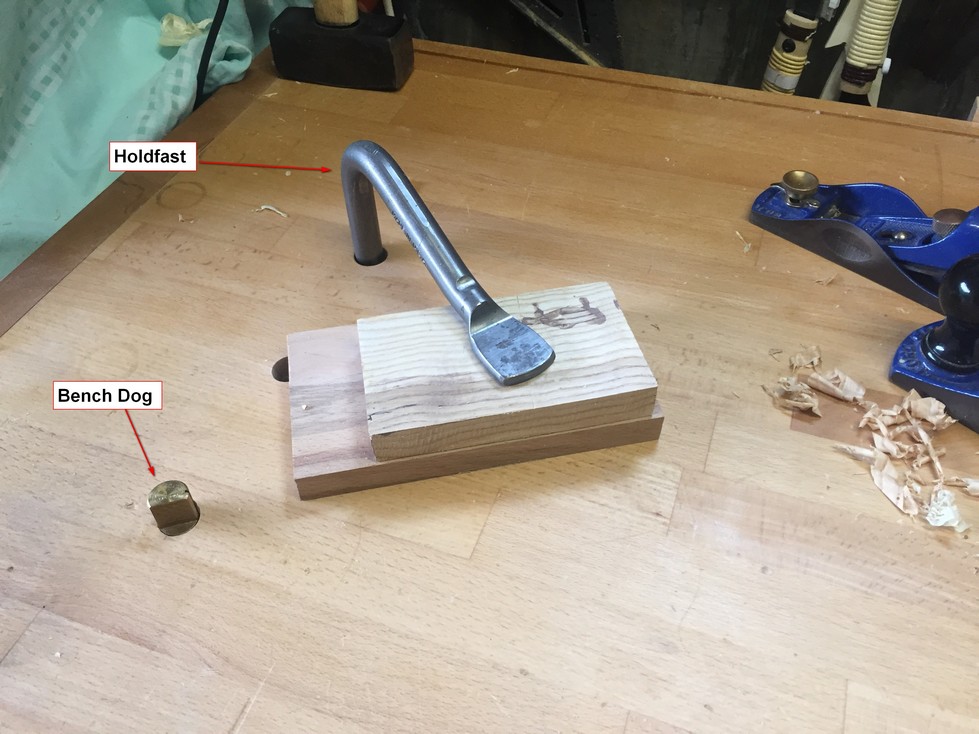
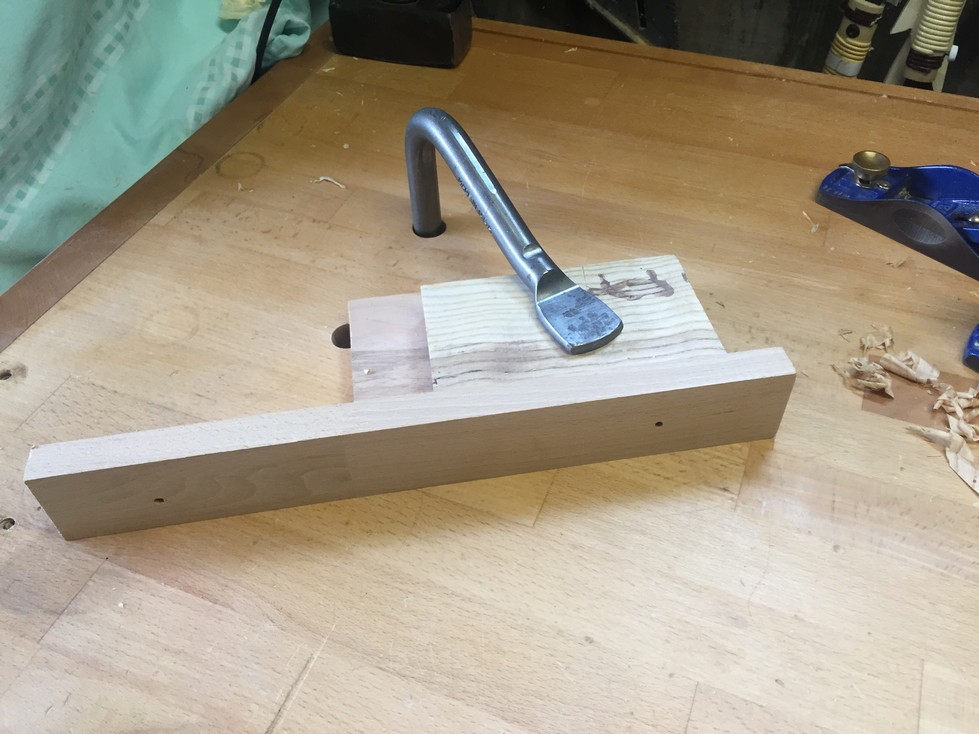
Just a quick blurb about simple holding devices: I really like my holdfast and bench dogs. In only a few seconds I can clamp something to the top of the bench with only a blow of the hammer (and unclamp the same way). I can use the bench dog as a quick “stop” for planing a small piece or, like below, in coordination with the holdfast to provide a wider stop for planing a large piece. In this way, I can put the drawer in the vise to plane the face or ends and then on the bench against the dog and holdfast to plane the top or bottom without clamping. All very quickly and efficiently.
Now for the spaces around the drawer front, the “reveal”. I inspect the reveal all around the drawer and luckily, I don’t have to touch the bottom or the left side of this drawer as there is a nice consistent gap.

A little fine-tuning on the upper right of the drawer front is necessary so I clamp the drawer in the vise and use a block plane to take off a few shavings. A block plane not only has a lower angle then a bench plane, but the blade is mounted bevel up; this makes planing end grain easier.

A couple of tries and I now have a consistent gap on the right as well as the left. A few shavings off the top and it is also looking good. I am now pretty happy with how this drawer fits.

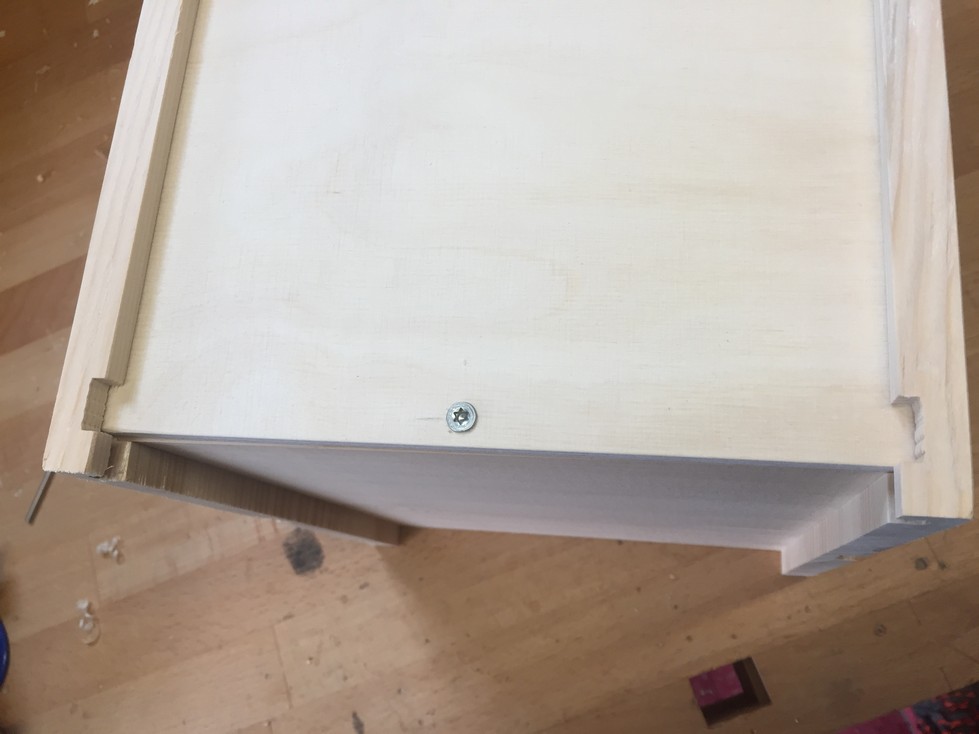
The drawer bottom is cut to fit and inserted into its groove. I’ve used 6.5mm birch ply for the bottom with the grain running side to side. Even though this is plywood, and theoretically should resist bending in either direction, it will still bend easier along the grain. If the drawer were close to square (in shape) then it wouldn’t make a difference however, with a rectangular drawer, cutting the bottom piece so the grain runs side to side will result in a stronger bottom. I cut its width so it fits snugly but not tight. The groove was cut to the same thickness as the plywood bottom and so it won’t slide easily into the groove. This is on purpose so I can round off the edges with some sandpaper until it fits just right and slides in smoothly but without slop. Similar to the frame and panels, the drawer bottom, when fit snug, adds rigidity and strength to the whole drawer. A single screw at the back is all that is needed to ensure it remains in place.

Finally, and only for the two bottom drawers (because they are the largest), I decide to reinforce the back with two nails on either side. Tage Frid (from Denmark) called these “Swedish dowels”. 🙂

And now, to repeat this process on the other five drawers.

Now that all the final drawer fitting is done, I go over every part of each drawer and ensure there are no errant planing or sawing marks and the minor gaps in the dovetails are filled and sanded. When I’m satisfied, I apply a first coat of oil to the drawer fronts and sides. I avoid the runner grooves because oil might eventually cause the sliding action to degrade. Instead, I only use wax in the runner grooves and on the runners. To further increase the smoothness of the drawer action, I’ll lightly sand the sides after the oil dries and also polish them with wax.

And the end result:

Next Chapter: De Feet
Leave a Reply