
Sheds?
…..are amazing.
In my humble opinion, there’s nothing quite so awesome as building a shed for the aspiring DIY’er. With just a few tools and some cheap lumber from the BOBS (big orange box store) you can build something that, in a very short time, will give you an amazing sense of accomplishment and just be so incredibly useful for as long as you own your house. If you rent, you can talk to the landlord about trading rent $$ for your time and materials.
This one’s for Brian…….
Please review the General Safety Disclaimer.
There are numerous different shed designs for just about every purpose; browsing the pictures here, here, and elsewhere on the internet will give you an idea. You can build something very simple or go hog-wild on features. The important thing is that you build a shed that not only looks good but is strong enough to survive time and the elements. I realize that “looks good” is a subjective term however, I believe you can have the simplest design in the world but if you use good quality materials and build it using professional techniques that are easy to learn, almost any shed can look good.
This is not what I have in mind:

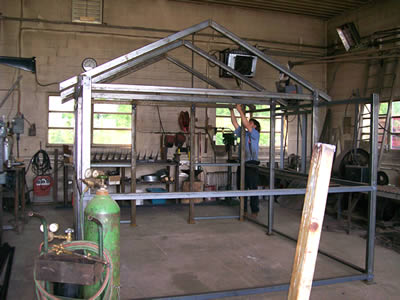
And this may be overkill:

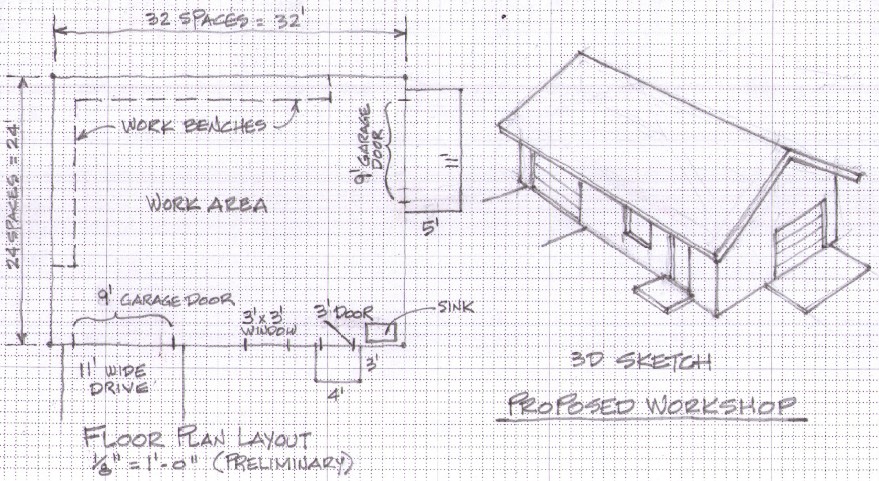
However, by building something like this, you can gain experience in a number of different and useful skills such as:
- Carpentry/framing
- Siding
- Doors and door installation
- Windows and window installation
- Roofing, in this case seamless metal as opposed to shingles
- The structure at top center is probably to vent hot air but is very similar to framing for a chimney or stovepipe
- Ground preparation
- And inside, I envision shelves, a small work table, and maybe a wall cabinet.
For obvious reasons, I favor wooden sheds. Oh sure, you could build your own metal shed but this pre-supposes your access to (and training in the use of) welding equipment and the means to cut and shape the metal parts. I’m familiar with oxygen and acetylene but only in terms of brazing bicycle frames so I’ll stick to wood for structures.
Also, building a wooden shed requires only a minor expense in tools, many of which will continue to be handy for any number of future projects.
Tools!
An aside: Speaking of tools, I’m not in love with any particular brand but I have found that when it comes to tools, both hand and power, you definitely get what you pay for. I like tools that are powerful, reliable and robust, with the added characteristics of as light and as quiet as possible. I also like yellow and blue 🙂 and have Dewalt tools that I’ve owned for 18 years, dropped from tall ladders, and never had any problems with. I have Bosch tools that are 20 years old and no matter what I do to them, they just keep working. My advice: buy tools only as you really need them, but buy the best quality you can afford. There’s a judgment call here, because that Hilti hammer/drill may be magnificent, but do you really need a contractor’s grade drill for $329? Especially when the equivalent Dewalt is almost as good for $129? Also keep in mind that my target audience for these DIY posts are typically non-contractors.
For the basic tools, let’s start with the inexpensive items that will allow you to begin planning and laying out your shed’s footprint while you save $$ to buy power tools after convincing your spouse of the need. I’m pretty lucky, my good wife never needed much convincing about tools. For example, after I bought a used Stihl chainsaw and tuned it up, I discovered that my wife was using it almost as much as I was (we had a back yard pretty choked with small trees and scrub oaks).
- Tape measure: (no, not the cheap $4.99 jobbie that begins with a “K”) and this goes without saying therefore we have to say it: “Buy a tape measure at least as long as the longest side of your planned shed”.

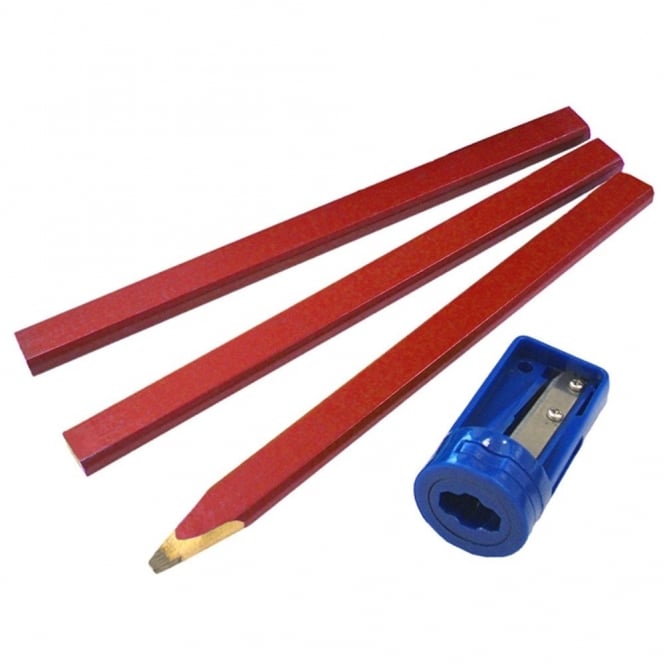
- Carpenter’s pencils (and a knife to sharpen them or the cool little sharpener that never works)
- Colored string: for layout
- Hatchet: to sharpen the ends of wood stakes for layout (and then pound them into the ground)
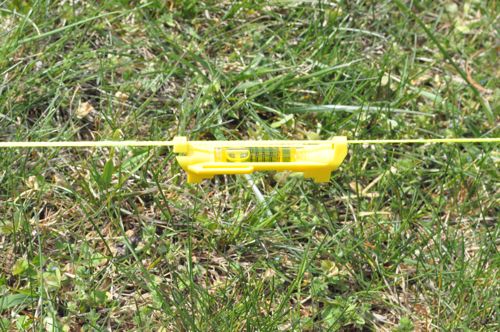
- Line level:
- A notebook of graph paper and a 0.7mm mechanical pencil (and a big pink gummy eraser)
- A book on basic carpentry:
I am going to recommend the first book I read on the subject: Homebuilding Basics: Carpentry by Larry Haun This guy was one of the foremost carpenters in America for over 50 years and this book is a great read, even if all you ever build is a shed (and maybe a garage). I originally got it from the library but soon realized I needed my own copy to write in, highlight, and leave out in the rain by mistake.
If you decide, like I did, that the shed just wasn’t enough to satisfy your building urge (family projects over the 10 years following my shed was a 600 square foot/two-story studio and a 250 sq/ft addition to the house), then I also highly recommend The Very Efficient Carpenter also by Larry Haun.
With these new treasures in hand (expense: less than $50 if you get Larry’s book at the library), planning and design can begin in earnest.
Step one: Drinks….
Sit with your spouse over a nice glass of wine and talk about what exactly you wish to use the shed for. And just by the way, a family that builds together, stays together!

If you make it a project together, it’s more fun AND it’s easier to convince him/her of the need to buy tools (see a theme here?).
Questions to consider:
- Will it be just a simple, small structure for garden stuff? Or do you have a riding lawn mower and/or patio furniture that you want to store during the winter?
- Have you filled up your closets and garage (American homes rarely have attics anymore, a pity) and need more general storage space?
- Do you have a bicycle habit and need half the shed to be a shop to work on your bikes?
- Are you a budding woodworker and need a place to store lumber?
Answers to questions like these will help you decide how big the shed will be, how tall, how sealed from the environment, if you need windows and how many, what kind of entry door you will want etc.
The two biggest mistakes we made were building our shed too small (okay, my fault) and building the studio too big (oh yeah, my fault). But we got the addition to the house just right 🙂 .
Step two: Think about the future.
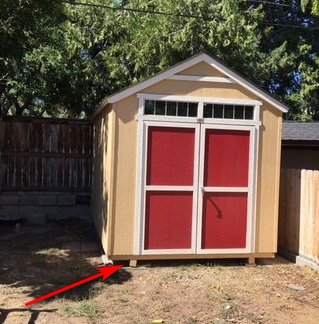
- Do you foresee a point where you might want to move the shed? Sheds can be built on “skids” so a forklift could move it. This is handy if you decide later to build something bigger, like an additional garage. Then you can sell your shed. Or give it to your neighbor in exchange for beer.

- Need a big, but still portable shed? Consider building in modules so a forklift can pick each of them up and load them on a truck separately. If you rent your house, portability is a great argument for convincing your landlord.
- Do you want electricity in the shed? Permanent wiring? Or can you make do with a couple of extension cords from the house? We won’t go into wiring in this post but be advised that running an extension cord to power a light bulb is very different than wiring for 20 amps and plugging in machines. Consult your local regulations. Incidentally, electrical wiring is not difficult but it needs to be done exactly right with the proper inspections. If in doubt, get your cousin Dupree the electrician to help.
- What about water? If your spouse wants a work sink or at minimum, a spigot for hoses or buckets, it’s best to plan for that now. Since the shed isn’t a permanent “domicile”, you could totally rig up some simple plumbing with water sourced from your house’s garden hose.
- Heating? If you plan on the occasional winter activity in the shed maybe a small portable heater is the ticket. More than that and, like the electrical, you’ll want to check out the local codes and ensure you do it right. It would suck if you put in a wood stove that didn’t comply with regulations, your shed and house burnt down as a result, and then the insurance company wouldn’t pay.
- What will be the position of the shed in relation to the house? Will it be concealed in a back yard or visible from the street? Think about the “curb appeal” of your shed and ensure that it won’t detract from the look of your house. A free standing shed by itself usually looks better if designed to mimic a house with a peaked roof:

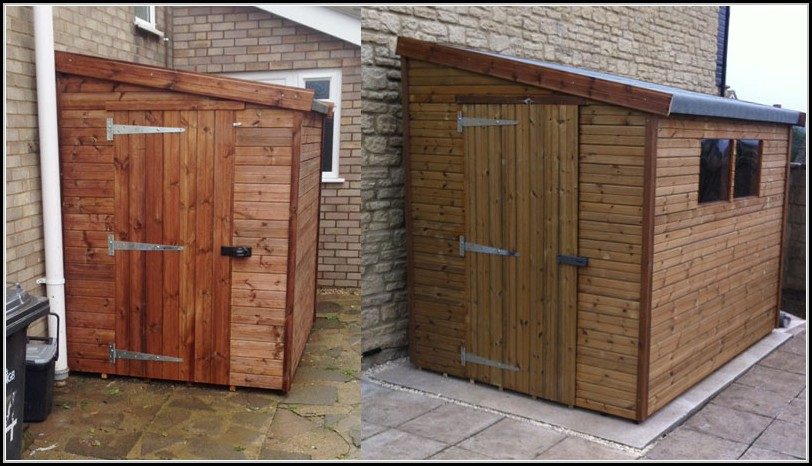
If you plan to build your shed adjacent to your house, will it face out perpendicular to the house? This would also allow a peaked roof.
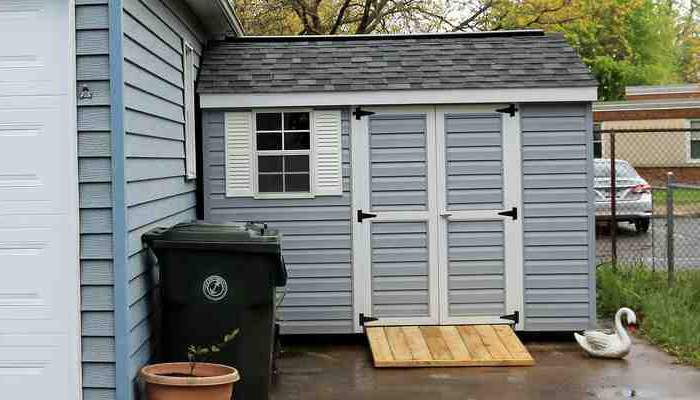
- Or maybe the long side will be against the house, in which case you may decide on a single pitched roof instead (that’s what we did). The advantage of the pitched roof is that you end up with more usable space inside at the high end and you don’t have to plan for rain drainage against the house.
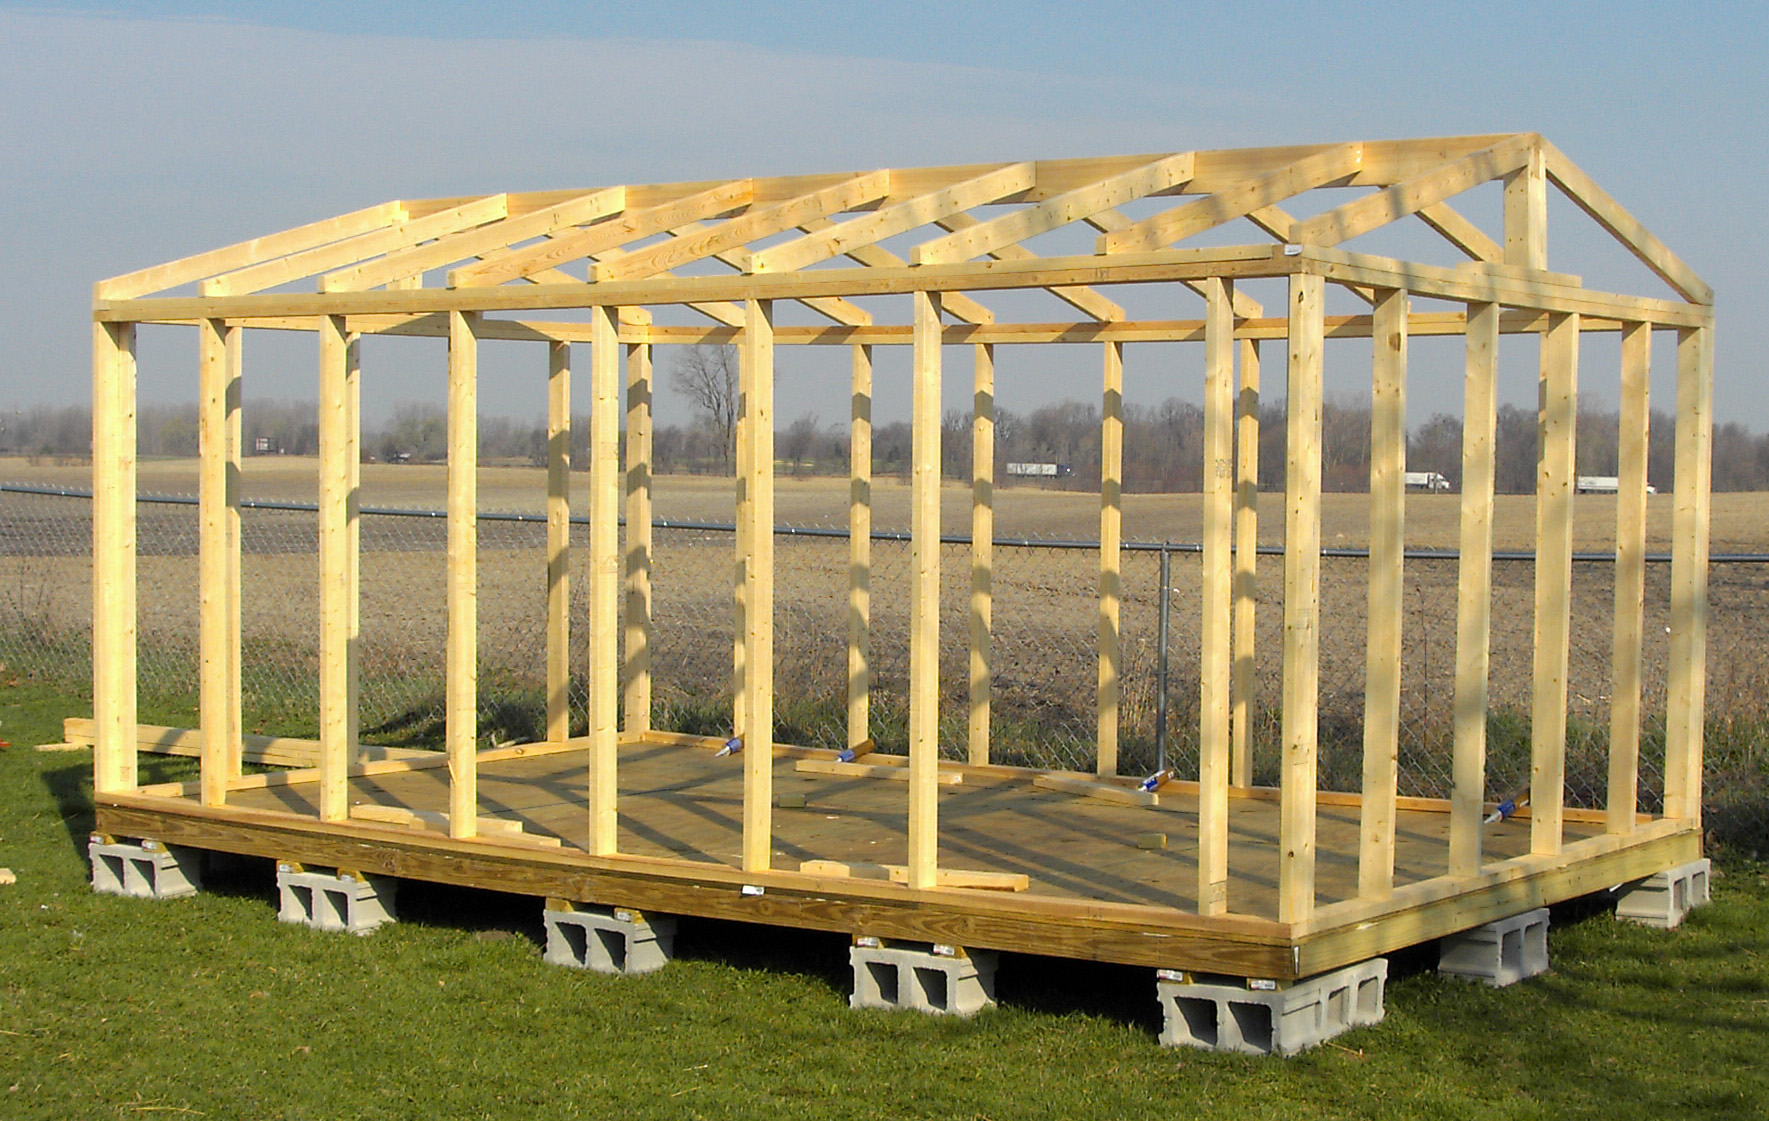
- Speaking of roofs, I can’t think of any reason to use roof trusses like this unless you just want to waste space:

By using appropriate sized lumber for “real” rafters, you can maximize your useable space. If you want storage space above, consider ceiling joists:
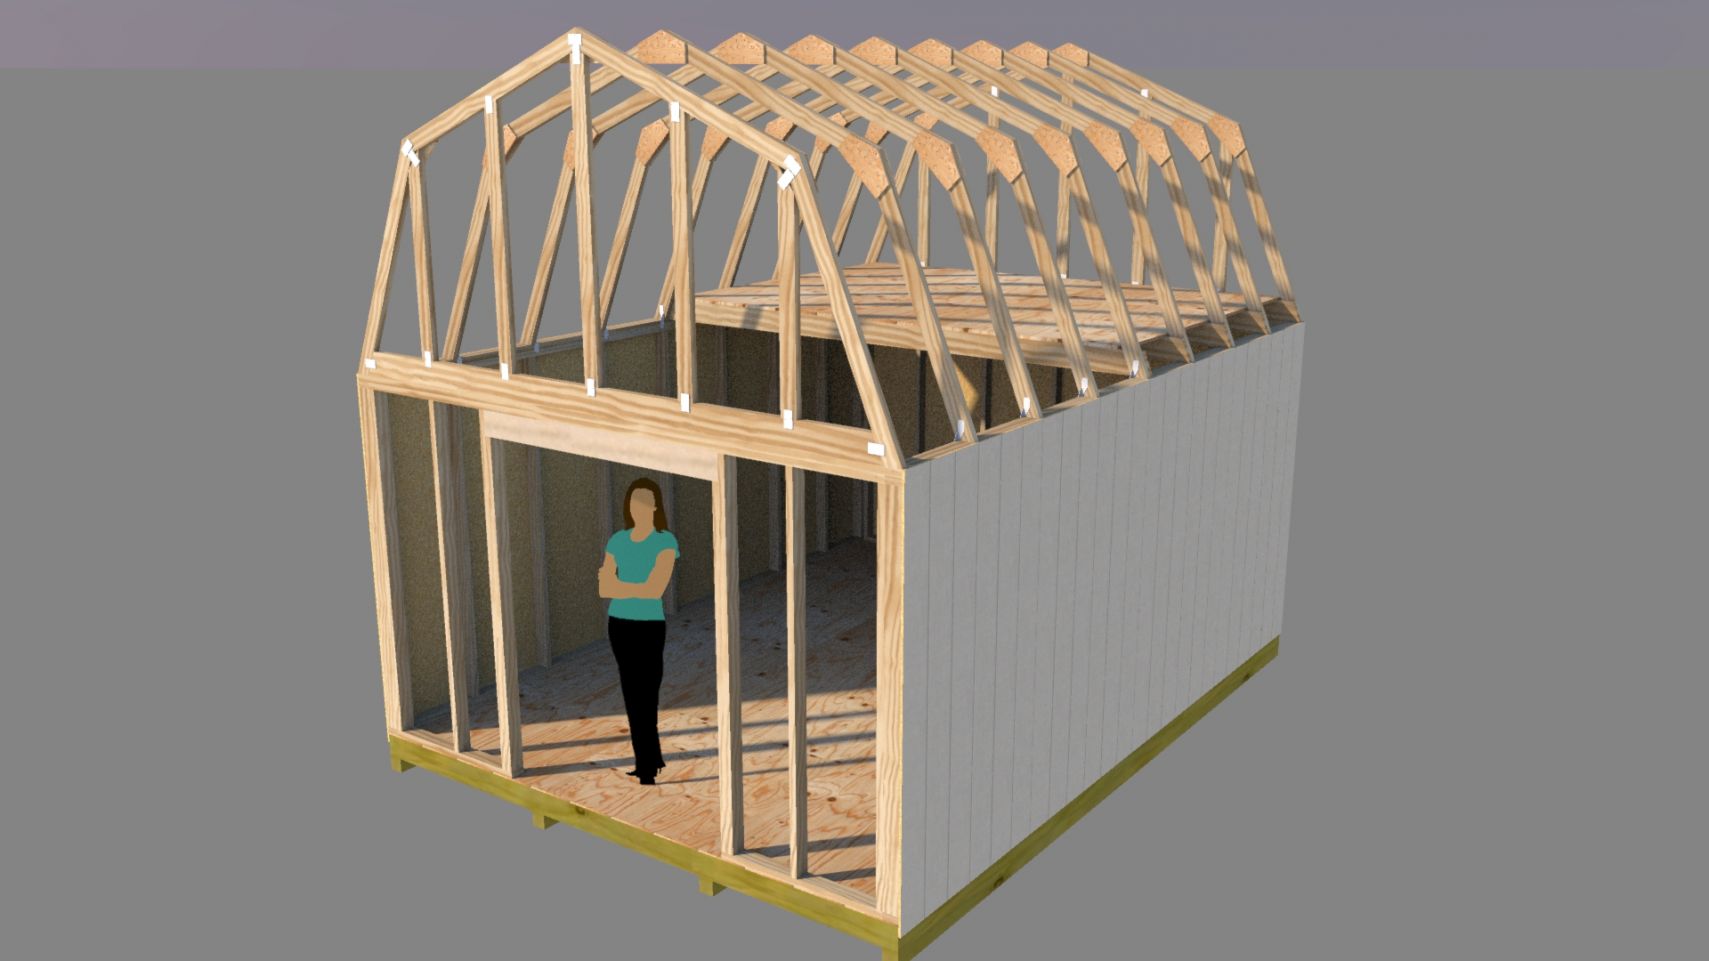
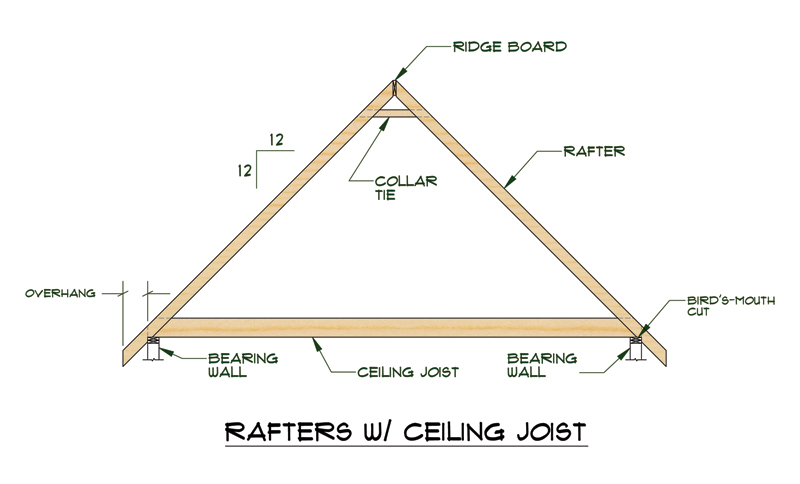 Joists add strength and you can screw some plywood to the tops of them for “attic” storage. Or, if you really need some headroom, maybe a gambrel roof:
Step Three: Layout
Now that you’ve thought about design, and have decided on the dimensions of your shed, it is a wise idea at a minimum to run a string around four stakes at each proposed corner. Having lived to regret the size of our studio, I would go further and buy some cheap 1×1’s, cut them a foot longer than the height of the shed and drive those into the ground at the corners. That will give you a better visual. When my wife and I staked out the studio, originally to be 12 x 20 feet, it looked too small and someone said “Hey, we can go 4 feet more on each side!”. Oh yeah, that was me. More importantly, if I had raised full height stakes at each corner we probably would have recognized the effect of that decision earlier.

Step Four: Foundation
While you don’t necessarily need a permanent foundation like a concrete slab, it would behoove you to consider what you’re going to build on top of. Concerns may include possible flooding, the slope of the land and the composition of the ground.
If there may be flooding during the rainy season, it’s necessary to elevate the shed. How much depends on your situation. Related to flooding, consider rain drainage from the shed. In New Mexico, it’s very dry and the ground is rocky but I still built the shed on half-buried concrete blocks. Even if your area isn’t prone to flooding, you don’t want any wooden timbers to be in contact with the ground. If you have soft earth, you might consider pouring concrete piers at the corners or maybe just dig down a ways, fill with coarse gravel, and install concrete blocks on top of the gravel.
Here’s a graphic of a poured concrete pier foundation:
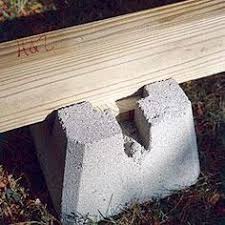
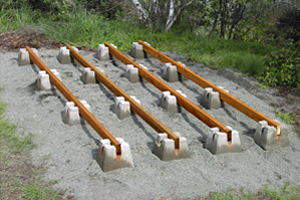
 And here are some really cool pre-made concrete foundation blocks with slots for timbers:
Or, like me, you could just use standard concrete blocks (I used solid ones):
Step 5: Make a Plan
So we’ll assume you’ve decided on the type, purpose, dimensions, location, and foundation for your shed. If you’re like me, you may be comfortable with designing your own shed given the information in Larry Haun’s books but it sure would be nice if there was a design plan out there somewhere you could use as a starting point. There are. Lots. Searching the internet may be the easiest way to start, but don’t neglect the library or even the book rack at the nearest BOBS. The great thing about an existing plan is that often you’ll see something in it you didn’t think of before. At the very least, it will give you a basic idea that you can then modify to suit your needs. Maybe you find a really cool design but it’s 8 x 10 feet and you wanted to go 10 x 14 feet. Use the design for idea points and draw up your new plan on graph paper. I love graph paper because it’s easy to draw something to scale and get a feel for the design.


Step Six: Get some materials and start!
Once you have settled on a particular design and have a plan, you can use it to make yourself a list of initial materials. The BOBS carries all the standard lengths and widths of construction lumber (2×4, 2×6, 2×8 etc).
By the way, and this is very important to remember when you’re putting pencil to paper to make a plan, we haven’t had “real” 2-by lumber since the early 1900’s. As lumber for building increasingly had to be shipped to its location (versus cut and fitted locally), standards were developed. An actual 2″ x 4″ piece of lumber was a rough cut piece of wood. By the time it was dimensioned (planed smooth and square), it lost width and thickness. Now, all construction lumber is actually ½” less in thickness and width than its stated dimension so a 2 x 4 is really 1 ½” thick and 3 ½” wide. A 2 x 6 is 5 ½” wide and a 4 x 4 is really 3 1/2″ by 3 1/2″ etc. Standard lengths are accurate so a piece of lumber marked 2 x 4 x 8′ is actually 8 feet long. Be careful though, “stud length” lumber for a standard 8′ wall (96″) is only 92 5/8″ long. This is because the bottom plate is 1 ½” thick and the two top plates are each 1 ½” thick. Add that up and you get 97 1/8″, subtract the standard 5/8″ thick sheetrock (drywall) for the ceiling and you’re left with the desired ½” gap at the bottom of the sheetrock hung on the wall.
More tools!
Let’s assume that you now have a stack of lumber in your garage, your foundation is ready, you’ve been reading up on carpentry and are comfortable to try your hand at framing a floor, walls, and a roof. We need more tools. And trust me, this can get out of hand….
I never had huge wads of cash to drop on tools and so I only bought tools as I really needed them. I also learned early this true statement: “The excitement of low price soon fades before the frustration of poor quality.” For this and other reasons, I always tried to be honest with myself about justifying new tools because buying good quality can really hit your wallet hard. For most of the tools I discuss in this article that was easy because I knew I had projects lining up that required them however, if I needed some specialty tool and would only use it once or twice, I tried to find someone I could borrow the tool from. Again, it goes without saying therefore we’ll say it: “Whenever you borrow a tool, always return it in the same or better condition then you received it”. This rule has served me well. Clean any tool before you return it and, if it had a cutting edge, sharpen it. Sometimes I go above and beyond; once when I borrowed a nice, water cooled, tile cutting machine I bought a good diamond blade for it so I wouldn’t have to use the owner’s. Renting is an option also. The BOBS rents tools and every major city usually has a few rental companies with contractor grade tools and machines to rent. Over the course of 13 years in New Mexico I rented a Bobcat about 5 times and there were occasions when I wistfully perused the classifieds for used ones. That is, until a contractor friend of mine told me that no one ever (ever) sells a good used Bobcat.
Wouldn’t this be a great machine to have in your garage?

Notwithstanding my Bosch/Dewalt love affair, there are a lot of good quality and economical tools out there. Prior to any purchase, I would read up on the latest tool reviews (for example: Circular saws) and check the homebuilding forums to see what real users had to say. Over the years, I’ve built up an informed (I imagine) opinion on some good quality, fairly economical brands. Since this is a “positive” statement, I don’t mind listing them here:
- Bosch
- Dewalt
- Makita
- Porter Cable
And for those with a little extra money:
- Milwaukee
And for those that just won the lottery:
- Hilti (best of the bunch, but oh boy, you’re gonna pay)
Unless noted otherwise, I don’t advocate cordless tools except in a few cases such as drills and drivers. Corded tools tend to be much cheaper for the same level of quality and you never run out of juice. That said, between building the studio and the kitchen addition I have been totally convinced of the benefits of cordless drills/drivers. I have an old Dewalt and an old Bosch (who knew?) that have survived significant use and abuse to include falling off of ladders, roofs, the back of trucks….. The Dewalt is an 18v I still use often, is as strong as an ox, and heavy (better for your biceps), and lasted almost 10 years before I had to buy a new battery. My old Bosch drill is still going strong. For the older models, battery prices have been steadily dropping and you can get great deals if you look around. If it finally broke, I would totally buy another NOS (new, old stock) Dewalt DC970 again.
Speaking of older models, power tools, like computers, are the most expensive by far when first introduced. I never buy the latest and greatest of anything. I buy what was the latest and greatest 2 or 3 years ago. The benefit is that by now, the price has dropped and, if there were bugs or faults, the tool reviewers have found them.
So, if I were building my first shed and had no tools to speak of, these would be on my list and have become indispensable to me:
- Circular saw: for fast cutting of lumber and sheet goods.

- Jigsaw: for cutting notches, curves, and cuts requiring straight and square inside corners such as bird’s-mouths on a rafter. If you have to choose one or the other (circular or jigsaw) initially, I’d go with the jigsaw (more versatile) but you’ll want that circular as soon as possible after.


- A Drill: is always handy, even if you’re not a ‘builder person”. The distinction to be made is a drill is used to “drill” 🙂 holes and can be used to drive screws. A driver is only good for driving screws however, it is really good at that. You can find a drill/driver in the same tool such as this Makita:

Or keep an eye out for holiday sales on a drill/driver combo kit. I picked this up a few months back on sale and have thought it was some of the best money I’ve spent on tools in a while. The manufacturers have really improved the comfort and feel, not to mention the weight distribution, of drills and drivers:
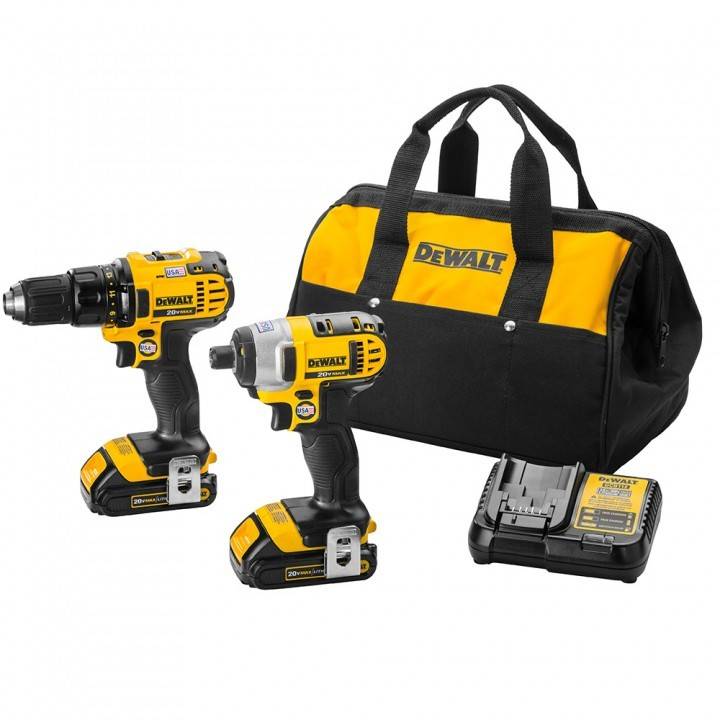
Lastly, always try to get anything cordless with an extra battery. Trust me.
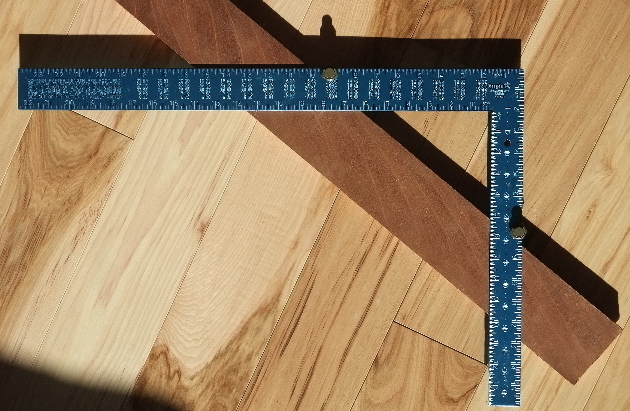
- Framing Square and/or Swanson “Speed Square”: I have both of these, a framing square (with the stair gauges) and both a 12″ and a 6″ speed square. While either will do the jobs you need like marking for crosscuts or rafters, I think the speed square is a lot easier to use and has many extra features that come in handy at odd times. Also, Swanson includes the little blue book of instructions on how to best use it for rafters and stairs. If I were only going to buy one, it would be the 12″ Swanson.

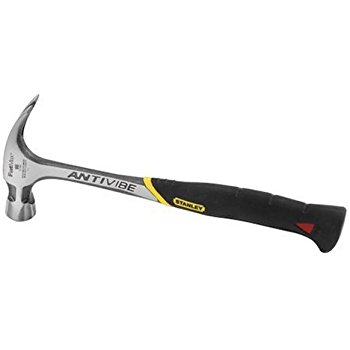
- Carpenter’s claw hammer: this is the most used construction handtool I have, even though 90% of the nails I’ve driven are with a nail-gun. I have both of the below types of framing hammers however, I recommend the Stanley, specifically the anti-vibe version. It’s best if you’re at the BOBS and just hold all the choices in your hand and pick one that is comfortable and not too heavy. The claw end is necessary to remove badly driven nails (yes, you will remove many before reaching hammering excellence).

- Chalk Line: this is extremely useful when cutting sheet goods. Mark your cut line on one end, pull the string taught at the other end, and snap a line that is easy to see while cutting.

Also, they come in handy for marking the positions of floor joists on flooring or rafters on roofing where you need to drive screws.

- Carpenter’s Level or Spirit Level: very handy, I have two, a 12″ to use in small spaces and a 60″ for framing. I wouldn’t go less than 48″ if possible.

- Utility Knife: Nuff said…..

There are many other tools that professional carpenters would add to this list but I think these basics will allow you to perform most, if not all tasks related to building a shed. Lastly, I can’t stress enough the value of reading a book on basic carpentry like Larry Haun’s. He describes the whats, whys, and wherefores much better than I could and spends a lot more time discussing the different aspects of the necessary tools. Build your shed like you would frame a house and you’ll be proud to have it.
Sarah
All of this is a bit over my head, but I love it nonetheless! Thanks Uncle Steve!!
Steve Bissell
Hi Sarah, I’m not buying that “over my head” stuff. You can do it!
Brian Witzig
I’m hooked on the blog already. Makes me want to start building our shed tomorrow
🙂
Love reading all of these. Thanks for taking the time to write them.
Steve Bissell
So far, I’m enjoying this as well!